Fiat Coupe Forum
- Founded by Kayjey & James Northam
- Funded by the Club for the benefit of all owners
Fiat Coupe Club UK
join the club
Fiat Coupe Forum
 
» Announced
    Posting images


» Related sites
    Main club site
    fiatcoupe.net


» External data
    owners listed
 
Who's Online Now
1 registered members (CVL200), 161 guests, and 1 spider.
Key: Admin, Global Mod, Mod
Forum Statistics
Forums69
Topics113,579
Posts1,340,911
Members1,797
Most Online731
Jan 14th, 2020
Top Posters(All Time)
barnacle 33,545
stan 32,122
Theresa 23,299
PeteP 21,510
bockers 21,071
JimO 17,917
Nigel 17,367
Edinburgh 16,750
RSS Feeds
Club Events
Club Information
Track Events
Rolling Road/RWYB
Social Events
Non-UK Events
Coupé Related Chat
Coupé Spotting
Coupé News/Press
Buying/Selling Advice
Insuring a Coupé
Basic FAQ's
How to Guides
Forum Issues
Technical Problems
General Maintenance
Styling
Tuning
Handling
ICE and Alarm
Coupés for Sale
Coupés Wanted
Parts for Sale
Parts Wanted
Group Buys
Business Forum
Other Vehicles for Sale/Wanted
Other Items for Sale/Wanted
Haggling/Offers
Ebay links
Other Cars
Other Websites
General Chat
Previous Thread
Next Thread
Print Thread
kj16v Home build - 16VT hybrid turbo project #794652
14/03/2009 23:13
14/03/2009 23:13
Joined: Feb 2008
Posts: 1,725
London
kj16v Offline OP
My life on the forum
kj16v  Offline OP
My life on the forum

Joined: Feb 2008
Posts: 1,725
London
After a completely failed attempt to map some better fuel economy out of the engine. I thought sod it, I may as go for a bigger turbo and more power. Then a Garrett T04e compressor and housing turned up on Ebay and one thing lead to another...

Turbo
Standard turbo – but not for long
http://img17.imageshack.us/img17/8941/oemturbo.jpg

Dismantled turbo. From left to right: Nut, fan thingie, metal, some stuff, more metal, some more stuff, hot metal, fan-on-a-stick
http://img17.imageshack.us/img17/3482/dismantledturbov.jpg

CHRA
http://img17.imageshack.us/img17/6455/chra.jpg

T3 and T04 comps and housings side-by-side
http://img17.imageshack.us/img17/2020/compscompared.jpg

Comp and turbine back from being cleaned and balanced
http://img17.imageshack.us/img17/5579/cleanturbineandnewcomp.jpg

Built T3/T04e. Now with extra meaty chunks for a fuller flavour.
http://img5.imageshack.us/img5/7816/builtt04et3h.jpg

Prototype sequential turbo smile
http://img50.imageshack.us/img50/6950/sequentialturbo.jpg

While the spinney bits were being balanced, I took the manifold and elbow to work and shot-blasted them. Then I sprayed them up with some hi-temp paint I found in a cupboard. Man, I love shot-blasting. “Go on ’av that, unshiftable rust!”
http://img17.imageshack.us/img17/6/cleanmanifold.jpg

Turbo and manifold fitted
http://img15.imageshack.us/img15/8731/turbofitted.jpg

The actuator didn’t fit the new larger comp housing so I had to make a bracket to relocate it. A workmate very kindly machined this for me. It has a slot in the housing-end so I can adjust the actuator to fit between the water pipes.
http://img15.imageshack.us/img15/705/wastegatebracket.jpg

At this point I connected the turbo up to the stock i/c, and the actuator directly to the comp housing, and took the car out for a “shake down” ( I hate that phrase. Sounds so pretentious). At 0.3 bar base boost it felt about as fast as a stock 16VT. Very promising…

Intercooler
This Iveco intercooler has plastic outlet pipes that come out at 45*; really handy on one side but needed to come out straight on the other side. So I got my beloved angle grinder out, chopped off the pipe and used my soldering iron to tack it back on straight. As you can see it turned out pretty good.
http://img527.imageshack.us/img527/2131/intercoolermod2.jpg

I’ll just turn it round to check the other side and… Doh!
http://img527.imageshack.us/img527/9059/intercoolermod1.jpg

Unfortunately I forgot to take a photo of the finished end tank mod. I used JB Weld too fill the gaps and strengthen the tacked-on side to the pipe. On the other side I moulded the missing shape out of Quick Steel putty, with more Quick Steel around the base for strength. A few minutes later everything’s set as strong as steel and perfectly sealed. Seriously, if you’re into DIY car stuff you need JB Weld and Quick Steel in your life!!

Iveco i/c fits nicely with just some angle grinding to the metal airflow separator flap thingies.
http://img50.imageshack.us/img50/4365/intercooler3.jpg

Pipework just fits between rad and chassis with some careful negotiation.
http://img50.imageshack.us/img50/483/intercooler1.jpg

Other side connects to the stock inlet pipework. Also see cheeky air filter poking out.
http://img50.imageshack.us/img50/7617/intercooler2.jpg

I was going to leave the left-hand air duct off but I found out it holds up those rubber sheets above it. So I had to hack it up with the jigsaw. You can’t see it so it doesn’t matter how it looks. There also happened to be two convenient threaded bolt holes in the chassis to help.
http://img50.imageshack.us/img50/5773/intercoolerduct.jpg

Turbo to i/c goes behind rad and incorporates stock outlet hose. I wanted to re-use that because its silicone
http://img50.imageshack.us/img50/686/intercoolerpipework1.jpg


A tiny bit of angle grinding to the bumper and all done. Even the plastic undertray fits as normal.
http://img50.imageshack.us/img50/3893/intercoolerfitted.jpg

I wuv my angle gwinder!
http://img155.imageshack.us/img155/8400/powertoollove.jpg

Next on the agenda was to change the cam belt, and whip the balance shaft belt out and bin it – well, put carefully into a box. Those belts are expensive you know.

Everything done, I could finally go out on the road and start tuning. I made a short video of the tuning process, which I need to edit. I might post it up if it’s any good.
Petrol must have been cheap when Fiat mapped this because I ended up actually removing fuel most of the map. 16VT’s run stoopid rich on boost.

Tuning completed. The hybrid, combined with my mbc (cheers for the freebee, Simon! smile ) makes driving a lot more, er, fun. Now the car drives just the way I like a turbo to drive with that lairy “barely in control” feeling.

Got to get it dyno’d but by my calculations it should be making around 240bhp at a measly 0.8 bar. And before anyone pipes in with “Yeah well mine makes 250 with the standard turbo!” It’s not all about peak figures. It’s about how you get there too! The engine now makes ladles of torque all the way from 3000rpm and keeps pulling like train all the way to the rev limiter at 6800rpm, instead of dying a death at 5k.


So there we go. homebuilt t04e hybrid+Iveco Dailey intercooler+pipwork=Potential for approx 300bhp and all for a quarter of the price of a fancy-pants GTblahbla ball-bearing job!
Future plans? Probably:

High flow cat
Have a go at making a tubular manifold
Get bored and wind the boost up to 300bhp and…
…subsequent rebuild. Which will lead onto my…
…Super Secret Project That Nobody Has Ever Done Before So Don’t Ask What It Is Because If I Tell Someone Will Do It First - project

-UPDATE-
21/03/09- Well I bowed to (not much) pressure and wound up the boost to a more manly 1bar, along with a bit more mapping. Didn't need much but I smoothed out the AFR a bit so it stays a steady 12.5 up to the redline.

25/03/09- Burned my map on to an eprom (chip) at work today, so no more ecu lying in the footwell! Also ordered my own programmer to let me burn chips at home for this and other projects on the go.

Well, removed all the tuning gear from the engine bay and ecu is back where it should be. Job done?? C'mon we all know projects never end!

Well this talk on other threads of aiming for 300+ has got me wanting some of that. So next I'm thinking of building that 3" exhaust, and maybe having a go at a tubular manifold. Althought I really didn't want spead all my money and time on more car projects this year. Since that's all I've been doing for the last seven years (ah my first project, that good ol' trusty-rusty Nova)!

I want to get this dyno'd at Torque of the Devil, in Uxbridge. If anybody wants to join me, let me know on the comments thread.

Last edited by kj16v; 21/08/2011 22:41. Reason: Removed photo popups for faster loading. Even the Hal 9000 Skynet uber-computers at work were beginning to struggle to load this page
Re: kj16v Home build - 16VT hybrid turbo project [Re: kj16v] #833276
16/05/2009 20:29
16/05/2009 20:29
Joined: Feb 2008
Posts: 1,725
London
kj16v Offline OP
My life on the forum
kj16v  Offline OP
My life on the forum

Joined: Feb 2008
Posts: 1,725
London
Update + Intercooler review:

The Castle Combe Action Day was a good test of my handiwork. And I was pleased that it all stood up well to 15mins of hard spanking to 6500rpm. Well nearly all. The poor intercooler went "whizzzpop" on the way home. popped intercooler=no boost=FAIL. Yeah, yeah, “told you so”. Shut up tongue . Actually it wasn’t the plastic end tanks – The diesel lorries it came from runs much more boost than the average petrol car – it was actually my ‘clever’ outlet mod. I think with 15 mins of hard running the thermoplastic tank softened enough to make the Quick Steel loose its grip.

So I was after an i/c with metal end tanks like I wanted in the first place! I actually bought the Iveco i/c thinking it had metal tanks like the last one I bought rolleyes

I thought I’d try a new all-metal i/c from Universal-Intercoolers on Ebay. There are loads of these generic Chinese/Japanese i/c on Ebay but I went for these guys because they’ve got really impressive feedback – oh, and I got it brand new for £50! Kerching!!

Black blob = Iveco i/c, silver blob = new i/c. Bloody Game Boy resolution phone camera grr
http://img39.imageshack.us/img39/1191/intercoolercomparison.jpg

i/c fitted
http://img36.imageshack.us/img36/5581/newintercoolercloseup.jpg

http://img38.imageshack.us/img38/6545/newintercoolerfitted.jpg

The Universal Intercoolers i/c is solidly built and surprisingly heavy. Couple of spiky welds but took like two seconds to file off. Will take more than a couple of stones to damage this thing.

My thinking was that a thing that transfers heat should be delicate and frilly, like Allan Carr. So I wanted to test the i/c to check if it was doing its job properly.

So here’s the setup: DVM + K-Type wire. Take temps at the i/c inlet and at the i/c outlet.
http://img39.imageshack.us/img39/1484/intercoolertest.jpg

The air from the To4e turbo was 95*C So can you imagine the temps coming from an overworked stock turbo at 1.2 bar? shocked

Efficiency = (in temp – out temp) / (in temp – ambient temp)

(95*C – 30*C) / (95*C – 15*C)

Efficiency = 81.3%

A good intercooler should be at least 70% efficient, so that’s great!
So all in all, a kick-ass intercooler that looks the muttz nutz

Re: kj16v Home build - 16VT hybrid turbo project [Re: kj16v] #833278
16/05/2009 20:31
16/05/2009 20:31
Joined: Feb 2008
Posts: 1,725
London
kj16v Offline OP
My life on the forum
kj16v  Offline OP
My life on the forum

Joined: Feb 2008
Posts: 1,725
London
Wheels

For a change I’ve had a go at something non-performance related. I bought some 20VT wheels and sprayed them anthracite (actually, Ford Levante Grey). I Googled wheel painting and some people said the spray cans won’t last 5 mins, yet other’s said it’s good and there are even wheel painting guides. I’ve given them as thick a layer of lacquer as I could to try and make sure it lasts a while. Never sprayed anything so perfection critical before. Very hard to get it looking just right with no runs.
I guess we’ll see how good they look and how long they last once they’re fitted.

This was the worst wheel. Badly scratched and gouged so it needed refurbishing anyway
http://img35.imageshack.us/img35/7674/newwheel.jpg

After. Looking much better
http://img36.imageshack.us/img36/8928/newwheelpainted.jpg

http://img36.imageshack.us/img36/3354/paintedwheel3.jpg


Wheels now fitted:
http://img190.imageshack.us/img190/9784/newwheels1.jpg

http://img31.imageshack.us/img31/984/newwheels2.jpg

Re: kj16v Home build - 16VT hybrid turbo project [Re: kj16v] #853004
19/06/2009 17:30
19/06/2009 17:30
Joined: Feb 2008
Posts: 1,725
London
kj16v Offline OP
My life on the forum
kj16v  Offline OP
My life on the forum

Joined: Feb 2008
Posts: 1,725
London
I'm building a custom exhaust system at the moment and since the car's off the road I thought I'd get round to prettyfying the rocker cover.


Prettyfication complete
http://img291.imageshack.us/img291/9564/ebaystuff002.jpg

Engine bay now signifacantly more pretty. Studies by Laboratoire Garnier have revealed that my engine bay is now 60% more prettyficated
http://img518.imageshack.us/img518/8059/ebaystuff003.jpg

Re: kj16v Home build - 16VT hybrid turbo project [Re: kj16v] #853963
21/06/2009 18:33
21/06/2009 18:33
Joined: Feb 2008
Posts: 1,725
London
kj16v Offline OP
My life on the forum
kj16v  Offline OP
My life on the forum

Joined: Feb 2008
Posts: 1,725
London
Exhaust system

As a lot of 16VT owners know, the stock turbo elbow is a major bottle neck in the exhaust system. It starts at 2.5” and then necks down to just 2”. 2” is fine for the standard 200 bhp for any more power, that elbow’s gotta go.

This is the downpipe I bought last year when the original one corroded through. IMO it’s actually better than the oem one. It’s stainless steel and 2.5” (63.5mm) instead of the 60mm of the oem one.
http://img132.imageshack.us/img132/9496/downpipe.jpg


The new elbow taped together prior to welding. I managed to fabricate it from a single 90 deg. bend. Flange machined at work over a few lunchtimes.
http://img14.imageshack.us/img14/8458/turboelbow.jpg

One trip to the welder later. I machined a flat into the flange to clear the wastegate actuator.
http://img14.imageshack.us/img14/5365/newdownpipe1.jpg
http://img10.imageshack.us/img10/7216/newdownpipe2.jpg

New downpipe fitted:
http://img197.imageshack.us/img197/3129/newdownpipefitted002.jpg

http://img197.imageshack.us/img197/5316/newdownpipefitted001.jpg

http://img188.imageshack.us/img188/5333/newdownpipefitted003.jpg

Next up, the rest of the exhaust system...

Re: kj16v Home build - 16VT hybrid turbo project [Re: kj16v] #871815
24/07/2009 21:52
24/07/2009 21:52
Joined: Feb 2008
Posts: 1,725
London
kj16v Offline OP
My life on the forum
kj16v  Offline OP
My life on the forum

Joined: Feb 2008
Posts: 1,725
London
Cat-Back

I bought silencers from Fast Fit in Basingstoke and mandrel bends from Dynoflow with the intention of also building the rest of the exhaust system myself. However, when I went to Fast Fit to pick up the silencers I got an estimate for having the guys there build it. Turned out, according to the estimate, that getting it built wasn't going to be hugely more expensive than doing it myself. Plus there wouldn't be the hassle of having the car off the road for about 3 weeks, lying on the floor for hours, and driving up and down getting things welded.

So I went against my no-garage principles and got it built for me:

http://img119.imageshack.us/img119/7299/exhaust001.jpg
http://img188.imageshack.us/img188/5403/exhaust002.jpg
http://img37.imageshack.us/img37/1381/exhaust008.jpg
http://img24.imageshack.us/img24/9919/exhaust004.jpg
http://img263.imageshack.us/img263/756/exhaust007.jpg
http://img263.imageshack.us/img263/1209/exhaust006.jpg

How's that for subtle? 3.5" slash-cut inward rolled tail. The guy even managed to get it exiting at exactly the same angle. Looks totally oem cool
http://img263.imageshack.us/img263/841/tailpipe001.jpg
http://img511.imageshack.us/img511/1801/tailpipe005.jpg
http://img149.imageshack.us/img149/2195/tailpipe007.jpg

So, a 2.5" stainless mandrel bend full-system for less than the price of a Blue Flame 2.25" cat-back.

Well chuffed with the result. Sounds good too: a deep burble at idle but, thanks to the turbo, gets quieter the faster you go. Will do a video of the sound if anybody's interested. Post in the dscussion thread.
Anyway, does anybody actually read this stuff or do they just look at the pictures?!

PS. A well deserved plug for Fast fit of Basingstoke:
Fast Fit Basingstoke!


FYI: I've found that a big-bore exhaust murders bottom-end torque (on the 16VT at least). Makes pulling off from traffic lights etc a real chore. And attempting a faster start just results in 'burnt clutch' aroma.
It's not the end of the world though. I worked a bit of 'magic'(!) on the fuel map to make some more torque at the right point

BTW. My map's changed alot over the months since I burned my first chip. After speaking to a couple of Lancia experts, and learning from my own experience with this car, I've found out the 12.5 AFR it was previously running at was too lean. These engines love fuel. So now it runs around 11.5 AFR, with more advance (yes, more!). Other experts I'd spoken to in the past had said to aim at 12-12.5 AFR

Just goes to show: When you're looking for information on anything it always pays to speak to people with first-hand experience - and then speak to as many experts as possible. Because even the experts may differ wildly in opnion. And ignore everyone else, because what they have to say isn't worth listening to.

Re: kj16v Home build - 16VT hybrid turbo project [Re: kj16v] #949370
11/12/2009 00:18
11/12/2009 00:18
Joined: Feb 2008
Posts: 1,725
London
kj16v Offline OP
My life on the forum
kj16v  Offline OP
My life on the forum

Joined: Feb 2008
Posts: 1,725
London
With a 130,000 miles (and a couple of track sessions) on the clock, I thought the engine had begun using a lot of oil. So I decided it was time to rebuild the engine.

With any engine build, or major car project, preparation is of paramount importance. So I prepared my girlfriend by breaking the news of the impending build (meaning months in the garage, and possibly her assistance) a month in advance, and then going on a nice holiday with her.

With the girlfriend fully prepped, I moved on to the engine...

£344 later (ouch) and I had a complete gasket set, piston rings, mains, and big-ends from Tanc Barrat. Not that Tanc Barrat are expensive – in fact they’re really decent priced, but still Ouch. I’m not used to paying –well- anything for anything!

I originally intended to remove the engine, but there wasn’t space in the garage for the engine crane – plus I ran out of arsedness until I got to the point where I just couldn’t be arsed. Even with the head off there’s still a lot of crap attached to the block.

So I decided to do it with the lump in situ. Just meant spending a lot of time lying on my back

Head off. Looks ok, just coked up as usual
http://img187.imageshack.us/img187/16/engineblock1.jpg

Un-honed cylinder. Glazed but perfect. Amazed to still see original honing marks.
http://img134.imageshack.us/img134/2686/prehonedcylinder.jpg

A main bearing. Normal wear According to Guy Croft (I posted pics on his forum)
http://img228.imageshack.us/img228/2986/mainbearing1.jpg
http://img171.imageshack.us/img171/4218/crank.jpg
The engine’s not that big. See I managed to get the whole thing in to a few bags laugh
http://img134.imageshack.us/img134/232/baggedbolts.jpg
http://img228.imageshack.us/img228/1870/engineinabox.jpg
http://img134.imageshack.us/img134/4642/valvelifters.jpg

I pulled the pistons and while removing the rings from the No.3, this happened…
http://img134.imageshack.us/img134/7387/brukpiston2.jpg
http://img134.imageshack.us/img134/110/brukpiston1.jpg
http://img209.imageshack.us/img209/7126/brukringland.jpg
Holy Crap!! That’ll probably be why it was using oil then. Lucky it stayed together all that time

Valves and valve seats pitted with age. Valve with well and truly cooked-on-crap. There’s probably a name for it but I like ‘cooked-on-crap’
http://img135.imageshack.us/img135/9990/cokedexvalve.jpg
http://img705.imageshack.us/img705/9315/cokedexvalvehead.jpg

I lapped the hell out of the valves and sanded but they were still pitted.
http://img13.imageshack.us/img13/5483/lappedexvalve2.jpg
http://img228.imageshack.us/img228/9996/lappedexseat.jpg
So I farmed the head out to Gardias Engine Services to have the seats re-cut. The bloke did an amazing job. Re-cut seats and valves, skimmed head, and de-cooked-on-crapped everything. Head mating surface looked like a cd afterwards.
http://img230.imageshack.us/img230/8896/machinedhead.jpg
http://img152.imageshack.us/img152/1551/grounedseats.jpg

This time it took me ten secs. to lap each valve.
http://img152.imageshack.us/img152/5008/machinedvalve1.jpg
http://img228.imageshack.us/img228/2771/machinedvalve2.jpg

It would be rude not to prate a few things so I had a go at knife-edging the port separators.

Inlet. Stock on left. Knife-edged on right. I did I highly scientific test by spraying carb cleaner down the ports and the atomised fluid flowed round the knifed divider instead of splitting and hitting the outer sides of the ports. So that proves that then crazy
http://img230.imageshack.us/img230/3291/knifeedgedinlet.jpg

un-knifed
http://img710.imageshack.us/img710/9438/unknifeedgedexhaust.jpg

knifed. Yeah it’s not perfectly straight Wot Eva!
http://img228.imageshack.us/img228/9178/kniifeedgedexhaustb.jpg

I also had the Flywheel lightened at Gardias. Oh and I also got him to shim the –er- shims. Screw doing that by hand.
http://img222.imageshack.us/img222/3749/lightenedbalancedflywhe.jpg

I also fitted the inlet cam from a Tipo 16V
http://img522.imageshack.us/img522/7632/tipocam2.jpg


Locking the balance shafts: Here’s a handy tip: Instead of buying a balance shaft locking kit, you can lock the front one by rearranging the spacers on the idler pulley and jamming it against the balancer pulley. The cam belt pulley still spins but the balance shaft stays put. The rear shaft can be left free because it doesn’t move anyway.
http://img228.imageshack.us/img228/8130/lockedbalanceshaftpulle.jpg

I completely forgot to take pics of the cleaned pistons or the honed block because I was to busy doing it tbh! So here are some tits instead.
bigtits.com

Anyway, long story short, measuring tolerances, weighing components, cleaning, bagging, un-bagging, refitting, swearing, etc. etc… Two months later all is done and engine broken-in. More on that later.

You didn’t think it was possible, but I’ve done it. Ladies and Gentlemen, I give the world’s one and only [-cough- nearly] oil leak-free 16VT!
http://img204.imageshack.us/img204/4291/builtengine.jpg

Tools for the job: Dial bore gauge, micrometers, Gunson’s Eezi Lap, torque wrench, cylinder bore hone.
http://img228.imageshack.us/img228/7532/toolsx.jpg


Work done:
Full gasket set
Main bearings
Big-end bearings
1 replacement piston
Injectors ultrasonic cleaned
Head cleaned and skimmed
Knife-edged port dividers
Valve seats re-cut
Valves cleaned and re-cut
Flywheel lightened and balanced
Front balance shaft locked
Fuel evap hoses removed
Boost raised to 1.2 bar
4 bar fuel pressure regulator
Re-mapped

Total price: A fair bit under a grand

My breaking in procedure:
Fill coolant tank with pure water, fill engine with 10W/40 semi synthetic.
Remove spark plugs, fuel pump fuse, and ignition coil cables. Open throttle fully, depress clutch ( to ease the strain on the starter motor), and crank over for 1 minute.

Refit parts and start. Keep engine idling above 1500rpm. Fluctuate revs occasionally. Continue until cooling fan kicks in.

Switch off and check for leaks. Leave engine to cool down fully (i.e. Go to bed).

Fully warm engine again and go for a drive.

The aim is to seal the piston rings against the cylinder walls as best as possible. For that they need pressure! Find a quiet road and accelerate, modulating the throttle to stay at atmospheric pressure, i.e. 0 on the boost gauge. If your car is n/a just floor it! When you hit 4500rpm snap off the throttle and let the engine over-run to approx 2000rpm. Repeat this several times. I did this at least 8 times. And then all the way home.

Go home and change the oil and filter. Drain the water and re-fill with coolant mix.

Drive for 200 miles. Avoid motorways or any road where you sit at constant throttle for very long time. Always vary the throttle, but no boost, throughout the 200 miles occasionally rev to high rpm, gradually reaching redline. Do this in low gears so as not to put too much load on the engine.

After 200 miles Tune the engine to whatever boost your running. Afterwards drive on any road as normal.

After, ooh I dunno, 1000 miles cane the crap out of it!

Re: kj16v Home build - 16VT hybrid turbo project [Re: kj16v] #1008599
27/03/2010 01:03
27/03/2010 01:03
Joined: Feb 2008
Posts: 1,725
London
kj16v Offline OP
My life on the forum
kj16v  Offline OP
My life on the forum

Joined: Feb 2008
Posts: 1,725
London
Been a busy bee over the last three months. Bought a tubular manifold from FCCK2000 (is that his name? [cloud9]? Can’t remember!). Not a bad manifold either. Not brilliantly fabricated, but it’s still solid, pretty well made, and makes power. And fuckinell, it only cost about £50 more than it would have cost for me to build one myself! Brilliant value for money.

http://img84.imageshack.us/img84/7057/manifold004v.jpg
http://img232.imageshack.us/img232/4945/manifold005.jpg

I didn’t like this weld. It made a flat spot that would stick out into the gas flow.

http://img88.imageshack.us/img88/1263/manifold002.jpg

So got Specialist Welding to re-weld it and blend it in to the rest of the manifold

http://img405.imageshack.us/img405/4517/manifold009.jpg

The top row of manifold studs were now far too long, so I made a new set of manifold studs by the heads off of these 8mm bolts. Sorry can’t remember how long they are. Just go into any shop and ask for “8mm bolts nearly as wide as KJ’s hand. They’ll know what you mean. smile

http://img405.imageshack.us/img405/8490/manifold010.jpg

The new header (tubular manifold) had increased volumetric efficiency beyond the point that the stock injectors could handle – even at 5 bar.

So I invested in an 240 lph fuel pump. I took a risk and bought a no-name Ebay pump for just £30 new. So far it’s worked great! Only took some minor modification to the holder to fit it.

The engine still needed a lot more fuel

So I invested in a set of 440cc Vauxhall VXR injectors from Regal Tuning. For £120.
You can also get these straight from Vauxhall. Now here’s a weird thing; if you ask for VXR injectors the parts guy will say “£240”. Now if you ask for injectors, fuel rail and fpr, as a complete set, he’ll say “£140.” Go figure crazy

http://img405.imageshack.us/img405/3909/newinjectors008.jpg

Even with the 440cc injectors at 5 bar, and at 100% duty cycle I could still only just make 12:1 AFR at peak torque. So guess what I did next.

WRONG!! I didn’t invest at all! This time I did the fabled “wiring mod” direct feed to the fuel pump, and short earth via the cd-changer bracket screws.

My God did that work! AFR plummeted through floor to 9:1 and threw so much fuel ant the WB sensor that it threw up a heater fault! Well done whoever discovered that.

So as things stand now: at 1.2 bar boost, the 440cc injectors run at 80% DC max @ 4.5 bar fuel pressure. Nice


Last edited by kj16v; 21/08/2011 22:58. Reason: This post seems to be the worst offender for slowing download times
Re: kj16v Home build - 16VT hybrid turbo project [Re: kj16v] #1067760
11/07/2010 00:04
11/07/2010 00:04
Joined: Feb 2008
Posts: 1,725
London
kj16v Offline OP
My life on the forum
kj16v  Offline OP
My life on the forum

Joined: Feb 2008
Posts: 1,725
London
Update: Spent a fair amount of time on the quest for powaaah. But been too busy to write a lot about it. So long story short: Turned out standard actuator isn't man enough to hold big boost and power so sacked it off and bought a -31 actuator. It's huge compared to the stock actuator so it was fairly difficult to fit.
Modified actuator rod with a turnbuckle to make it adjustable.
Original actuator bracket modified (ie butchered crazy) to fit -31
http://img149.imageshack.us/img149/6128/adjustableactuator.jpg


Also built a 2.5" decat pipe - Well I say built. I chopped up the bits and other people did the rest!
http://img155.imageshack.us/img155/5339/decat.jpg

The result: 260 bhp / 289 lbs ft @ 16 psi (1.1 bar)
http://img294.imageshack.us/img294/2166/dynoresults001.jpg

Great results for the current setup but the quest for powaaah never ends...


Re: kj16v Home build - 16VT hybrid turbo project [Re: kj16v] #1100677
13/09/2010 00:57
13/09/2010 00:57
Joined: Feb 2008
Posts: 1,725
London
kj16v Offline OP
My life on the forum
kj16v  Offline OP
My life on the forum

Joined: Feb 2008
Posts: 1,725
London
...and now for something different The quest of r POWAAAAH still continues, but in the meantime I'm also have another project running on the Coupe. I call it the:

KJ16V Home Build-16VT Make the Bloody Thing Actually Go Round Corners project.
I never mentioned it previously, but a few months ago the front suspension (shock absorber, lower arm, top, mount and bottom ball joint) got absolutely DESSIMATED by the worlds largest pothole, it was 5ft long and 6" deep shocked
So I replaced both lower arms, ball joints, anti-roll bar links, and front shock. I also fitted Apex lowering springs all round.

Result is much less roll, but needs uprated shocks to go with the springs. The new standard shocks don't dampen enough, making the ride comfortable but bouncy. More on that later...

Today I just fitted these bucket seats. Got them on Ebay for £82, along with some Ford Subframes. The subframes obviously didn't fit, so I had to modify them.

Well I say modify, I hacked the crap out of the subframes and drill holes in them until the finally submitted and agreed to get in my car. I'm not very good at measuring and fabricating, and this has been the most difficult thing I've ever done on a car. But it was soooo worth it. It's amazing what a difference it makes having seats that actually hold you in the car, instead of leather sofas. Now I can take tight corners with more confidence and less effort. And my Fiancee no longer has to hold on to the door handle! Also I find it makes you feel more 'in touch' with what the car's doing (mainly not going round corners).

I'm well pleased with them and think they fit well in the car. Let me know what you think.

Subframes originally looked like this
http://www.scoob.co.uk/rebuild/scoobyfloor1.jpg

Much choppage later
http://img842.imageshack.us/img842/7813/bucketseats003.jpg

To fit the seatbelt clips I made 90 deg. brackets at work. Fitted them using he original nuts and washers.
http://img714.imageshack.us/img714/3876/bucketseats004.jpg
http://img269.imageshack.us/img269/2232/bucketseats005.jpg

Passenger seat in
http://img534.imageshack.us/img534/4647/bucketseats001.jpg

One week, much drilling, and even more angle-grinding later:
http://img339.imageshack.us/img339/278/bucketseats006.jpg

Last edited by kj16v; 22/08/2011 01:12.
Re: kj16v Home build - 16VT hybrid turbo project [Re: kj16v] #1252026
22/08/2011 01:10
22/08/2011 01:10
Joined: Feb 2008
Posts: 1,725
London
kj16v Offline OP
My life on the forum
kj16v  Offline OP
My life on the forum

Joined: Feb 2008
Posts: 1,725
London
ALOT has changed since I last updated this thread. My little tuning business has really taken off over the last year. So with that and other things keeping me busy, I haven't had the time to update the thread. So it's about time I did smile

Back to the quest for powwaaaar!!

Some time last year I decided to max out the turbo and see what I could get from it. To do that it was going to take some more modifications:

The thing that stopped me from going for more power in the first place was the stock clutch, which slipped with more than 284 lbs ft torque.
So I replaced it with this CG Motorsport clutch - basically a cerametallic paddle driven plate with a stock cover. Very good price, not too harsh, IMO and so far it has stood up well.
http://img846.imageshack.us/img846/2967/paddleclutch.jpg

The 440cc injectors were already at their limit, I replaced thim with a set of Siemens 660cc man-size injectors, fuel pressure at 3 bar. No pic but you know what injectors look like - sort of injector-y

I upgraded the turbo with:

360 deg. thrust bearing
http://img691.imageshack.us/img691/6261/360degbearing.jpg

Stagger-gap oil seals (the one on the right)
http://img13.imageshack.us/img13/2502/staggeredgapoilseal.jpg

I also managed to get hold an RS Cosworth .63 a/r turbine housing
http://img195.imageshack.us/img195/8026/newt342.jpg
http://img692.imageshack.us/img692/2354/newt341.jpg

With the Cossie ex. housing fitted, the actuator fouled the gearbox, so I ended off having to file a daft amount of metal off the bell-housing to get it to fit.
The actuator is also in a very hard to reach spot on the the Coupe and it makes it a real pain to adjust or swap out. For these reasons I decided to junk the internal wastegate setup and build an external setup instead.

Demon Motorsport 35mm External wastegate and screamer pipe. The part below is a motorbike silencer I was going to test to see how well it quietened the dump noise. As it is, the screamer pipe is so quiet anyway I didn't bother in the end:
http://img834.imageshack.us/img834/2230/externalwastegate007.jpg

This not my welding. I wish it was my welding. More awesome TIG-ing from Specialist Welding.
http://img718.imageshack.us/img718/6775/externalwastegate005.jpg

external wastegate fitted
http://img153.imageshack.us/img153/1570/externalwastegate009.jpg
I took a risk and tried this cheap wastegate from Demon motorsport and I have to say its worked brilliantly for the last 7 months. Rock steady boost all the way to the redline. It's very well made with good quality materials too. The only part that lets it down a bit are the hose-tails, they're very easy to break. But they just screw in so its not the end of the world to replace them.

I tried a couple of tial knock-offs before this one and they were terrible both leaked far too much air through down the valve stem. Definitely not worth bothering with - even if you can get them for £50.

Manifold modified for external wastegate
http://img155.imageshack.us/img155/5020/externalwastegate003.jpg

I also fabricated a new 3" downpipe
http://img829.imageshack.us/img829/6485/3inchdownpipe006.jpg

Upper lambda port moved to the front to clear the screamer pipe
http://img696.imageshack.us/img696/7047/3inchdownpipe004.jpg


Another piston cracked during testing, so I bought the most expensive single component for my car to date; a set of Wossner forged pistons from Martin at Delta Parts. I've bought a few parts off him now and he's always reliable. Knowledgeable and friendly guy to chat to over the phone too. Very rare trait these days
http://img109.imageshack.us/img109/1715/wossnerforgedpistontop.jpg
http://img27.imageshack.us/img27/2659/wossnerforgedpistonside.jpg
http://img11.imageshack.us/img11/497/wossnerforgedpistonsins.jpg

Stock piston showed for comparison
http://img600.imageshack.us/img600/3309/stockpistontop.jpg
http://img708.imageshack.us/img708/6309/piston3brokenagain1.jpg

So very long story short, this is the result of all my labours; 321 bhp / 296 lbsft @ 1.3 bar cloud9 :
http://img717.imageshack.us/img717/9041/externalwastegatedyno.jpg

The complete spec as it currently stands:
>homebuilt hybrid T3/T04E turbo, 44-trim compressor, RS Cosworth .63 a/r turbine housing, stock Coupe wheel, 360 deg. thrust bearing, staggered-gap oil seal
>Demon Motorsport 38mm external wastegate with (surprisingly quiet) screamer pipe
>tubular exhaust manifold modified for external wastegate
>Homebuilt 3" downpipe
>2.5" decat and exhaust system
>Siemens 660cc injecotors
>FSE 1:1 FPR @ 3 bar
>Universal Intercoolers FMIC
>255 lph fuel pump with "wiring mod"
>fully rebuilt engine
>Wossner forged pistons
>head with knife-edged port dividers, exhaust/inlet ports matched with manifolds
>Tipo 16V inlet cam and Pulley
>Home-mapped - of course wink


So, a fully rebuilt engine with forged internals, >300bhp and potential for more with a different turbo for less than £2500

And in keeping with the low-cost build philosophy, the car's been mapped on 95 RON Asda 'no frills' unleaded biglaugh

I hope this project shows that you don't need to have infinitely deep pockets in order to make reliable horsepower as long as you're not afraid to get a bit greasy. Even if you've never picked up a spanner before there's nothing to be afraid of. There are plenty of people out there who will be happy give you advice - including me!


That will do for power for the time being. Any more power will require a new turbo and I want to concentrate on other aspects of the car now ( Plus spend more time tuning you lovely peoples' cars laugh ).

Re: kj16v Home build - 16VT hybrid turbo project [Re: kj16v] #1263773
26/09/2011 00:50
26/09/2011 00:50
Joined: Feb 2008
Posts: 1,725
London
kj16v Offline OP
My life on the forum
kj16v  Offline OP
My life on the forum

Joined: Feb 2008
Posts: 1,725
London
Being the obsessive petrol-head I am, I'm already making plans.

Big plans...

...Expensive plans...

...But great value for money plans, of course!

Re: kj16v Home build - 16VT hybrid turbo project [Re: kj16v] #1387188
24/10/2012 01:33
24/10/2012 01:33
Joined: Feb 2008
Posts: 1,725
London
kj16v Offline OP
My life on the forum
kj16v  Offline OP
My life on the forum

Joined: Feb 2008
Posts: 1,725
London
There have been some big changes since I last updated my project...

...Expensive changes...

... But, as promised, great value for money changes!

Last year I had a big setback - a big expensive setback. The knock sensor on the car developed a fault. It still registered knock (meaning no error was flagged by the ECU, hence I never knew about it), but now it registered knock that didn't exist. Meaning that during a dyno power run it decided there was det going on, the ECU drastically retarded the ignition - just at the point where the ignition was already at it's most retarded and the combustion chamber temperature sky-rocketed (though, interestingly, not the EGT, All resulting in an impressive 'BANG' as the head gasket's no.4 fire ring blew out of the block and this happened to the pistons. Ironic, an engine safety device destroyed my engine rolleyes

Engine build

Wossner pistons are evidently tough cookies; stock Coupe pistons would have fallen apart and wrecked the block under the same circumstances:
click to enlarge

I fitted a new set of forged pistons and carried on. Voodoo Tuning keeps me very busy these days so it took me months in between tuning customers cars to work out what was causing the problem with my Coupe.

I finally nailed it but I wasn't happy with it. Bore No.3 was still just within spec. but the piston still slapped when cold . So early this year I decided to buy ANOTHER new set of pistons (yeah that's 3 sets of forged pistons), oversized. Drop the whole engine and build it bigger, better - and more expensive. Afterall, it's only even more money I don't have lol.

Engine out:
click to enlarge click to enlarge click to enlarge click to enlarge

Bores bored out and honed, deck face skimmed flat for head gasket.


Washed block
click to enlarge

Had some spare time at one point waiting for something-or-other, so I used it to paint the block. Aah pretty!
click to enlarge

Gearbox was caked in grease
click to enlarge click to enlarge

Degreased 'box
click to enlarge

Most people, when rebuilding an Fiat/Lancia engine fit a Spesso 1.9mm racing head gasket because, well, that's everyone else does! There's nothing wrong with that, Spesso racing gaskets are well proven. But time moves on and technology improves, plus I don't like to follow the herd just for the sake of following. So I decided to try a multi-layer steel (MLS) gasket. This seem to be becoming the industry standard in oe cars (Jap cars have been using them for years) and they're also becoming very popular in the high-performance tuning world too.

Another feature of MLS gaskets - and one very important to me - is that they come in a relatively large range of thicknesses; Cometic do something like 5 or 6 thicknesses. This meant I could actually choose a gasket to give me a compression ratio and squish height of my choosing; Compression ratio affects off-boost performance, so I like to keep it close to stock 8:1 as possible. Squish height is crucial for det resistance; widening the squish height can decrease an engine's resistance to detonation. Definitely not a good thing...

However, you can't just slap on an MLS gasket and go, The block and head mating faces have to be machined completely flat and to a roughness level smoother than what you could get away with when fitting a conventianal fibre gasket.

To work out squish height and compression ratio, you need to measure the volume of the piston dish and the volume of the combustion chamber by "cc'ing".
click to enlarge

You also need to measure the deck height - the height the piston stick out of the block. All this measuring is VERY time consuming, but it's gotta be done if you wanna do it right.
Oh and before some eagle-eyed so-and-so points out that I should be measuing deck height along the gudgeon pin centre-line, I just put the dial gauge in that position to take a picture!
click to enlarge

Then you can select the right head gasket. In this case 1.6mm
click to enlarge click to enlarge

Steel H-beam conrods
click to enlarge

Spot what's wrong with this pistons and win...
...absolutely nothing!
click to enlarge

Old main bearings were surprisingly worn after 3 years.
click to enlarge

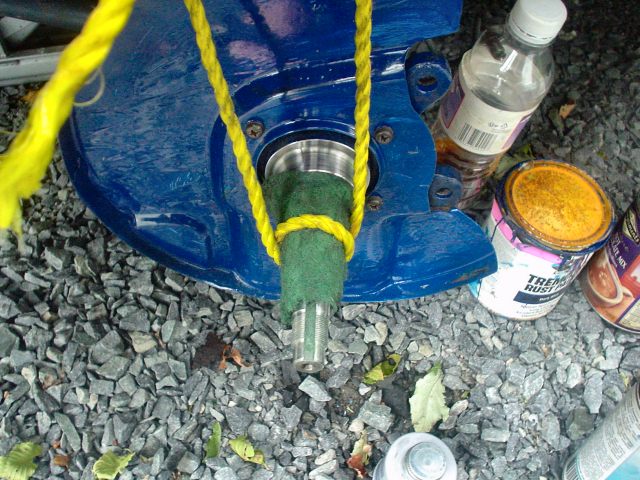
So replaced with new. I also polished the crank journals. I didn't take any photos, but I used a similar method to the one in this photo:
click to enlarge

I had removed the aircon radiator a long time ago. Now that the engine was out it was a good oppotunity to remove the pump and the rest of the aircon apparatus. Afterall, with England's lousy weather I can count the number of times I've needed aircon on two fingers! I haven't gotten round to weighing the aircon stuff but it must weigh around 10kg.

On the 16VT the aircon pump is belt driven from the crank and in turn the PAS pump is belt driven from the aircon pump. So you can't just remove the aircon. Fortunately it turns out that Fiat cleverly made the pump mounting bracket in such a way that the same bracket could be used for aircon and non-aircon 16VTs. So all I had to do was move the PAS pump to the correct mounting point and space out the pulley.
click to enlarge

washers to space out the pulley (taped together for ease of fitting)
click to enlarge

The engine mount rubbers were cracked. I wanted to replace the mounts but it seems it's impossible to get them - even from Fiat. So I tried filling them with PU body adhesive. I didn't fill the mounts right up because I still wanted some give. Don't know how well this will work long-term but it's worth trying since there's no alternative.
click to enlarge

A couple of people had recommended to me that a good way to increase clamping load on the clutch is to machine down the flywheel where it mounts the clutch. So I got this done.
click to enlarge

So a month later and the engine is back under the bonnet. Time to tune...

Tuning

Turbo
My old home-built T3/T04E turbo had proved itself tough and very capable. I had gone all the way from 220 bhp @ 0.8 bar. to 320 bhp @ 1.3 bar with this turbo. I had upgraded the turbo several times: 44-trim T04E comp, 360 deg thrust bearing and staggered-gap oil seal, .63 a/r hot-side, finally external wastegate.

Now it was time for a change. Turbonetics T3/T04E, 50 trim comp, .63 a/r hot side, st.3 wheel (Turbonetics wheel stages are different specs to Garrett wheel stages, nonetheless st.3 is bigger that st.1). I couldn't afford anything fancy like a billet comp wheel or ball bearing CHRA, but at least the turbine is Turbonetics' modern 'F1' wheel. Stll, awesome turbo. Spools fast and hard and makes big power.

Turbonetics comp vs Garrett comp
click to enlarge

Turbonetics st.3 wheel vs Garrett st.1 Note the 3" V-band adaptor on the T.netics.
click to enlarge

I previously had a Demon Motorsport 38mm external wastegate. Definitely one of the better makes (there's some real cheap shite out there), but still not quite good enough: After 1 year it developed a leak at the hosetail. So I bought a new one. Unfortunately this one had an incurable leak through the diaghragm.

So I finally sacked it off. Shame because I really like the unique adjustable spring-rate design. I replaced it with this:
click to enlarge
Certainly looks better quality. I also like the fact it comes with everything - even the full range of springs - other brands make you buy springs and fittings seperately. It certainly works brilliantly - even with no boost control at all. Time will tell how well it lasts

Cams
Anyone who followed my previous project thread will know I've been running a Tipo 16V 5-door inlet cam for some time. On stock cam timing this cam setup wasn't so hot, good torque but limited to 280 bhp @ 5500 rpm. However it was okay when the cams were timed correctly; On the old turbo I made 320 bhp @ 6200 rpm. The limiting factor was the stock 16VT exhaust cam. It's little more than a bumpy stick and it limited how far I could swing the cams. So out went the exhaust cam and in went the 16VT inlet cam in it's place, with a slot machined in the end to drive the cam phase sensor. The 16VT inlet cam has much more lift and duration than the 16VT exhaust. This allowed my to run the lobe seperation (the spread between cam lobes) I wanted in order to make good torque AND power.

Intercooler
The old front-mount was very good and fitted nicely behind the bumper, but effiency began to drop by 320 bhp. So I bought an aftermarket Mitsubishi Evo I/C from a Coupe owner up the road from me. Man, these things do NOT fit easily!

The easiest thing to do would have been to hack everything out the back of the bumper, but I wanted it to look as subtle as possible. So I spent hours cutting away the bumper bit-by-bit until the I/C fitted - just!
click to enlarge click to enlarge click to enlarge

It's important to listen to old-skool D&B whilst building fast cars:
VIDEO


Fuel Pump
Now the engine was working at peak performance, it was showing the limitation in the fuel system. I already had a 255 lph fuel pump and direct power feed, but it wasn't enough. I supplimented the pump with a second 255lph pump running in parallel, but it still wasn't enough. Two 255 lph pumps should flow enough liquid to dowse a house fire. So why wasn't it flowing enough fuel?

Time to look at the rest of the fuel system. I replaced the replaced the 6mm fuel pipe with 8mm fuel hose (plus fitted a fuel filter with hose tails instead of unions, for ease of fitting). 6mm to 8mm might not seem much but it represents a 56% increase in volume. I also replaced the plastic concertina hose in the fuel pump hanger with 8mm hose. Lo behold it worked - significantly improved fuel flow. Seems the stock fuel system is terribly restrictive.

I'm sure the 20VTs must have exactly the same fuel system. I'm interested to know if anyone else running around 400 bhp has found the fuel system to be restrictive. Let me know.
click to enlarge
[will ad a pic of the fuel tank-to-hose adaptor]

Time to hit the dyno... The result: 403 bhp and 385 lbs ft.
click to enlarge

The spec in full:
*Wossner forged 84.4mm pistons
*Forged conrods
*1.6mm MLS head gasket. Chosen for 8.0 CR and <1mm squish height
*Tipo 16V 5-door inlet cam, Coupe 16VT inlet cam (on exhaust)
*Voodoo Tuning adjustable cam pulleys
*uprated head bolts
*Tubular exhaust manifold
*Turbonetics T3/T04E 50-trim comp, st. 3 wheel, journal bearing
*Precision Turbo 39mm external wastegate
*screamer pipe
*3" downpipe custom-made (by me!)
*2.5" decat
*2.5" stainless mandel-bend exhaust system
*Siemens Deka 660cc fuel injectors
*Dual 255 lph fuel pumps
*8mm i'd fuel hose
*adjustable FPR @ 4 bar
*CG Motorsport 6-paddle clutch
*lightened + balanced flywheel, modified for extra clutch clamping force
*Weber Marelli 3 bar MAP sensor
*Stock Weber Marelli P8 ECU
*Voodoo Tuning Live map (Obviously!)

If I'm not mistaken this makes my Coupe the most powerful 16VT on the stock Weber Marelli ECU in the UK cool

It's not all about peak figures on the dyno though. On the road, off-boost performance is great; crisp acceleration even from low revs and tractable off idle. the old school turbo reaches full boost at 5000 rpm, but starts making boost from 3500 rpm. Then there's full throttle... Absolute beast. Torque steer? Put it this way, you don't floor it whilst holding the wheel one-handed - unless you REALLY like ditches.

My wife hates it when I floor it!
CLICK

25 psi + loose boost hose = fail. The scraping sound near the end is the undertray dragging on the ground after the boost hose blew it off the car shocked
CLICK

30 mins later, That's better!
CLICK

I won't lie; owning one of the UK's most powerful 16VTs that I built and tuned myself is a nice feeling smile However this definitely isn't the most important thing for me - far from it. The important thing for me is the huge amount of knowledge and experience I've gained over the years.

This experience has allowed me to give help and advice to other people with their own projects. It's also nice to hear from people that reading my project thread has helped them with their own projects.

Not to mention, I've been able to develop new products from doing this project.

Voodoo Tuning (VT) T34 turbo upgrade
click to enlarge

VT adjustable cam pulleys
click to enlarge click to enlarge

VT downpipes
click to enlarge

I've been able to use the skills gained from tuning my own Coupe for tuning customer's car's, not just Coupe's but other makes like Alfas and even Ford Cosworths.

Most of all it's allowed me to carry on doing what I love, making cars go faster!

Like I said, owning a fast car isn't the important thing for me. The thing I'd love to do next is build and tune an even more powerful engine for someone else. So who's up for it? smile

Re: kj16v Home build - 16VT hybrid turbo project [Re: kj16v] #1391608
14/11/2012 02:40
14/11/2012 02:40
Joined: Feb 2008
Posts: 1,725
London
kj16v Offline OP
My life on the forum
kj16v  Offline OP
My life on the forum

Joined: Feb 2008
Posts: 1,725
London
ACCELERATION VIDEO
In case you're wondering about the ECU light, I don't think the cheap lambda sensor could take the heat!

Re: kj16v Home build - 16VT hybrid turbo project [Re: kj16v] #1401563
05/01/2013 21:16
05/01/2013 21:16
Joined: Feb 2008
Posts: 1,725
London
kj16v Offline OP
My life on the forum
kj16v  Offline OP
My life on the forum

Joined: Feb 2008
Posts: 1,725
London


Powered by UBB.threads™ PHP Forum Software 7.7.1
(Release build 20190129)
PHP: 7.3.33 Page Time: 0.014s Queries: 15 (0.006s) Memory: 0.9009 MB (Peak: 1.2320 MB) Data Comp: Off Server Time: 2024-04-20 05:52:57 UTC