Fiat Coupe Forum
- Founded by Kayjey & James Northam
- Funded by the Club for the benefit of all owners
Fiat Coupe Club UK
join the club
Fiat Coupe Forum
 
» Announced
    Posting images


» Related sites
    Main club site
    fiatcoupe.net


» External data
    owners listed
 
Who's Online Now
1 registered members (Edinburgh), 335 guests, and 3 spiders.
Key: Admin, Global Mod, Mod
Forum Statistics
Forums69
Topics113,543
Posts1,340,439
Members1,785
Most Online731
Jan 14th, 2020
Top Posters(All Time)
barnacle 33,521
stan 32,122
Theresa 23,296
PeteP 21,482
bockers 21,070
JimO 17,917
Nigel 17,366
Edinburgh 16,662
RSS Feeds
Club Events
Club Information
Track Events
Rolling Road/RWYB
Social Events
Non-UK Events
Coupé Related Chat
Coupé Spotting
Coupé News/Press
Buying/Selling Advice
Insuring a Coupé
Basic FAQ's
How to Guides
Forum Issues
Technical Problems
General Maintenance
Styling
Tuning
Handling
ICE and Alarm
Coupés for Sale
Coupés Wanted
Parts for Sale
Parts Wanted
Group Buys
Business Forum
Other Vehicles for Sale/Wanted
Other Items for Sale/Wanted
Haggling/Offers
Ebay links
Other Cars
Other Websites
General Chat
Previous Thread
Next Thread
Print Thread
Page 2 of 2 1 2
Re: Barnacle's Olde Original 16v Fettle [Re: barnacle] #1527812
28/02/2015 23:17
28/02/2015 23:17
Joined: Dec 2005
Posts: 33,521
Berlin
barnacle Offline OP
Club Member 18 - ex-Minister without Portfolio
barnacle  Offline OP
Club Member 18 - ex-Minister without Portfolio
Forum Demigod

Joined: Dec 2005
Posts: 33,521
Berlin
It's starting to go back together. The holes in the front chassis arms and suspension towers have been cut out and new metal let in:
click to enlarge click to enlarge click to enlarge click to enlarge click to enlarge click to enlarge click to enlarge click to enlarge

After that, the loose paint and surface rust was wire brushed off - just a couple of hours and four charges for the wire wheel.
click to enlarge click to enlarge click to enlarge click to enlarge

The whole area was degreased with POR Marine Clean diluted 5:1, which turns oil and grease into soap, rinsed down, dried, and then all the visible rust treated with POR metal ready brushed in and left to dry.

While it did that, I turned the engine over and finished the bottom end build - refitted the oil pickup, the gearbox rotary seal carrier, and the sump - new gaskets and rotary seal, of course. Care needed with the seal carrier since there is enough movement on the bolts to position it half a millimetre or so out of line, which will allow a leak. The sump gasket compresses as it's fitted, so you need to tighten things up two or three times.
click to enlarge click to enlarge click to enlarge click to enlarge

Finally, back to the body: POR15 painted over all the new metal and converted rust. It's bloody expensive but it goes on a lot better than Hammerite and it has a hell of a reputation - we shall see. (I'm trying to organise an FCCUK discount with the supplier).

click to enlarge click to enlarge click to enlarge


[Linked Image]
Don't get no respect! Coupe Fiat 1994-2000 - an owner's guide <-- clicky!
Re: Barnacle's Olde Original 16v Fettle [Re: barnacle] #1528692
07/03/2015 22:52
07/03/2015 22:52
Joined: Dec 2005
Posts: 33,521
Berlin
barnacle Offline OP
Club Member 18 - ex-Minister without Portfolio
barnacle  Offline OP
Club Member 18 - ex-Minister without Portfolio
Forum Demigod

Joined: Dec 2005
Posts: 33,521
Berlin
Decided that there was rather more surface scab in the engine compartment than was immediately obvious last week, so got busy again with the clean/rust bust/POR15 again. It would be a shame to spoil the ship for a ha'porth of tar, as they say... (We also found a couple of places on the undertray which needed attention, but we can't do them until we can get the car on the ground since we need to wheel it to open the door so the carpet above can be removed... if it's not one thing, it's another.

click to enlarge click to enlarge click to enlarge

The author as the architect of his own misfortunes!
click to enlarge

Back to the engine. The balance belt is on, with the correct phasing (see the marks) for TDC. Keep an eye on that water pump... the stay bracket is fitted, along with the first shield, which was a little tricky since the holes didn't want to line up.

click to enlarge click to enlarge click to enlarge click to enlarge click to enlarge

The finished cam cover, along with sundry pipework (powder coated).
click to enlarge click to enlarge click to enlarge click to enlarge

The belt end is now finished... or is it? The power steering bracket would not fit over the water pipe, which is attached to the water pump, and which for some reason was about four millimeters out of position. Reversion to an older plastic impeller type resolved the issue - one to complain about to the supplier. The second photo is a little unclear, but shows the correct position for the water pipe. With that pump fitted, the shield, which bolts onto one of the outlet pipe bolt, dropped straight into place...
click to enlarge click to enlarge

The steering pump fitted, and the ICV, and then we're ready for the clutch, right?
click to enlarge click to enlarge click to enlarge

Well, we would be, if only we had the advertised release bearing. Look at what's written *under* the 'three part clutch kit with bearing' label... not a happy bunny, and rude phone calls will be the order of the day on Monday.
click to enlarge

So the engine has gone to bed for a couple of weeks, and we finish with some curious cut-off parts on the front frame. It's been noticed before that this chassis is very early, and it looks as if someone in the factory changed their mind about something...

click to enlarge click to enlarge click to enlarge click to enlarge


[Linked Image]
Don't get no respect! Coupe Fiat 1994-2000 - an owner's guide <-- clicky!
Re: Barnacle's Olde Original 16v Fettle [Re: barnacle] #1530906
21/03/2015 22:52
21/03/2015 22:52
Joined: Dec 2005
Posts: 33,521
Berlin
barnacle Offline OP
Club Member 18 - ex-Minister without Portfolio
barnacle  Offline OP
Club Member 18 - ex-Minister without Portfolio
Forum Demigod

Joined: Dec 2005
Posts: 33,521
Berlin
After some persuasion ("You should have told us within ten days") the supplier delivered a replacement clutch release bearing, and with a new input shaft seal, Joe's got the gearbox finally on the engine.

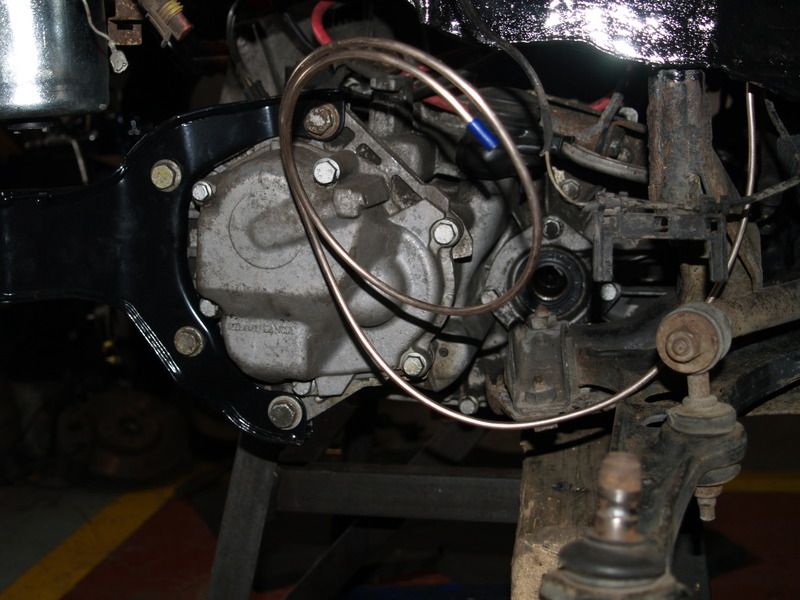
He's also been busy replacing the brake lines with shiny new cupro-nickel lines:

click to enlarge click to enlarge

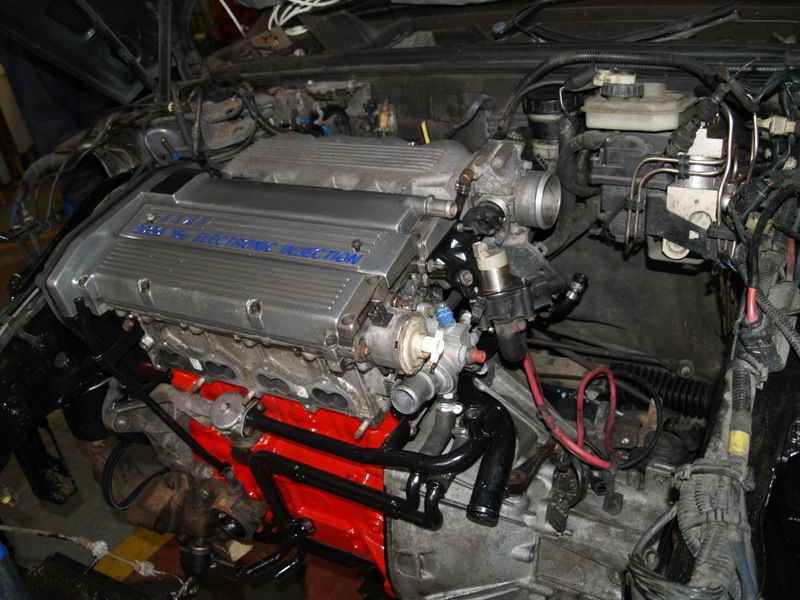
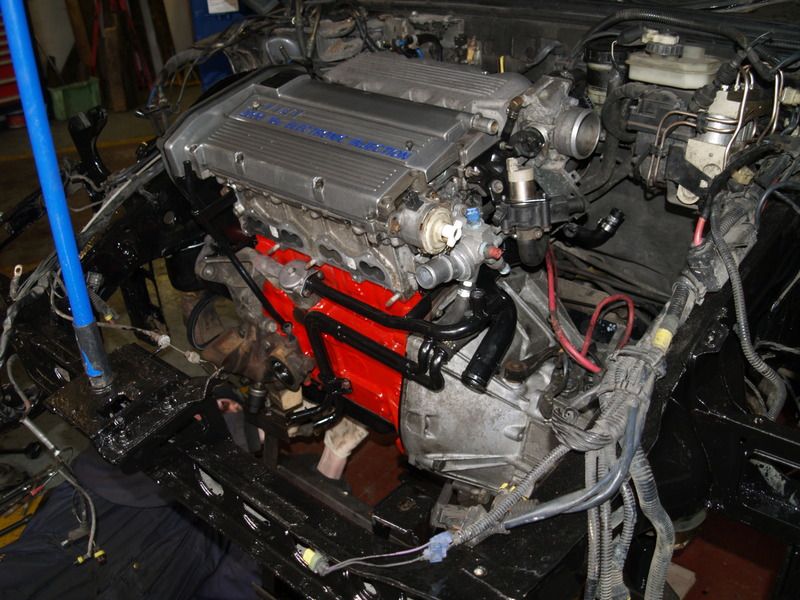
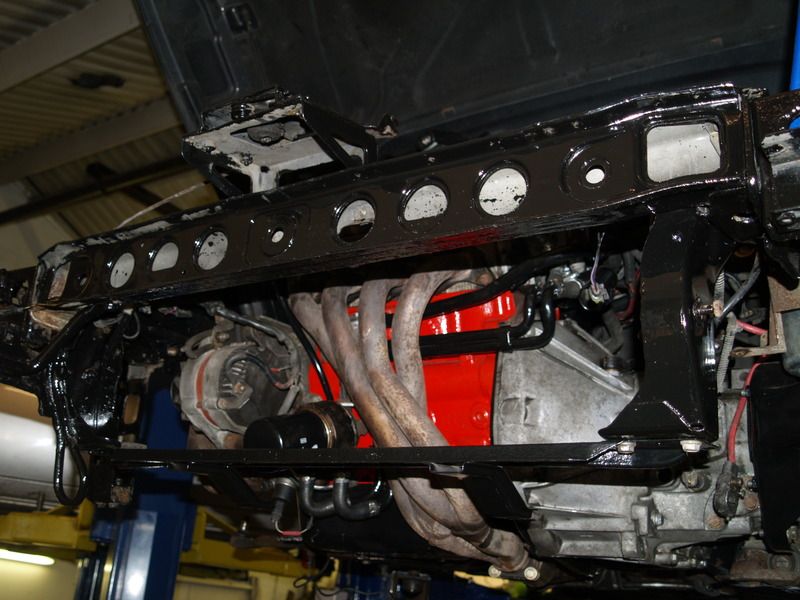
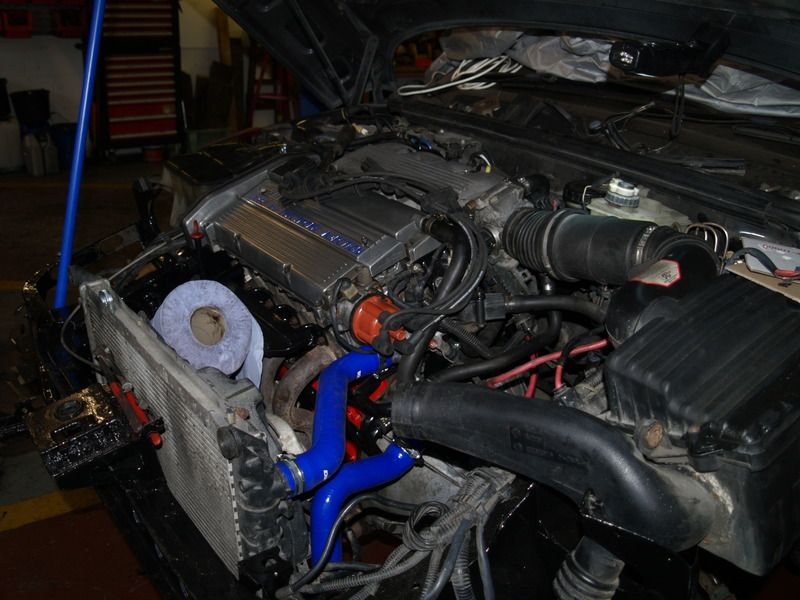
Then the engine and box goes back in the bay:
click to enlarge click to enlarge click to enlarge click to enlarge click to enlarge click to enlarge

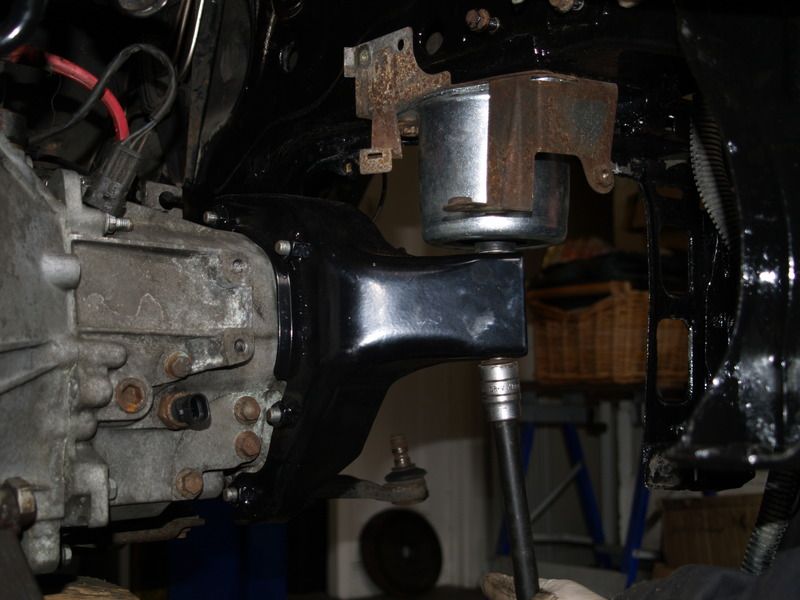
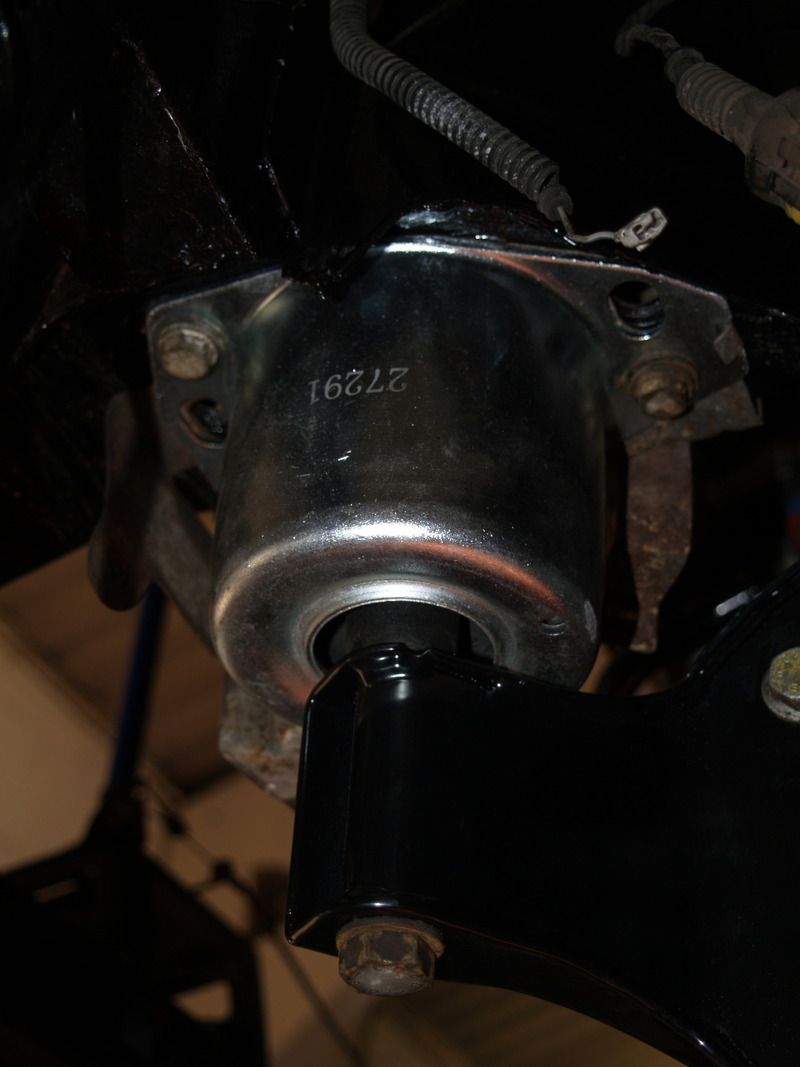
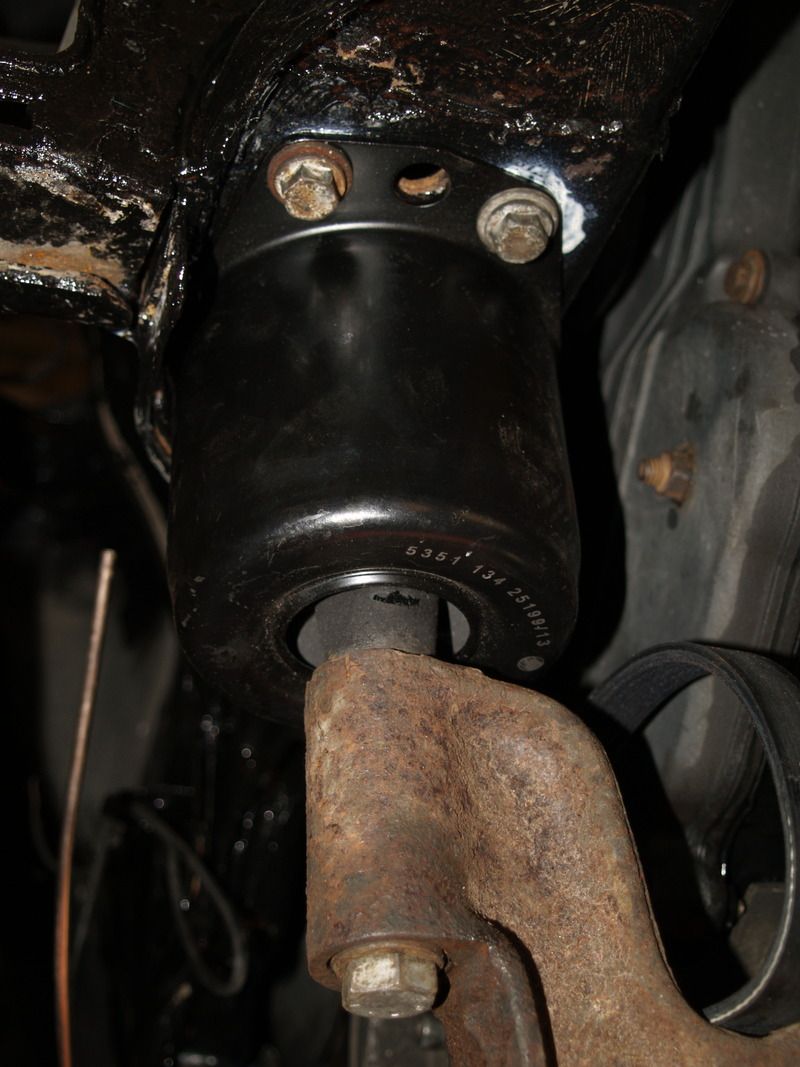
The bolts holding the subframe up were a little thinner than they should have been, so were replaced:
click to enlarge

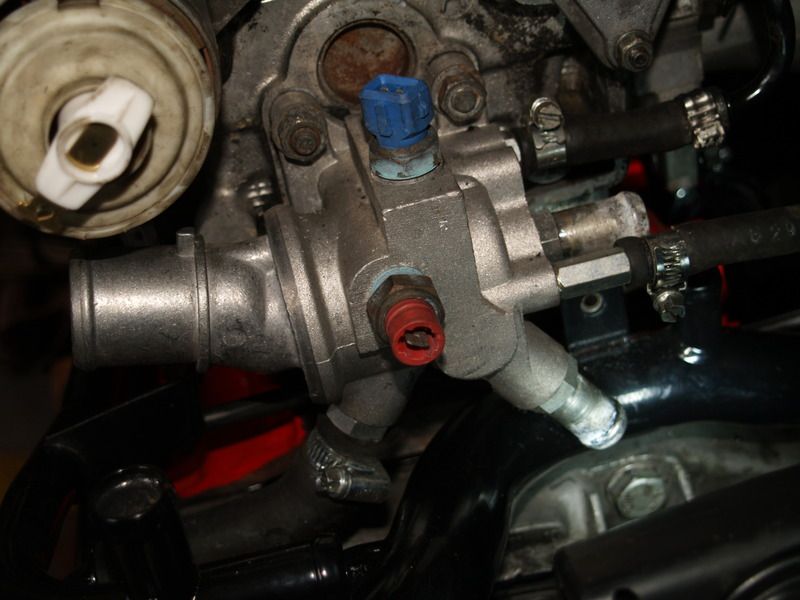
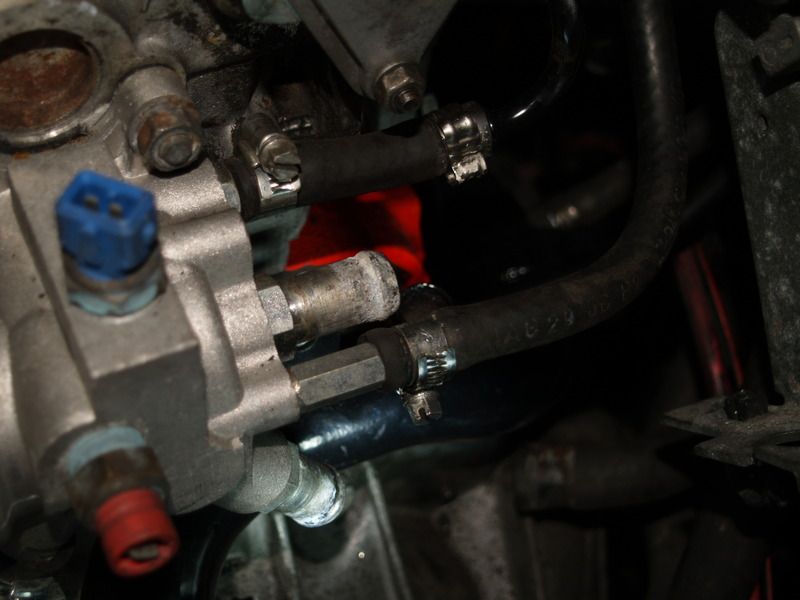
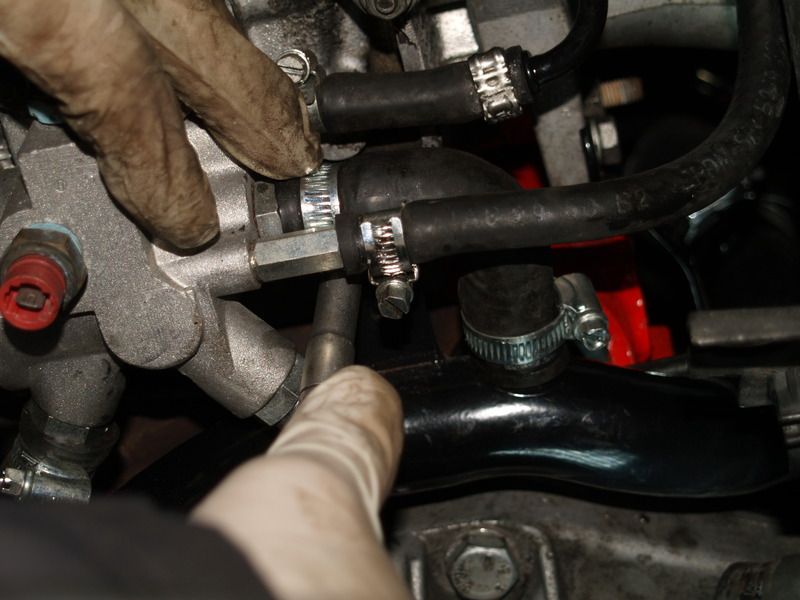
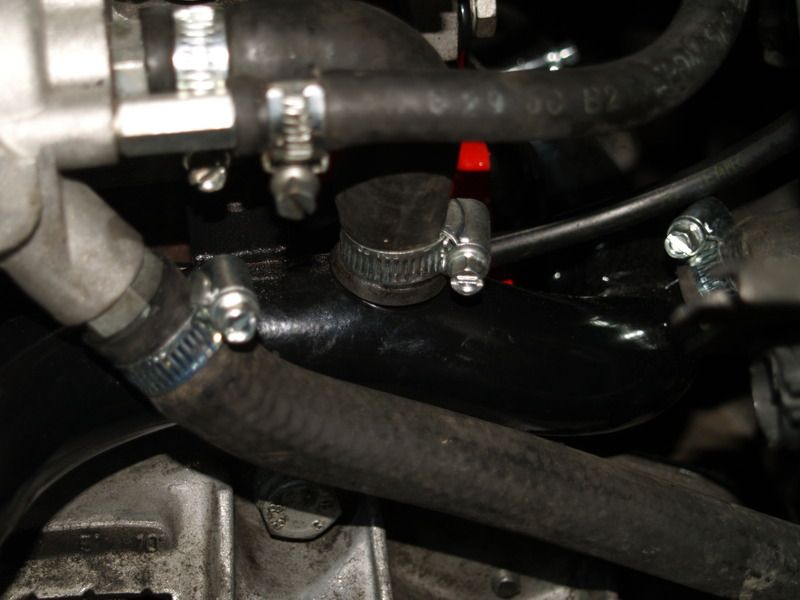
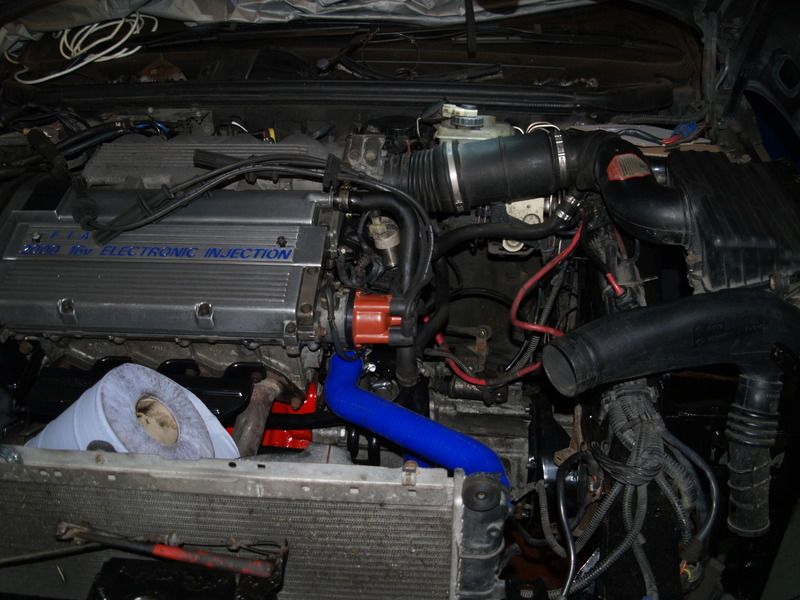
The plumbing around the thermostat is installed:

click to enlarge click to enlarge click to enlarge click to enlarge

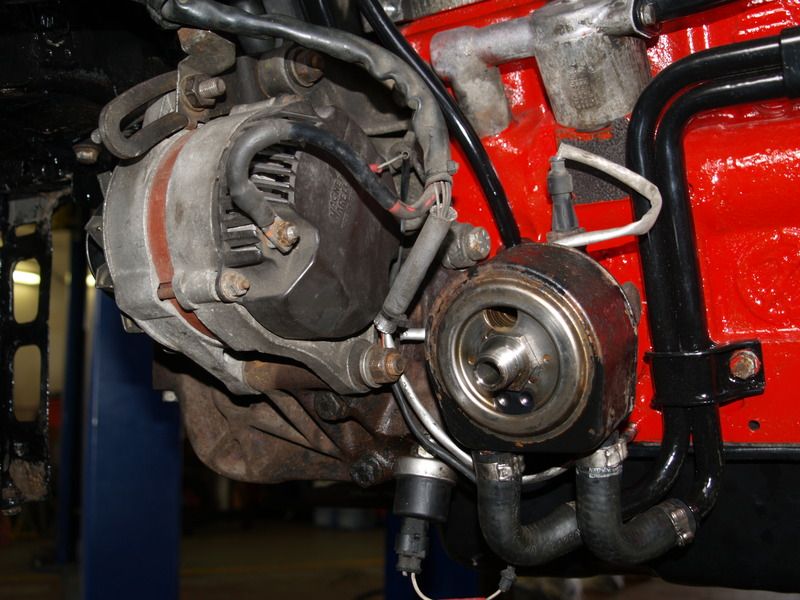
Then the heat exchanger, alternator, and associated wiring:

click to enlarge click to enlarge click to enlarge click to enlarge

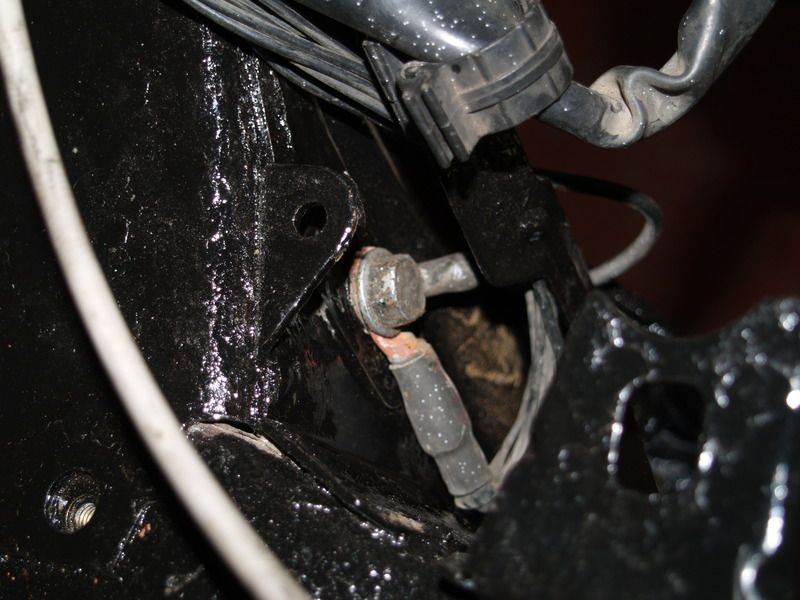
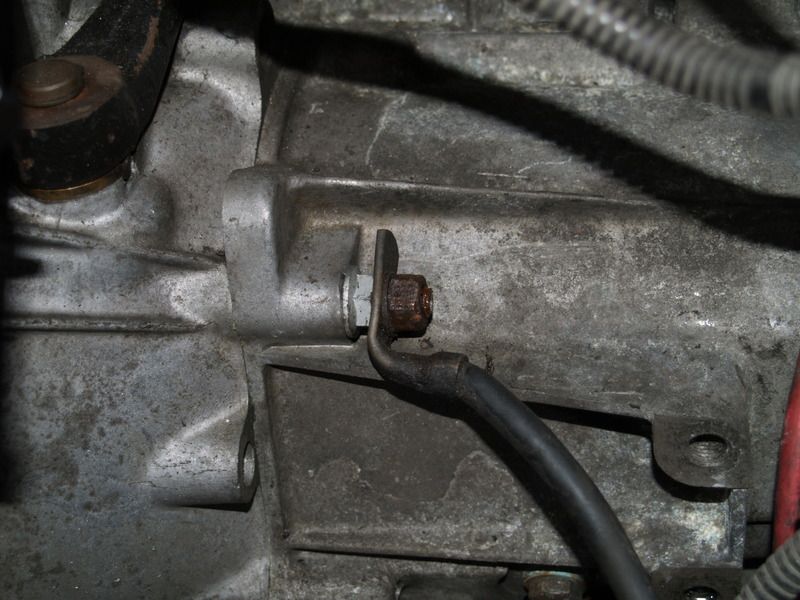
Essential earthing points:
click to enlarge click to enlarge click to enlarge

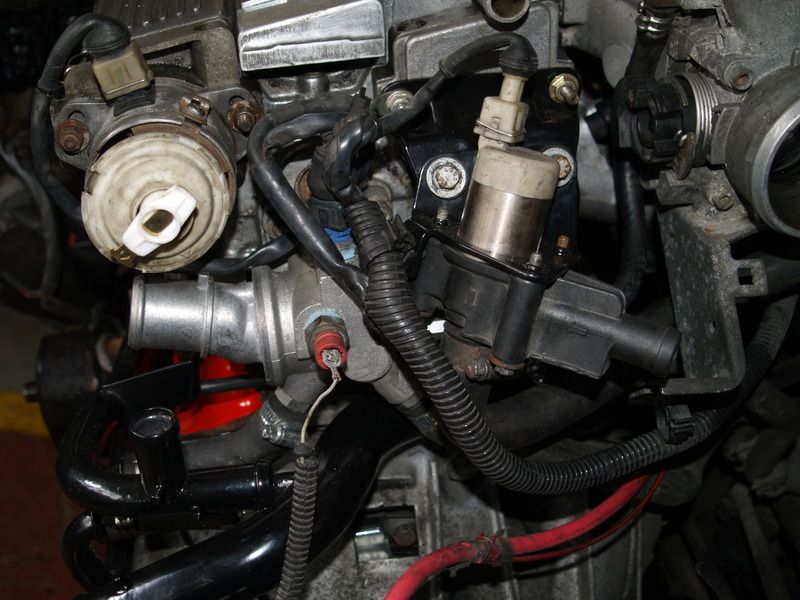
The idle control valve (ICV) and wiring
click to enlarge

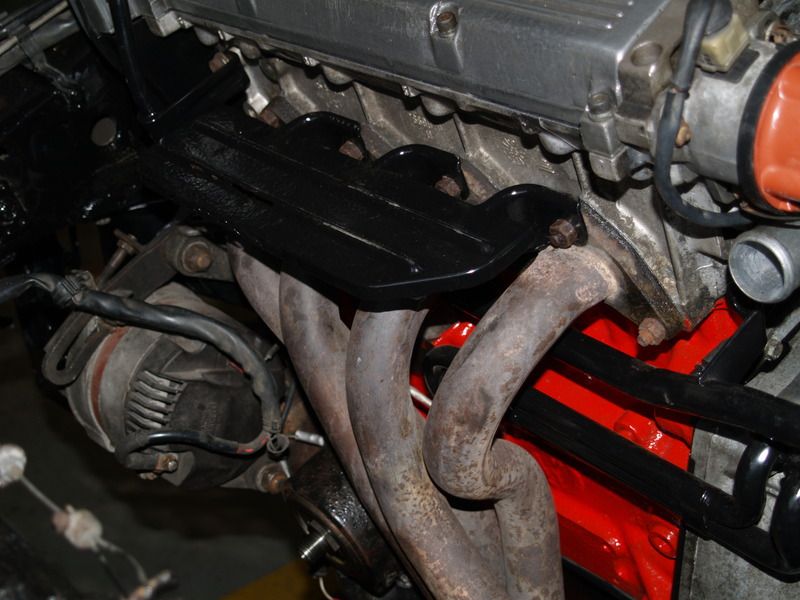
Four into two into one (shame we accidentally powder coated the heat shield... oh well.)
click to enlarge

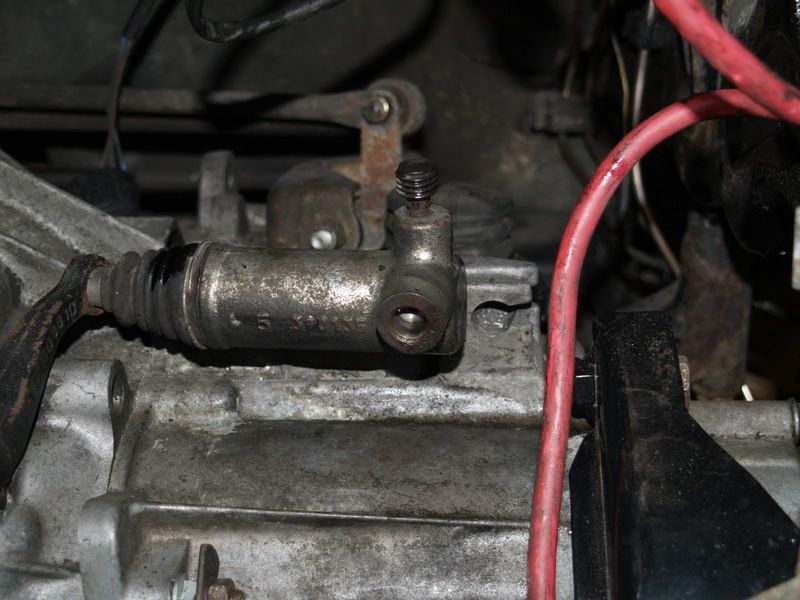
And the clutch slave servo - bolted in on a 16NA. We'll be making a single braided pipe from the master to the slave, given the difficulty of obtaining either new slave hard pipes or pipes to make as new.
click to enlarge

The powder coated radiator support bar, the radiator, and we're good to go.
click to enlarge click to enlarge click to enlarge

Filled the gearbox, the engine (using a cheap 10W-40 for the first thousand miles or so), and the cooling system.

Time to see if it starts. First, prime the oil; plugs out and the injectors disconnected, and let the engine turn over on the starter for a couple of minutes. This isn't quite fast enough to maintain a pressure indication on the gauge, but ensures that the oil gets to everywhere it needs to. Checking through the filler hole shows the oil is getting pumped around.

Plugs in, connect the HT, and the injectors. Does it start? No.

Investigate... no spark. Some muppet has inadvertently connected the spark coil to the sidelight cluster loom. Oh well.

Now does it start? No.

Hmm, perhaps we got the fuel go and return lines the wrong way round? No... ah, wait, petrol isn't coming out of either pipe and we can't hear the pump.

Turns out some *other* muppet has removed the inertia switch connector. To access this one need only open the door, but the two-post lift won't allow this, and as we haven't put the front wheels on, we can't drop it off. So there is much amusement as we take turns dangling in through the driver's window and try to connect this plug and socket, upside down and legs waving. Eventually we succeed.

The pump priming now works, and makes horrible noises as it blows air through the pressure regulator. After half a dozen primes it runs quietly, so we try and start again.

Woohoo. It runs, and the pressure is right where it should be. Which is nice.

Last edited by barnacle; 21/03/2015 23:19.

[Linked Image]
Don't get no respect! Coupe Fiat 1994-2000 - an owner's guide <-- clicky!
Re: Barnacle's Olde Original 16v Fettle [Re: barnacle] #1531026
23/03/2015 10:20
23/03/2015 10:20
Joined: Dec 2005
Posts: 33,521
Berlin
barnacle Offline OP
Club Member 18 - ex-Minister without Portfolio
barnacle  Offline OP
Club Member 18 - ex-Minister without Portfolio
Forum Demigod

Joined: Dec 2005
Posts: 33,521
Berlin
Things not photographed but also done last week:
  • new steering rack gaiters fitted
  • new UJ gaiters on both driveshafts
  • cupro-nickel brake lines front to back, with joiners under the passenger footwell for future use
  • new front shock absorbers


[Linked Image]
Don't get no respect! Coupe Fiat 1994-2000 - an owner's guide <-- clicky!
Re: Barnacle's Olde Original 16v Fettle [Re: barnacle] #1531912
28/03/2015 22:11
28/03/2015 22:11
Joined: Dec 2005
Posts: 33,521
Berlin
barnacle Offline OP
Club Member 18 - ex-Minister without Portfolio
barnacle  Offline OP
Club Member 18 - ex-Minister without Portfolio
Forum Demigod

Joined: Dec 2005
Posts: 33,521
Berlin
We're getting there... let's start with an end view of the gear box, with the new plumbing and (this side only) a replacement OEM wishbone.

click to enlarge

One of the nastiest stickiest jobs on a car is changing the CV joint gaiters. It's *much* easier if (a) the correct gaiters are provided, (b) it's not necessary to take the joint to bits to clean it out of dried grease, and (c) the splines aren't rusted into the joint. It turned out though that the shaft with the rusted splines had some nasty wear at the other end, so a s/h from Joe's collection went in on that side.

click to enlarge click to enlarge click to enlarge click to enlarge
It turns out that the cage and balls don't go back in the place you might expect them to, because the slots in both parts are sloped in odd directions...

The powder coated slam panel has all its bolt holes drilled out (Joe broke one of my drills last time, and I broke one of his this time, then he broke one of his, so I suppose I have to break one of mine to equalise...) and the crash foam fitted - all holes with the proper bolts.
click to enlarge click to enlarge

The hubs, shafts, brakes and discs reassembled and fitted.
click to enlarge click to enlarge

It is important to ensure that when lifting an engine, appropriate techniques are used:
click to enlarge

Finally, it's pretty much all back together:
click to enlarge click to enlarge

Still to do this week:
  • Tighten a couple of 'weight on wheels' nuts and bolts
  • Fit the clutch pipe (a single flex pipe by Pirtek is being used
  • Bleed clutch and brakes
  • Install battery tray and ancillaries
  • Install undertray
  • MOT
  • Wheel alignment


[Linked Image]
Don't get no respect! Coupe Fiat 1994-2000 - an owner's guide <-- clicky!
Page 2 of 2 1 2

Powered by UBB.threads™ PHP Forum Software 7.7.1
(Release build 20190129)
PHP: 7.3.33 Page Time: 0.012s Queries: 14 (0.006s) Memory: 0.8330 MB (Peak: 1.0253 MB) Data Comp: Off Server Time: 2024-03-28 23:46:04 UTC