|
0 registered members (),
89
guests, and 3
spiders. |
|
Key:
Admin,
Global Mod,
Mod
|
|
|
Forums69
Topics113,769
Posts1,342,466
Members1,609
| |
Most Online731
Jan 14th, 2020
|
|
|
 Barnacle's Olde Original 16v Fettle
#1478096
Barnacle's Olde Original 16v Fettle
#1478096
08/03/2014 20:16
08/03/2014 20:16
|
Joined: Dec 2005
Posts: 33,628
Berlin
barnacle
 OP
OP
Club Member 18 - ex-Minister without Portfolio
|
OP
Club Member 18 - ex-Minister without Portfolio
Forum Demigod
Joined: Dec 2005
Posts: 33,628
Berlin
|
The time has come, the Walrus said, to speak of many things. Of ships and string and sealing wax, and whether pigs have wings... And apparently they do, since I've getting my hands dirty doing some tidying up, mostly the interior/console and the engine compartment. It's getting a respray in April, so before then I want to sort out some of the rust under the bonnet and get some new hoses on the engine. First - the undertray. I didn't even *look* for a replacement, but the car has been off-road too many times (farmers fields, tops of mountain tracks when I've been flying) and parts of it have abraded completely away. 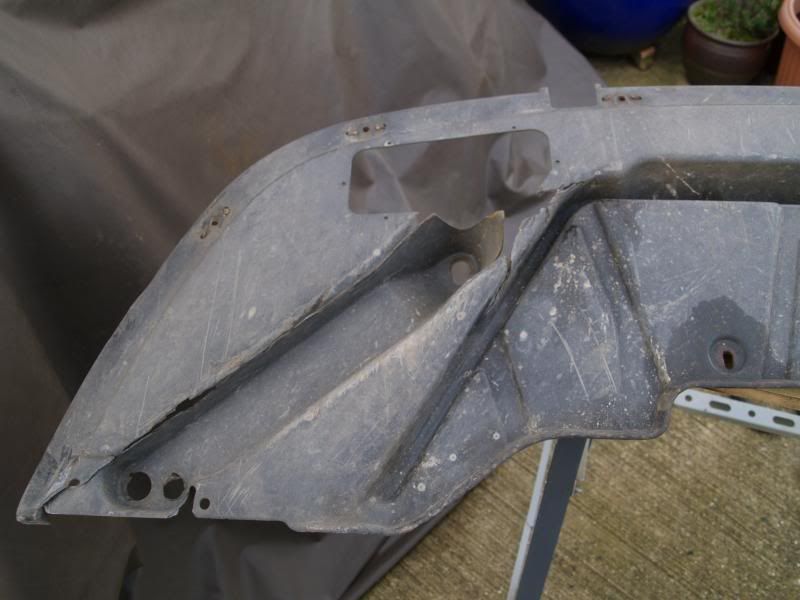 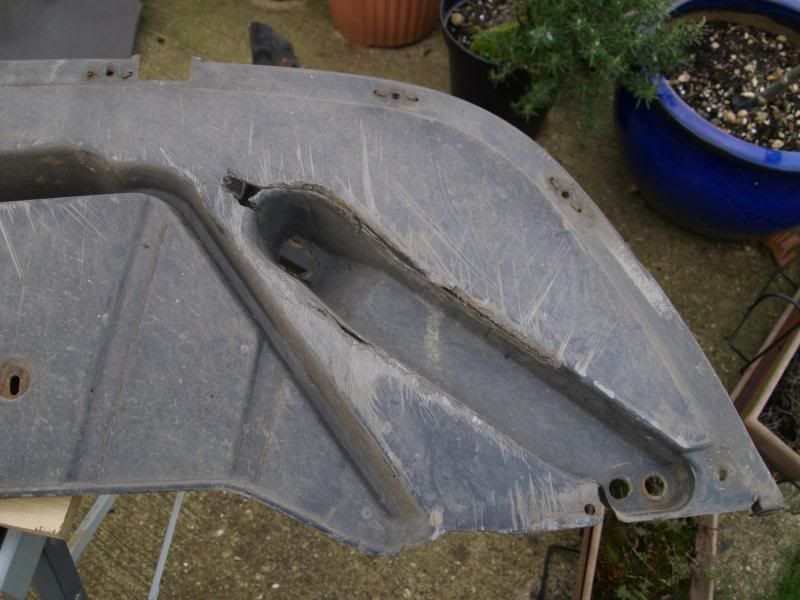 Getting busy with some fibreglass to try and hold it all together; here's today's result from the bottom; the glass has been applied to both sides. Tomorrow I'll trim it and sand smooth as required. I'm not planning to repaint it. 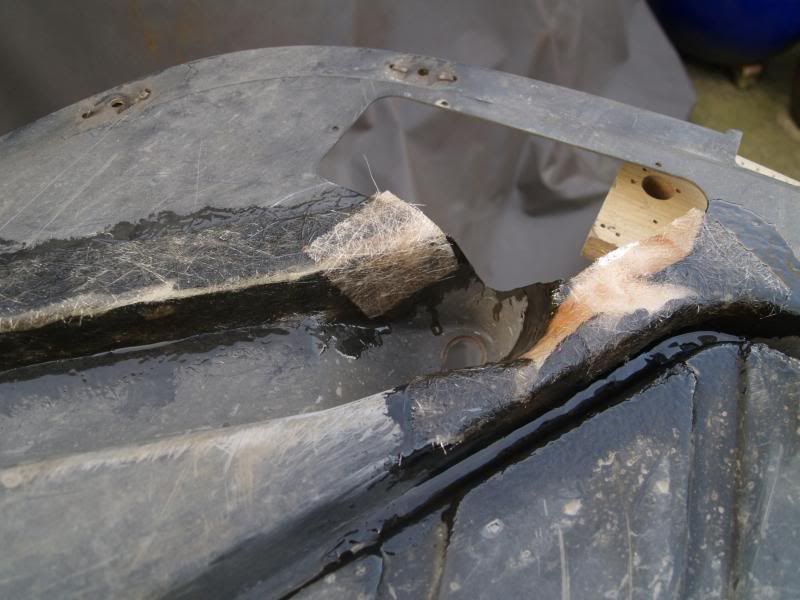 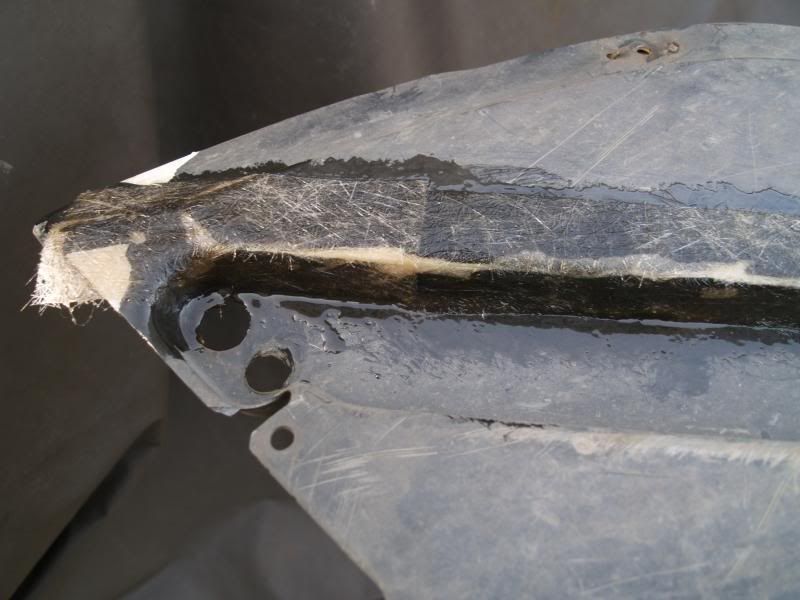 Currently it's curing overnight. If nothing else, it's one less rattle...
|
|
|
Re: Barnacle's Olde Original 16v Fettle
[Re: barnacle]
#1478203
09/03/2014 21:01
09/03/2014 21:01
|
Joined: Dec 2005
Posts: 33,628
Berlin
barnacle
OP
Club Member 18 - ex-Minister without Portfolio
|
OP
Club Member 18 - ex-Minister without Portfolio
Forum Demigod
Joined: Dec 2005
Posts: 33,628
Berlin
|
|
|
|
Re: Barnacle's Olde Original 16v Fettle
[Re: barnacle]
#1479207
16/03/2014 11:04
16/03/2014 11:04
|
Joined: Dec 2005
Posts: 33,628
Berlin
barnacle
OP
Club Member 18 - ex-Minister without Portfolio
|
OP
Club Member 18 - ex-Minister without Portfolio
Forum Demigod
Joined: Dec 2005
Posts: 33,628
Berlin
|
More on the interior - the last removable console panel is the heater control unit: 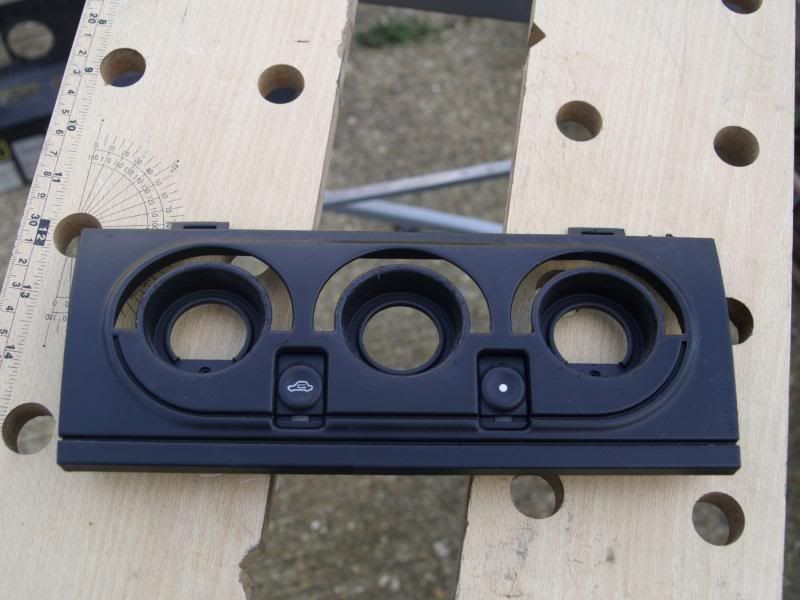 Not terribly tatty but sticky and gouged in a couple of places. With the nasty stuff taken off and repainted: 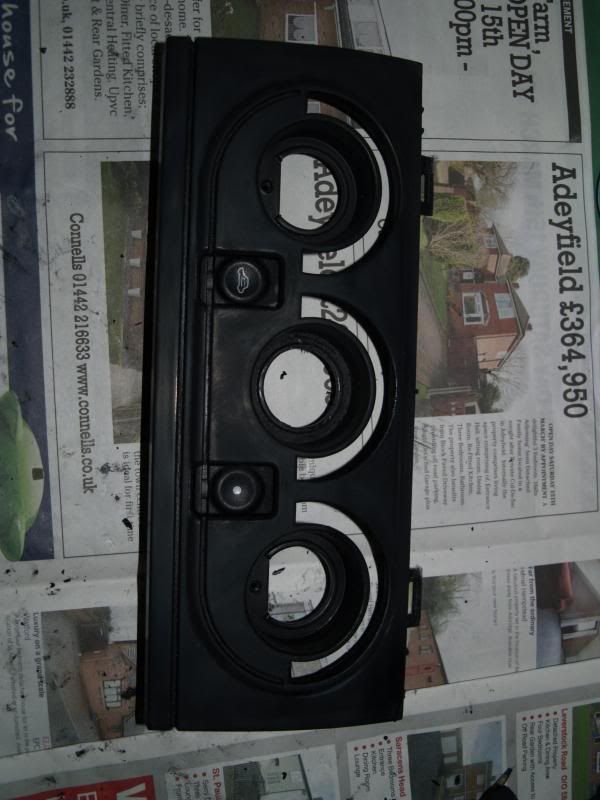 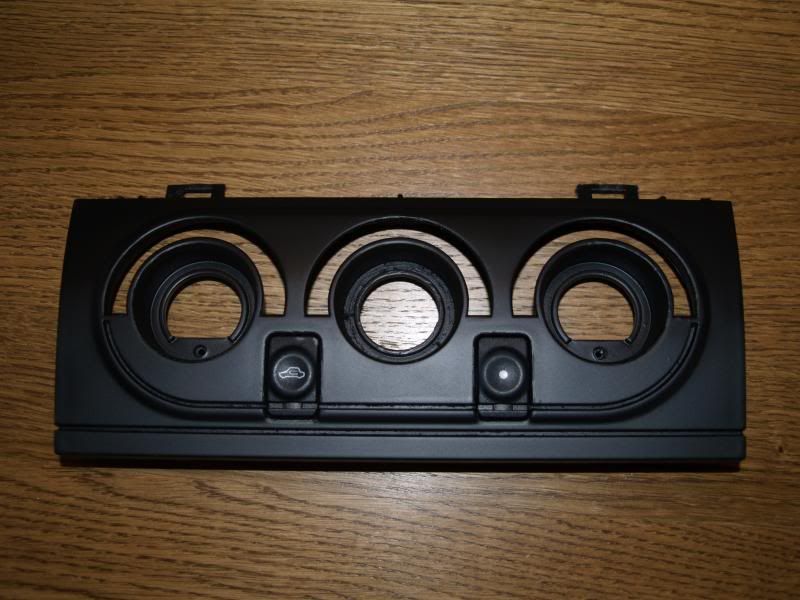 Back in situ and it really shows up the remainder of the console... unfortunately, not easy to remove, and something of a pain to sort out that area of sticky. I'll try and see if I can use the methylated spirit to clean up the existing surface, or if it will leave it sticky. 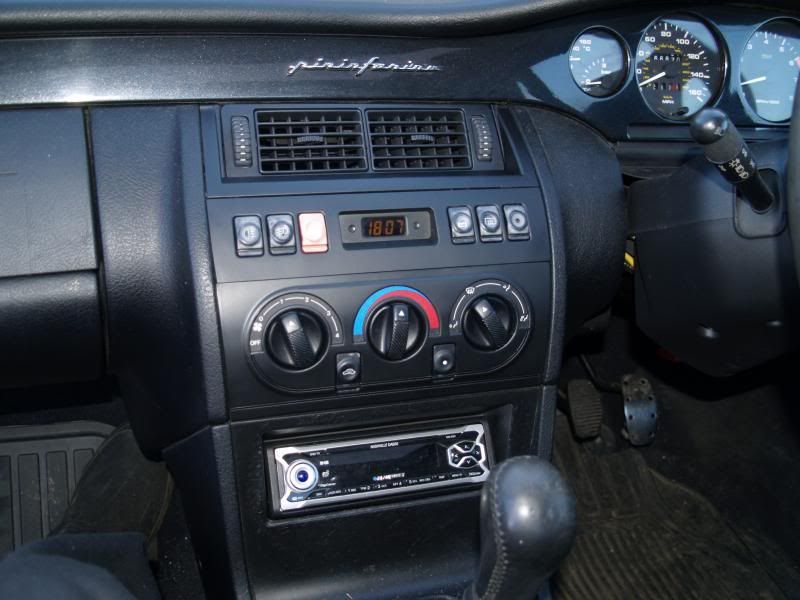 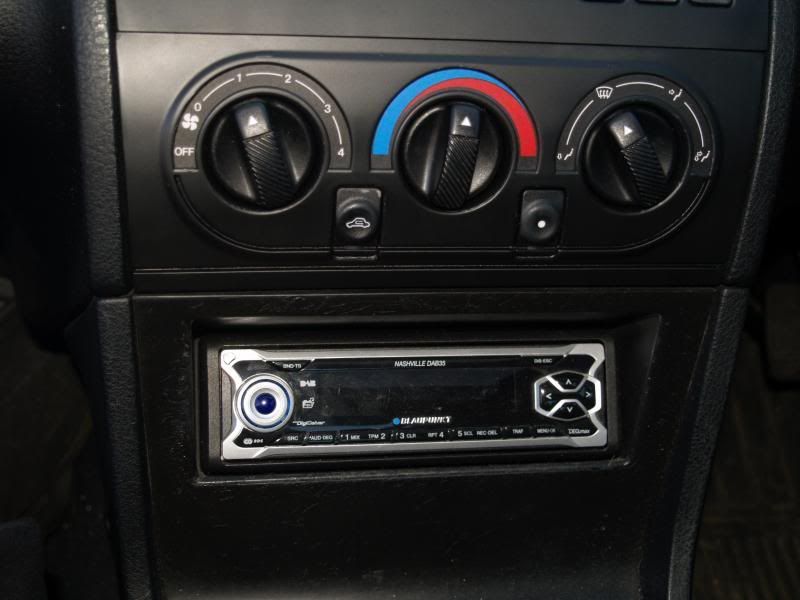 More important: next two jobs are passenger window, which has given up (and down), and driver's door lock which is stiff and sticking on occasion.
Last edited by barnacle; 16/03/2014 11:08.
|
|
|
Re: Barnacle's Olde Original 16v Fettle
[Re: barnacle]
#1480351
23/03/2014 19:33
23/03/2014 19:33
|
Joined: Dec 2005
Posts: 33,628
Berlin
barnacle
OP
Club Member 18 - ex-Minister without Portfolio
|
OP
Club Member 18 - ex-Minister without Portfolio
Forum Demigod
Joined: Dec 2005
Posts: 33,628
Berlin
|
Another day, another door... and a bit of a detective story. This is to make the passenger window go up and down. Start by removing the door card; first remove the five cross-head screws below the bottom edge, and pop the four covers (three shown) and remove the hex bolts beneath. Only three shown because, mystery one, there are only three bolts on mine. 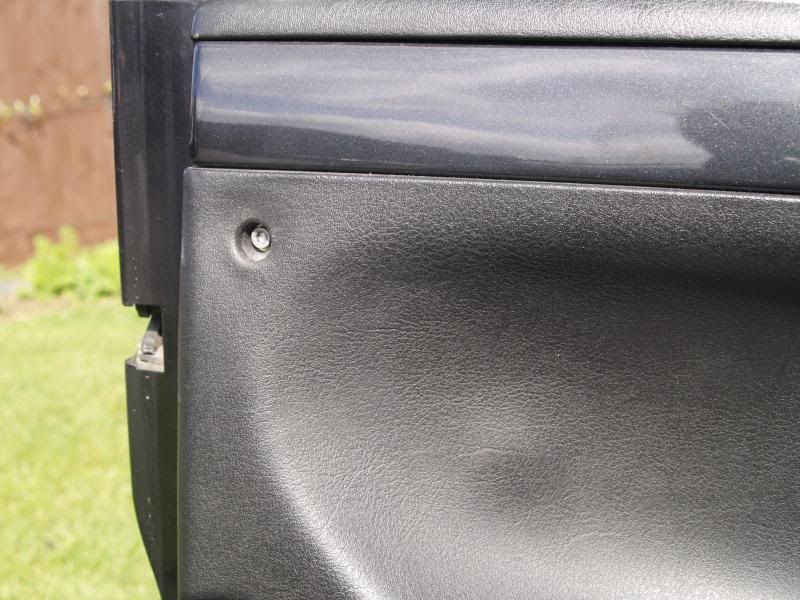 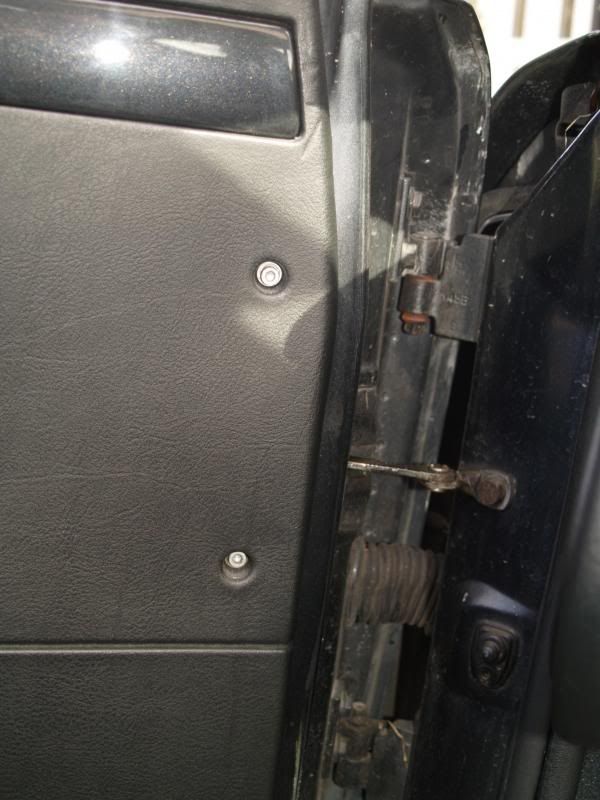 Remove the cover below the handle (it's a different shape) and remove that bolt, and the bolt which goes up from behind the handle, then remove the handle. 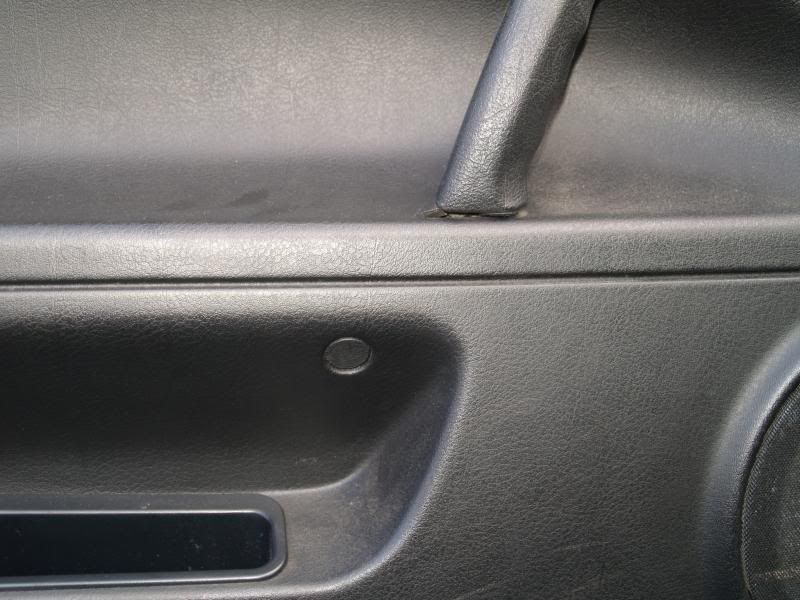 While you're at it, remove the screw that holds the handle trim. The door card then lifts up from the bottom and lift the card off the inner edge of the window space, working from the back. Note the tasteful (mystery two) packaging tape holding the somewhat torn and tattered rain trim on... 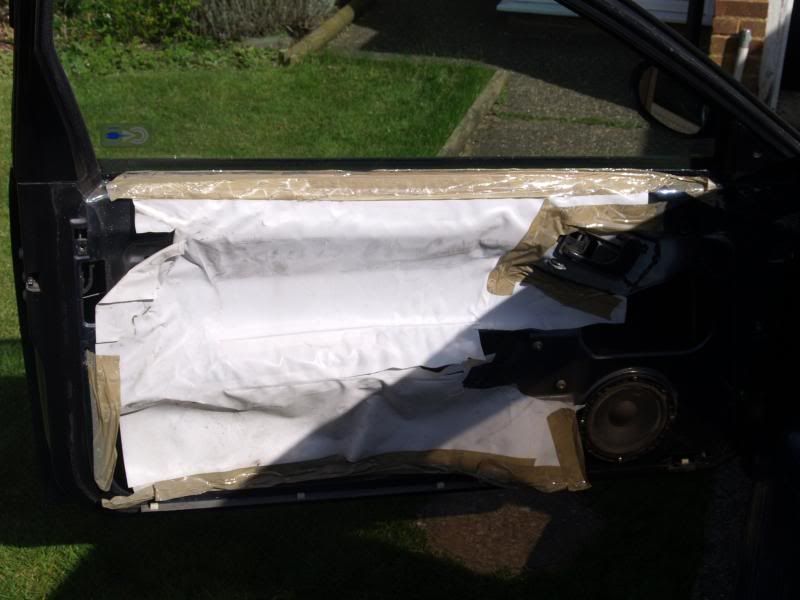 To get to the winder motor is tricky. Since there are volts present at the connector, but the motor doesn't even twitch, it looks like the motor is jammed. Three nuts hold the motor to the frame (mystery three - one was almost off the stud) and removing them allows the motor to be moved around in the door space. It won't let you get it out though: it's also attached to two guide posts which are held with two bolts each. I discovered too late there's no need to remove these... 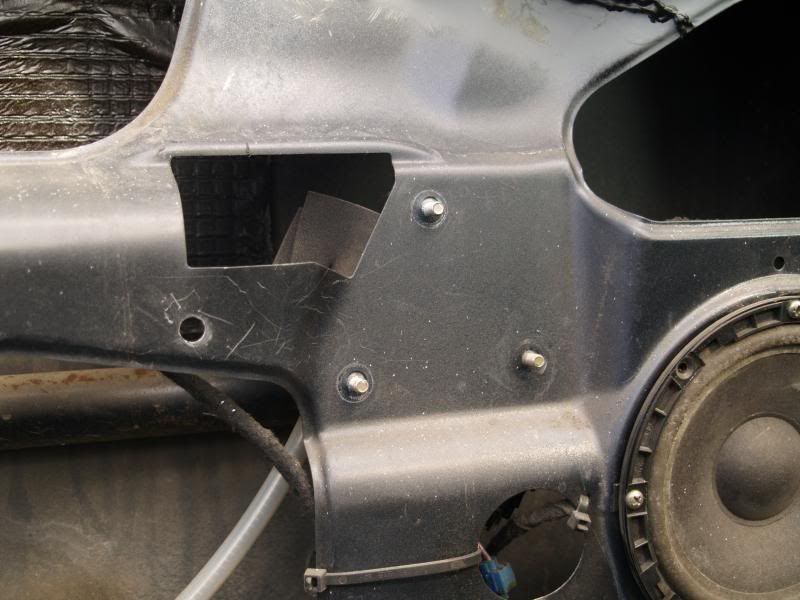 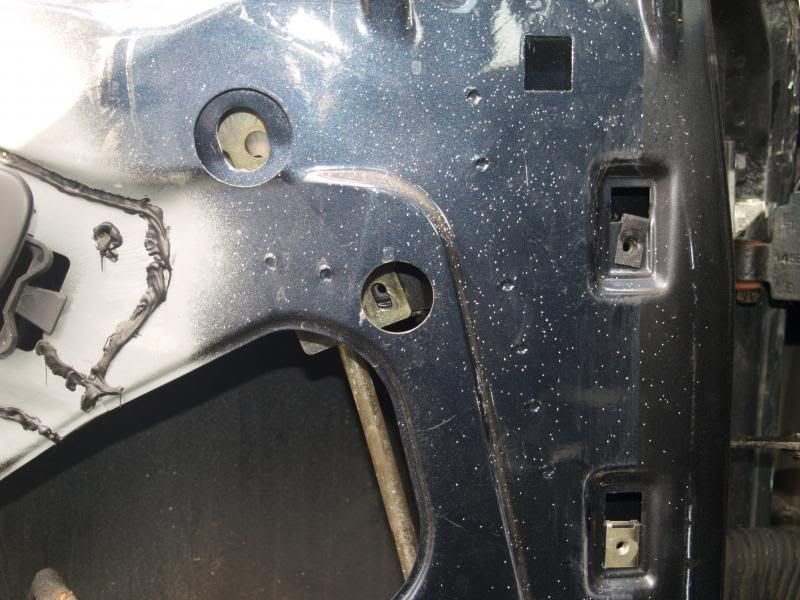 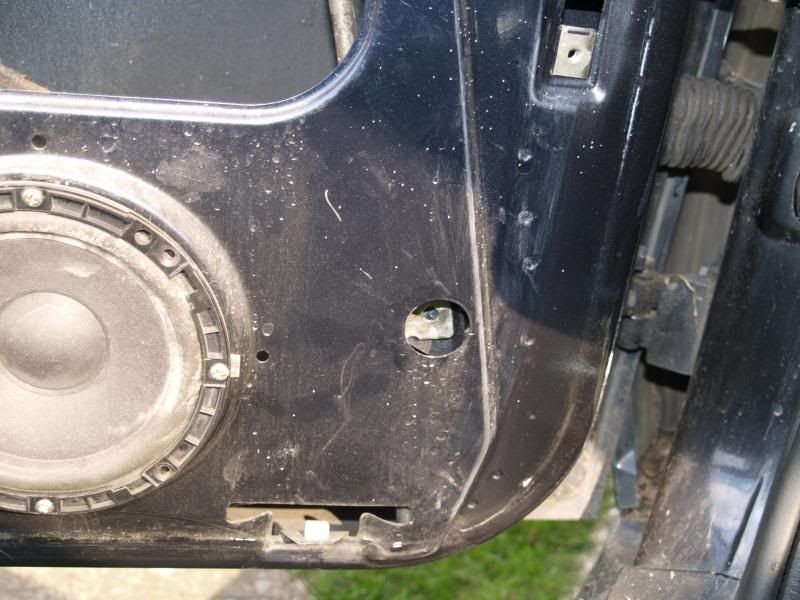 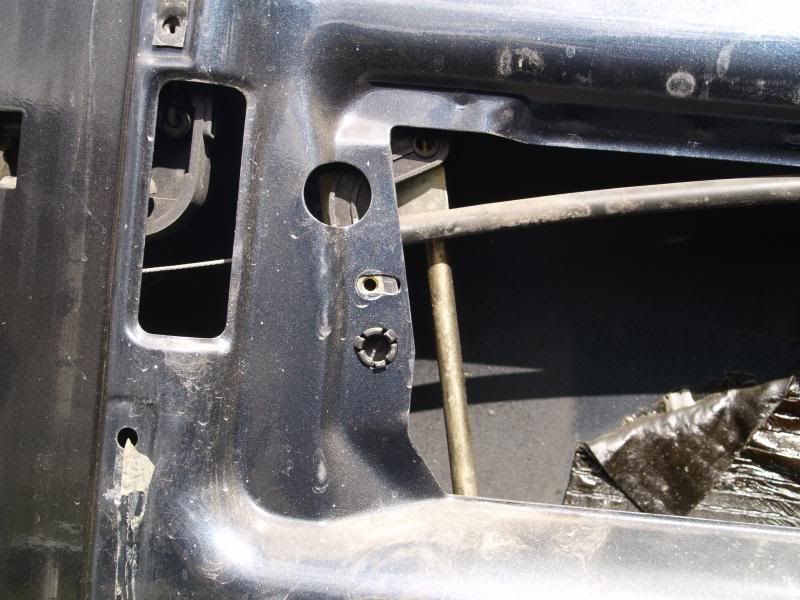 revealing mystery four: why is there a feed for the puddle lamp? The 16NA has no puddle lamp... 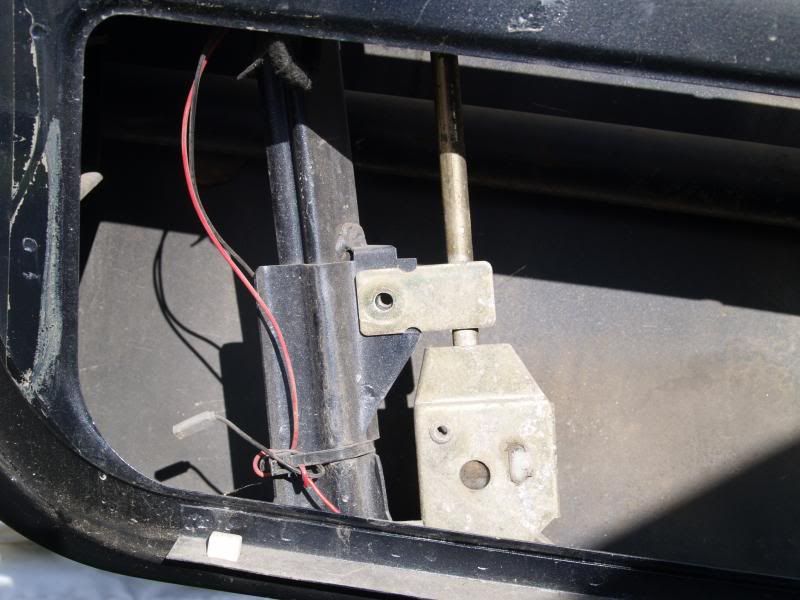 The motor can be removed from the traveller system by unscrewing it from behind, blind, once it's removed from the door; there are four crosshead screws which once removed allow the motor to be pulled away. 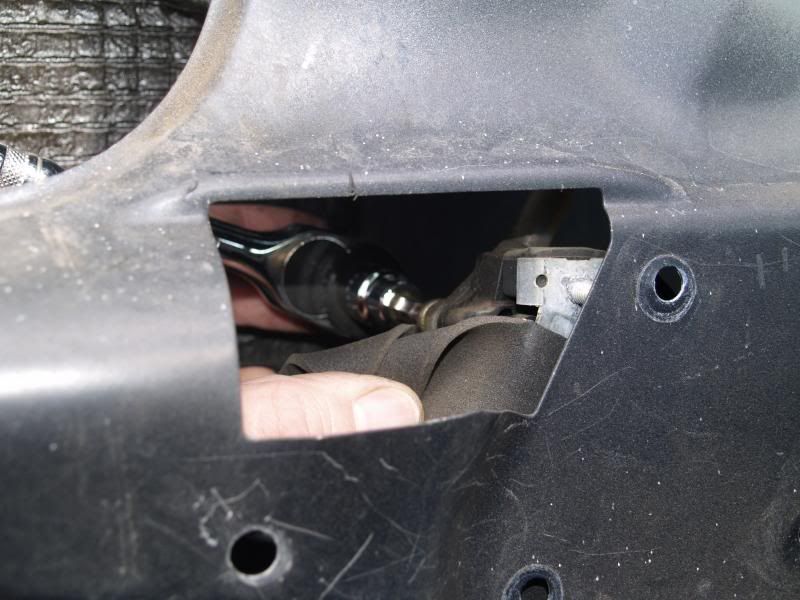 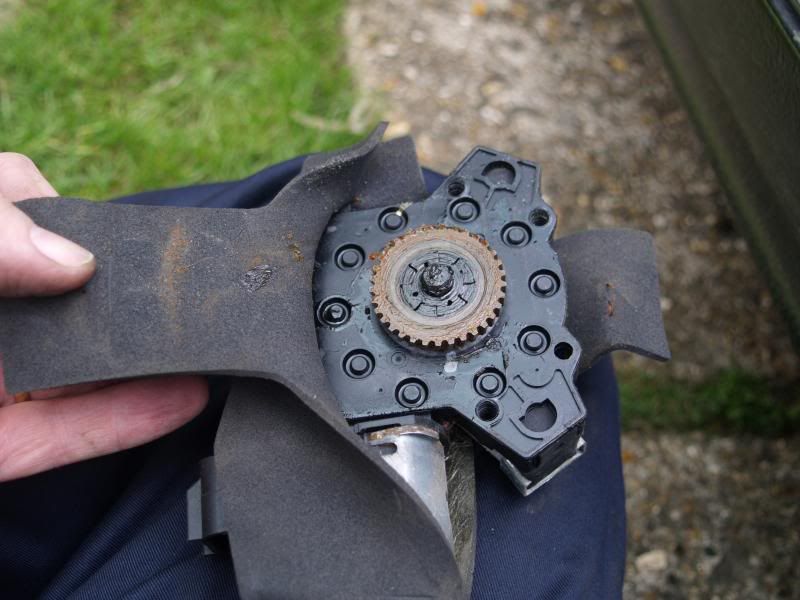 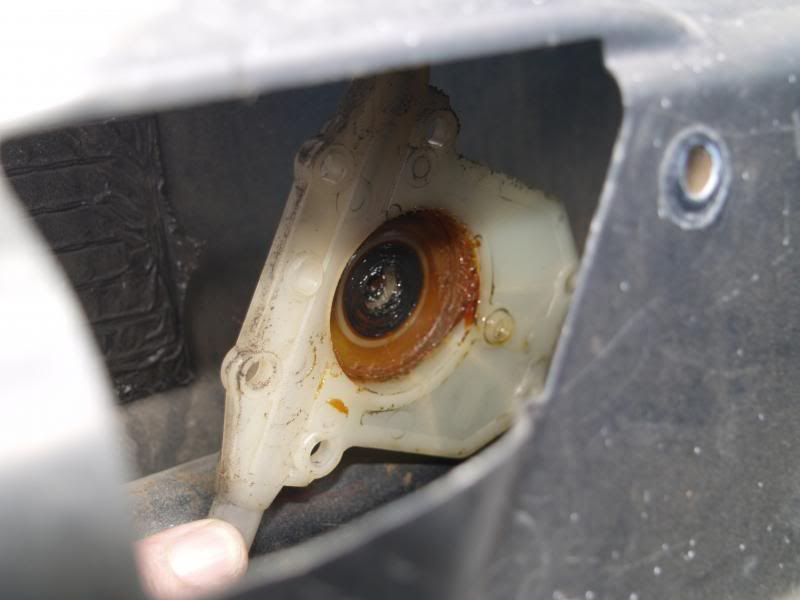 There seems to be no way of dismantling the lifter motor so if it doesn't go it's going to need replacing. Fortunately, once removed, the motor decided to spin in the appropriate manner, so it was either a jam, or (mystery five) the unexpected scotchlok connectors were playing up. Mystery six is the presence of a couple of chunks of toughened glass in the bottom of the door. Either way, all back together and working, with some rather fine red gaffer tape to hold the waterproofing up... 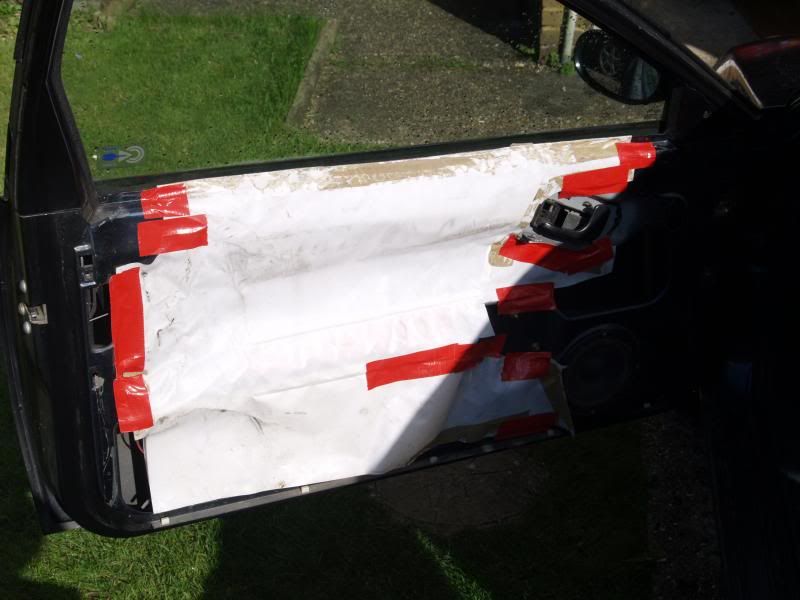 Now the mystery: I've never had the door panel off. However, eighteen years ago, there was an incident involving an unlit skip, a scaffolding pole, and Mrs Barnacle. That led to a three inch gouge in the passenger door and rear quarter which was repaired under insurance. One might have expected that an insurance approved repair centre would have used, on a less-than-two-year-old car, new parts. What I conclude, though, is that they have sourced a second hand door from a crashed 16vt - hence the glass, extra wires, missing screws, and probably all the squeaks and rattles.
|
|
|
Re: Barnacle's Olde Original 16v Fettle
[Re: barnacle]
#1481301
29/03/2014 20:37
29/03/2014 20:37
|
Joined: Dec 2005
Posts: 33,628
Berlin
barnacle
OP
Club Member 18 - ex-Minister without Portfolio
|
OP
Club Member 18 - ex-Minister without Portfolio
Forum Demigod
Joined: Dec 2005
Posts: 33,628
Berlin
|
Curiouser and more curious... the driver's door *does* have a puddle lamp. It's not working at present, along with the interior lights and the clock, for reasons I have not yet investigated - they worked a couple of days ago. Perhaps a fuse. Hmph. Anyway... this is how the door screen *should* fit. The passenger door has been replaced inside out... 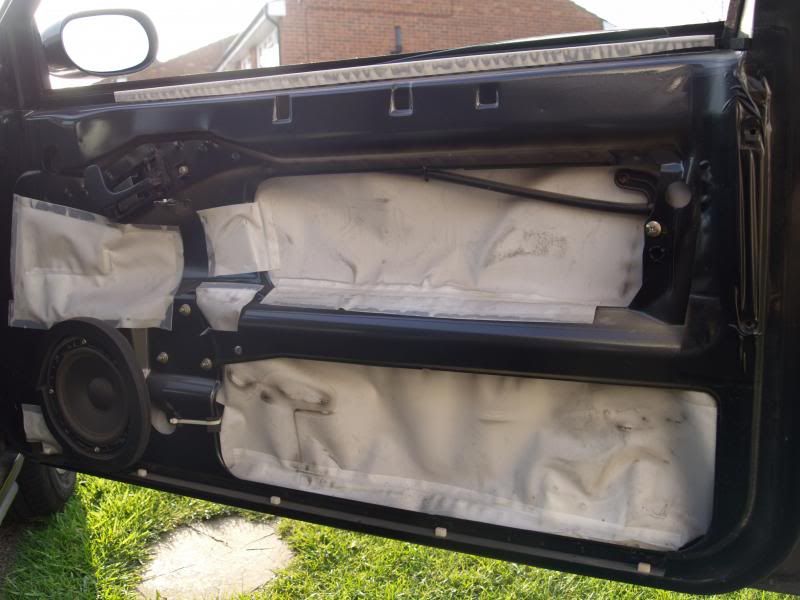 Investigated the driver's door lock, which has been a bit sticky: three plastic rivets hold the window seal in place, then the guide rubber is removed to reveal the two screws and a further screw on the outside. 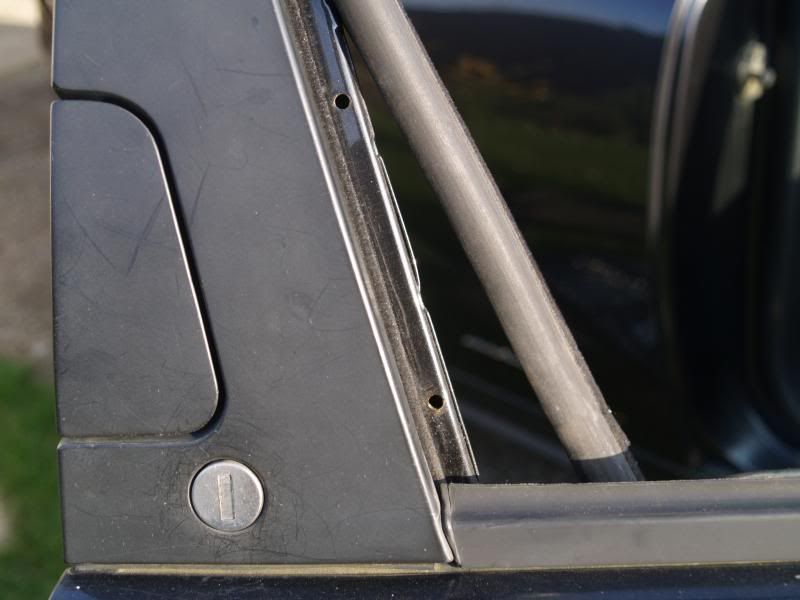 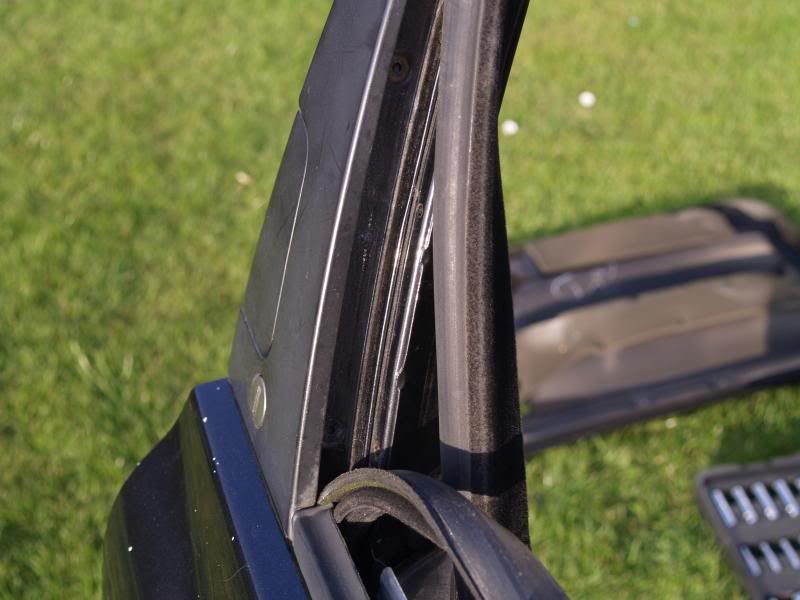 Unfortunately one of the screws goes round and round but remains firmly attached to something inside which prevents the removal of the handle, so I settled for greasing what I could reach. Instead I settled for a little more work removing sticky from the centre console. Turns out that plastic pan scrubby things are excellent at removing it... not perfect yet but a damn site better than when I started. 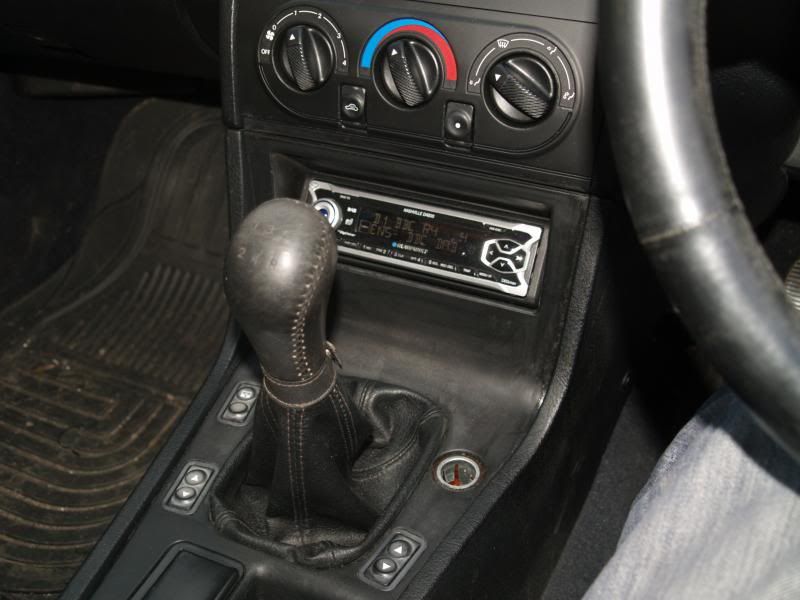 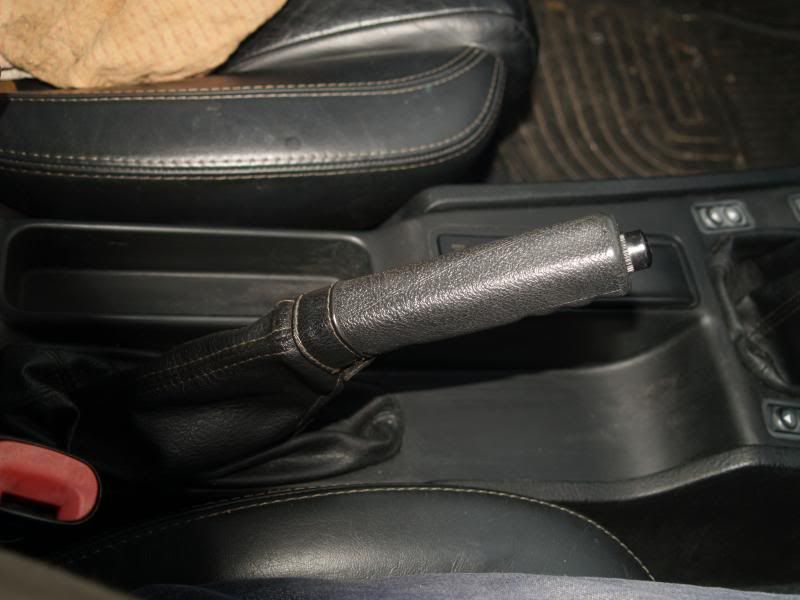
|
|
|
Re: Barnacle's Olde Original 16v Fettle
[Re: barnacle]
#1483396
13/04/2014 09:08
13/04/2014 09:08
|
Joined: Dec 2005
Posts: 33,628
Berlin
barnacle
OP
Club Member 18 - ex-Minister without Portfolio
|
OP
Club Member 18 - ex-Minister without Portfolio
Forum Demigod
Joined: Dec 2005
Posts: 33,628
Berlin
|
The car is now at Joe's, stripped out and ready to paint. The mystery of the passenger door is resolved: it's a 20v door that's been modified to take the 16v door card - I have no idea why the bodyshop felt the need on a car only a year or so out of production at the time, but there you go... clock and interior lights work again after replacing the fuse (they're supposed to be different fuses, but there you go!).
Big pile of bits for me to tart up and mostly spray black this week - B-panel trims and lock panels (just ordered a couple of new 16V badges from the bay), the windscreen wiper arms front and rear, wing mirrors, wiper cover panel, grille, fuel filler cap and no doubt other bits I will remember as soon as I open the big box of bits I brought back.
There's nothing in the car aft of the front seats; the interior trim and seats are out to get at the trim fixings and to clear access for some welding to be done under the Pininfarina badge, driver's side (the passenger side is for some reason still in reasonable condition).
Pictures later, hopefully.
|
|
|
Re: Barnacle's Olde Original 16v Fettle
[Re: barnacle]
#1483489
13/04/2014 22:30
13/04/2014 22:30
|
Joined: Dec 2005
Posts: 33,628
Berlin
barnacle
OP
Club Member 18 - ex-Minister without Portfolio
|
OP
Club Member 18 - ex-Minister without Portfolio
Forum Demigod
Joined: Dec 2005
Posts: 33,628
Berlin
|
|
|
|
Re: Barnacle's Olde Original 16v Fettle
[Re: barnacle]
#1486480
03/05/2014 18:29
03/05/2014 18:29
|
Joined: Dec 2005
Posts: 33,628
Berlin
barnacle
OP
Club Member 18 - ex-Minister without Portfolio
|
OP
Club Member 18 - ex-Minister without Portfolio
Forum Demigod
Joined: Dec 2005
Posts: 33,628
Berlin
|
|
|
|
Re: Barnacle's Olde Original 16v Fettle
[Re: barnacle]
#1488747
18/05/2014 13:26
18/05/2014 13:26
|
Joined: Dec 2005
Posts: 33,628
Berlin
barnacle
OP
Club Member 18 - ex-Minister without Portfolio
|
OP
Club Member 18 - ex-Minister without Portfolio
Forum Demigod
Joined: Dec 2005
Posts: 33,628
Berlin
|
It's back... All the bits back together, new original mats, new exhaust, flex, and cat, newly painted wheels, shiny shiny shiny. Still needs before the weekend: wheels replacing, oil change, new filter, replacement oil pressure sensor, and a fan remote switch - the switch in the radiator is new, but operates five degrees hotter than I would like, so I want a temporary override in the cabin. Granddaughter helped polish... 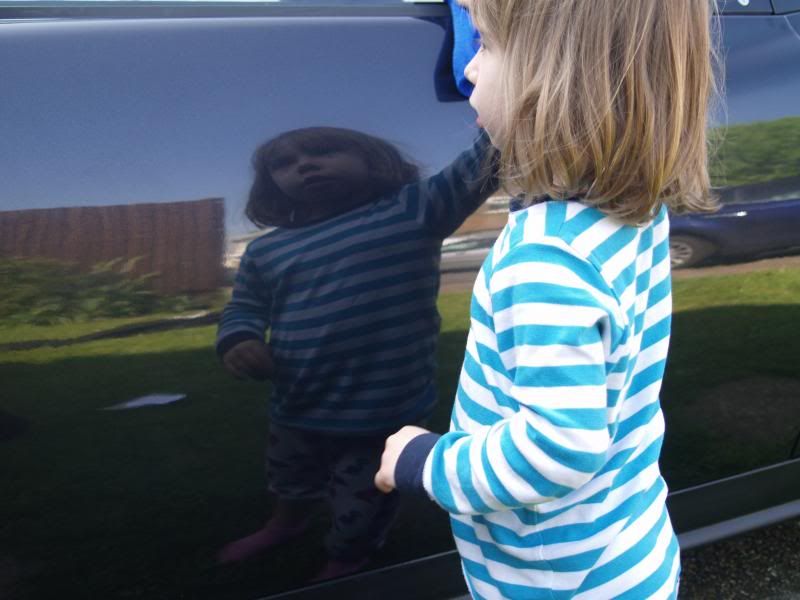 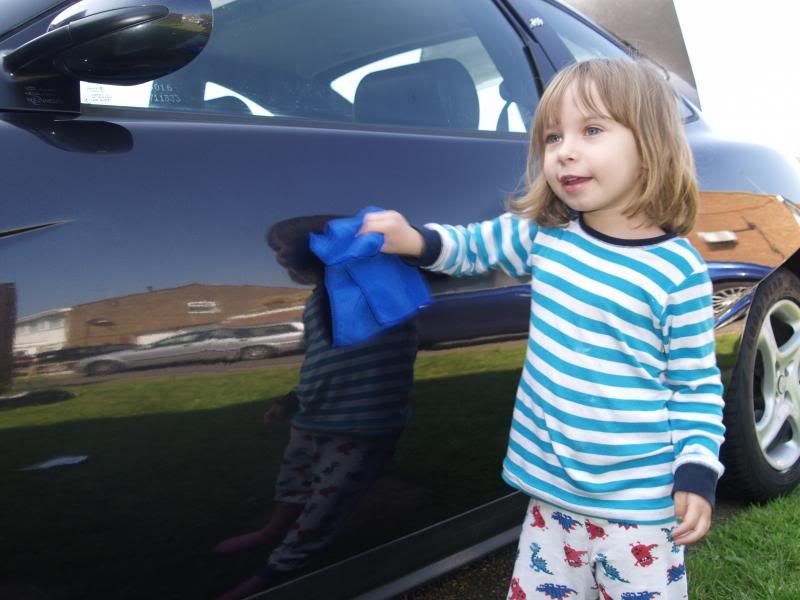  Shots for the insurance valuation - still on winter wheels: 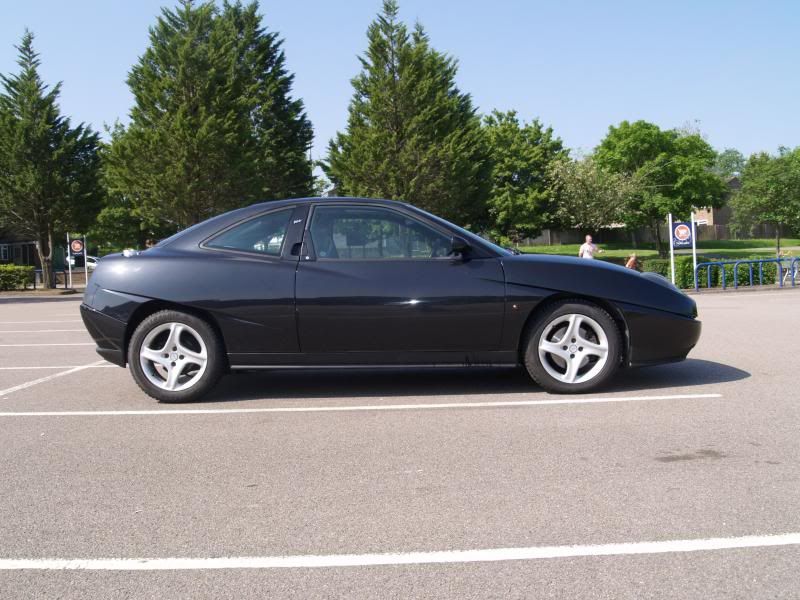 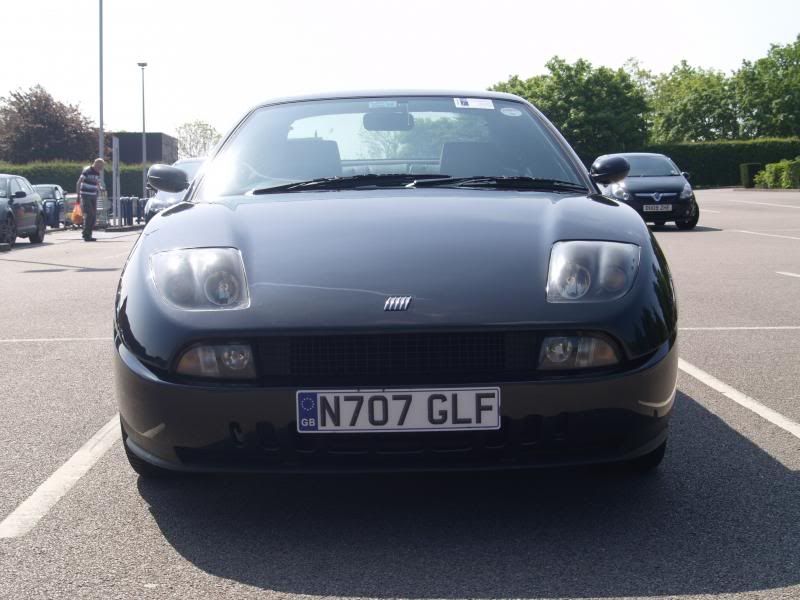 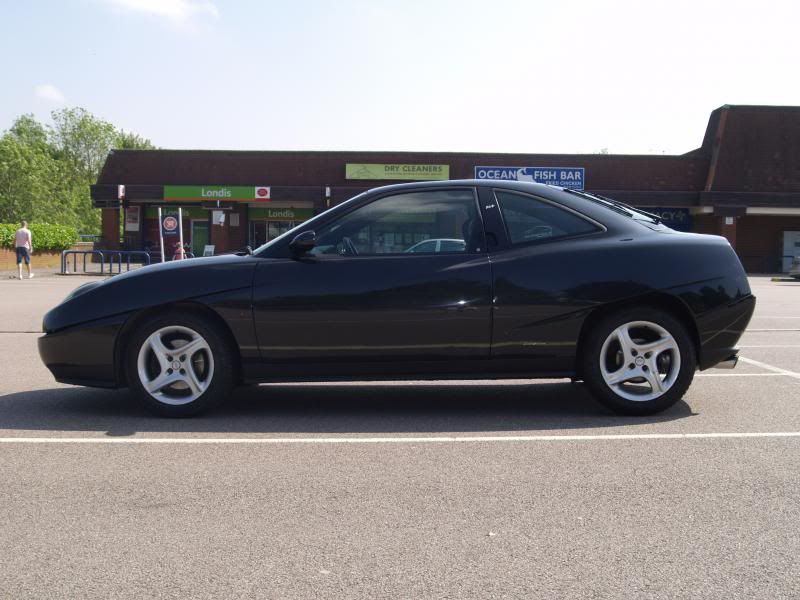 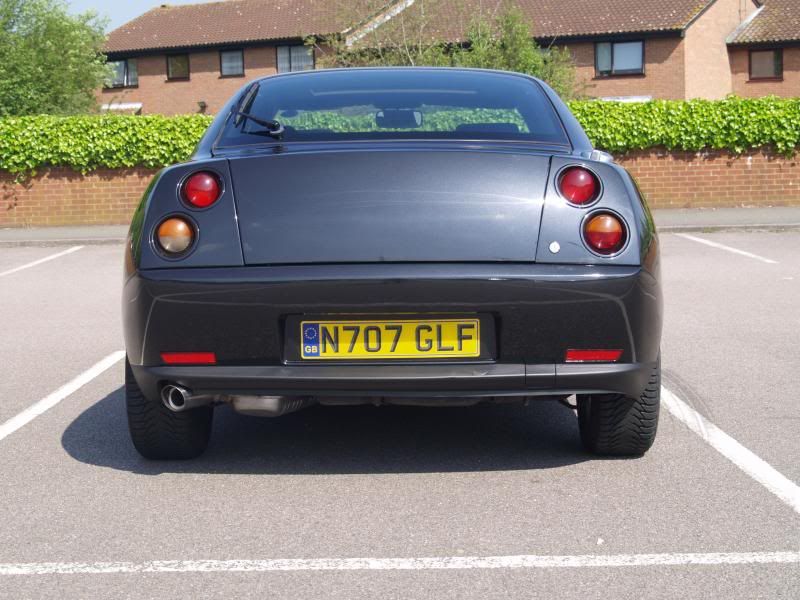 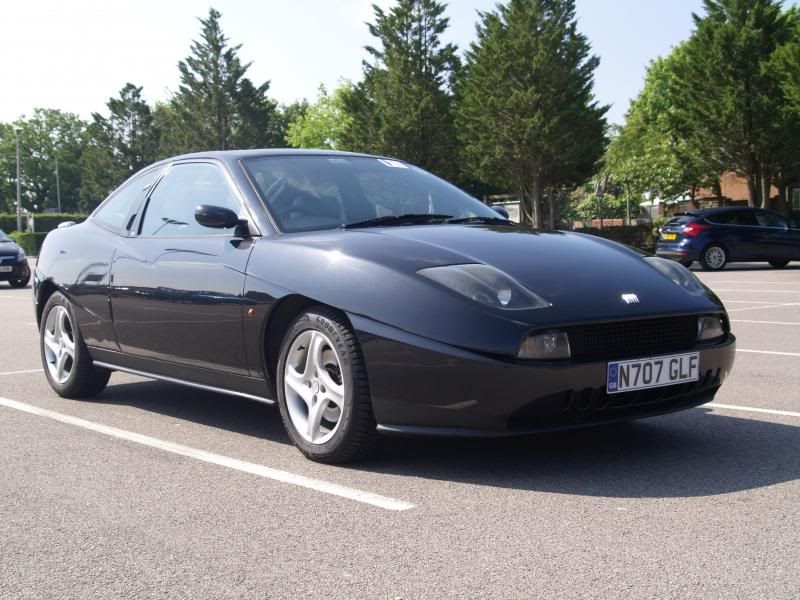 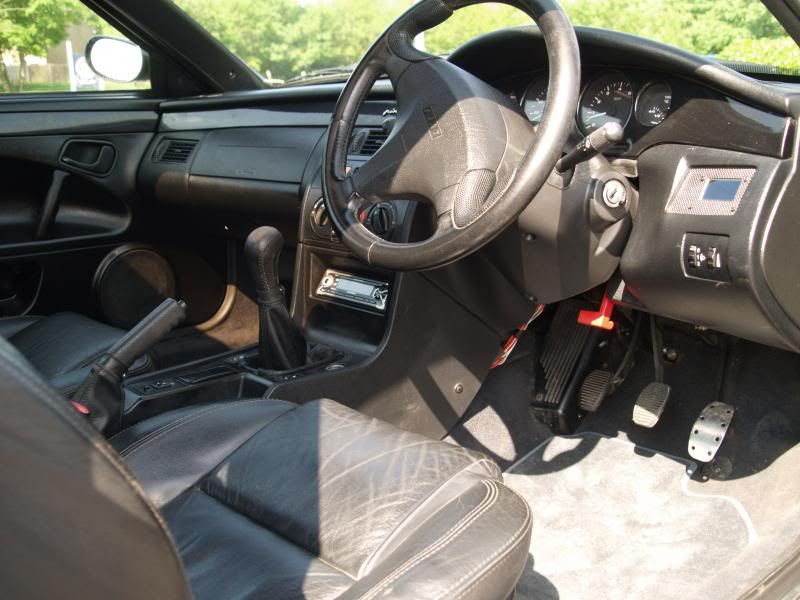 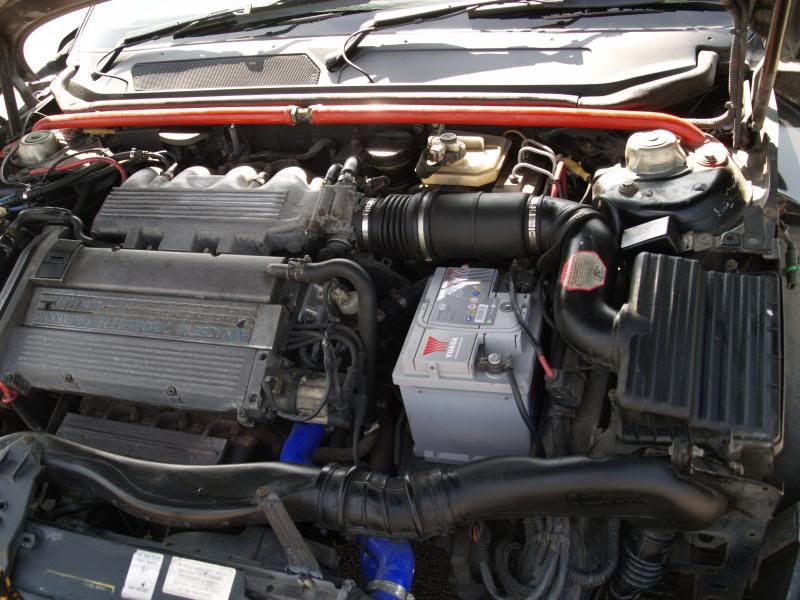 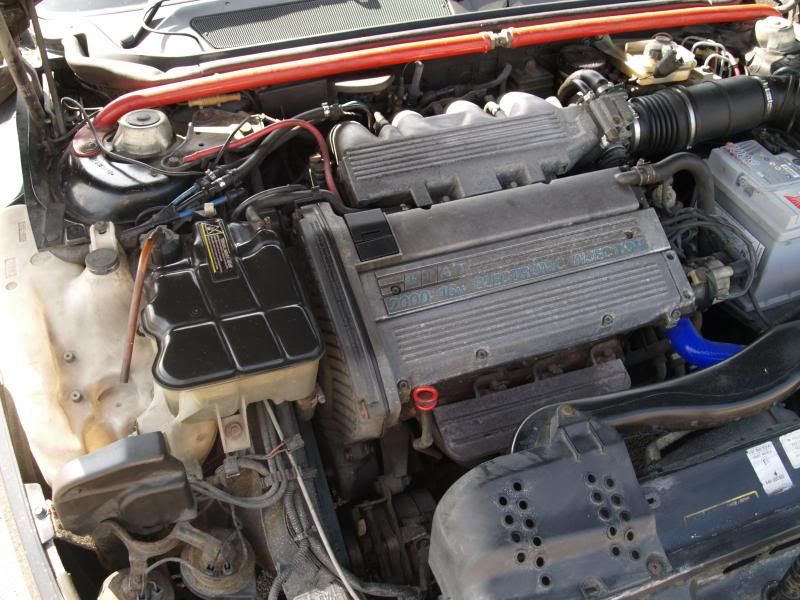 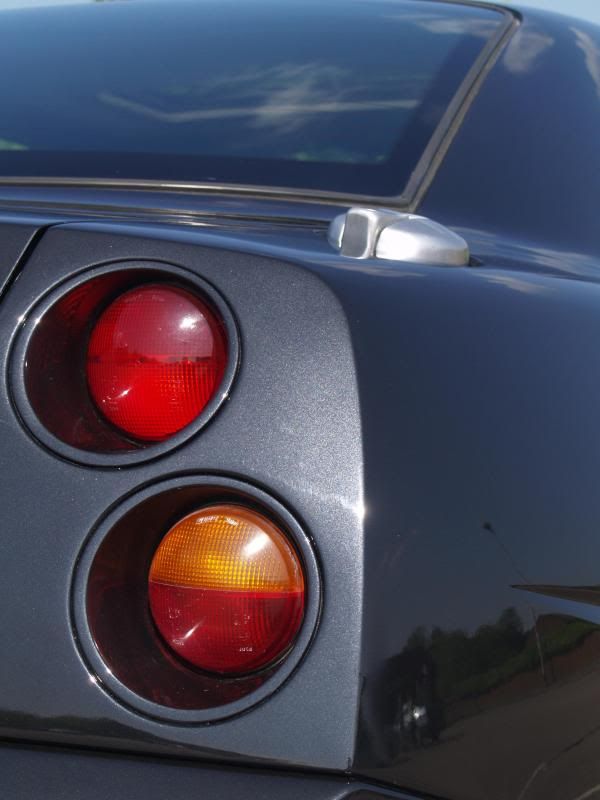
|
|
|
Re: Barnacle's Olde Original 16v Fettle
[Re: barnacle]
#1515558
15/11/2014 23:12
15/11/2014 23:12
|
Joined: Dec 2005
Posts: 33,628
Berlin
barnacle
OP
Club Member 18 - ex-Minister without Portfolio
|
OP
Club Member 18 - ex-Minister without Portfolio
Forum Demigod
Joined: Dec 2005
Posts: 33,628
Berlin
|
Today Joe and I dropped the engine from the coupe, which is in winter hibernation and continuing the on-going fettle. En passant, we noticed the following couple of things that will require fixing or replacing before things go back: - Drive shaft gaiters (one almost split)
- Steering rack gaiters
- Differential final drive seals
- Inlet doughnuts
- Drop links
- Track rod ends (found a couple at the back of my garage!)
- Shock absorbers (one is gently leaking at the front)
- Cam belt kit and associated parts
- Water pump
- Engine mounts
- Front bumper legs
- Welding around subframe mounts
- Clutch flexible pipe
- Brake flexible pipes
- (Possibly) brake solid pipes
And then on the engine, we also expect to need - Exhaust cam shaft
- cam shaft seals
- big end, mains, and thrust bearings
- core plugs
- head gasket set
- sump gasket
- differential
- various gearbox seals
- clutch
I hate to think what this little lot is going to cost.
|
|
|
Re: Barnacle's Olde Original 16v Fettle
[Re: barnacle]
#1515680
16/11/2014 21:46
16/11/2014 21:46
|
Joined: Dec 2005
Posts: 33,628
Berlin
barnacle
OP
Club Member 18 - ex-Minister without Portfolio
|
OP
Club Member 18 - ex-Minister without Portfolio
Forum Demigod
Joined: Dec 2005
Posts: 33,628
Berlin
|
Some photos of the yuck, crap due to phone's inability to be both a phone *and* a camera. Rust at the bottom of the passenger suspension tower: 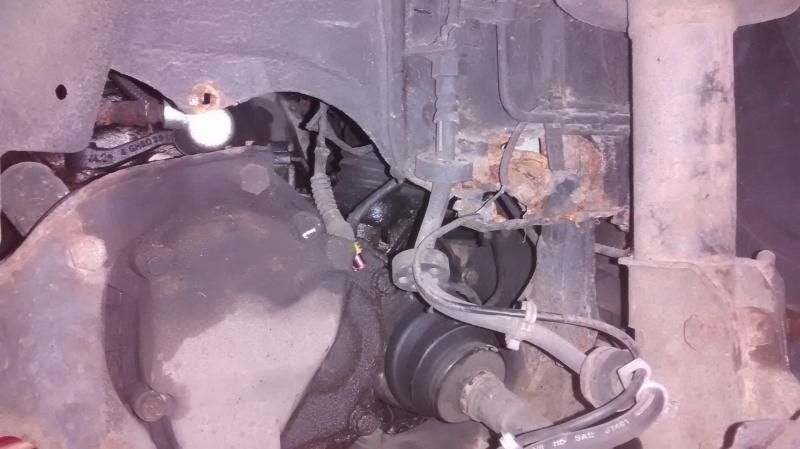 Oily gearbox and sump, slightly bent: 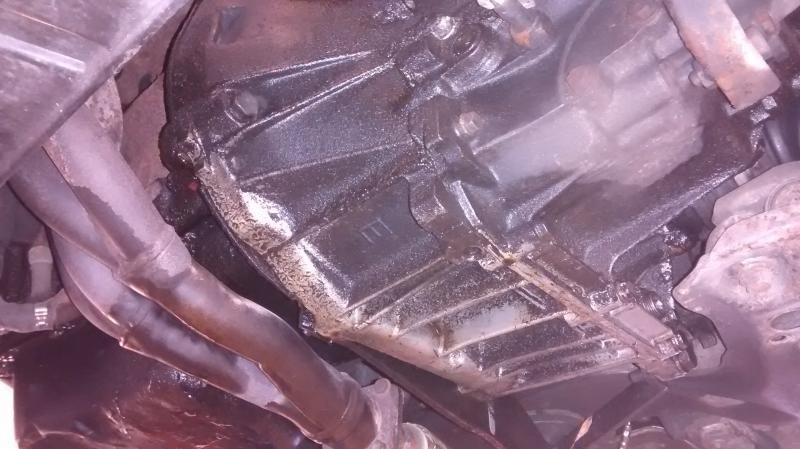 Bumper tower; driver's side is as bad: 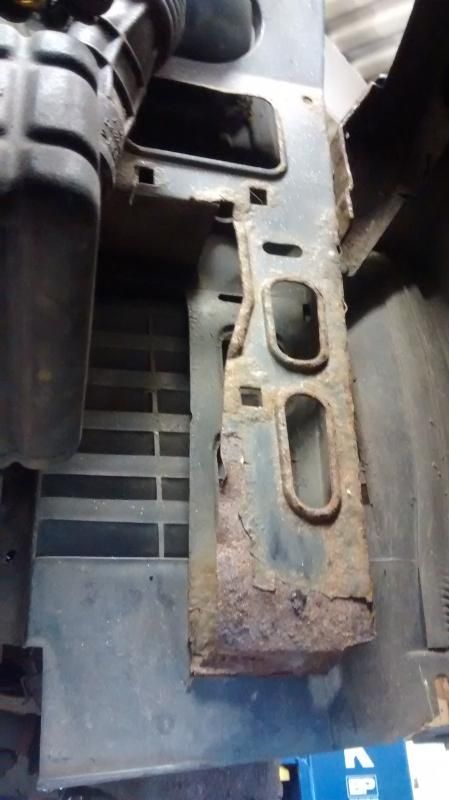 Amazingly, the engine is still attached: 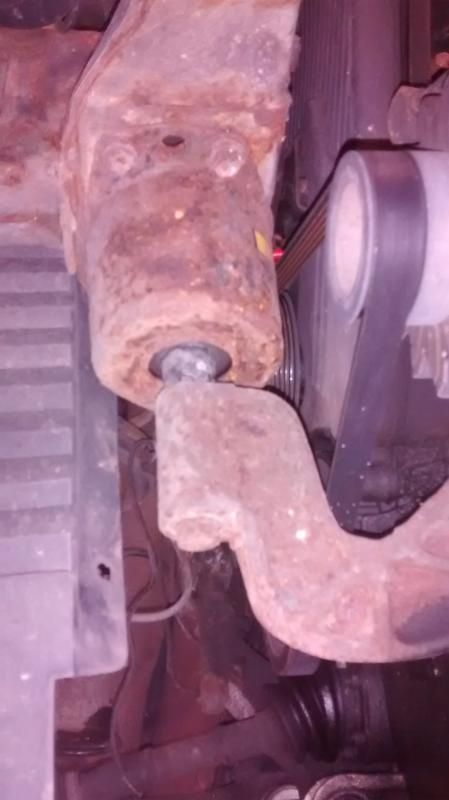 Clutch operates perfectly! 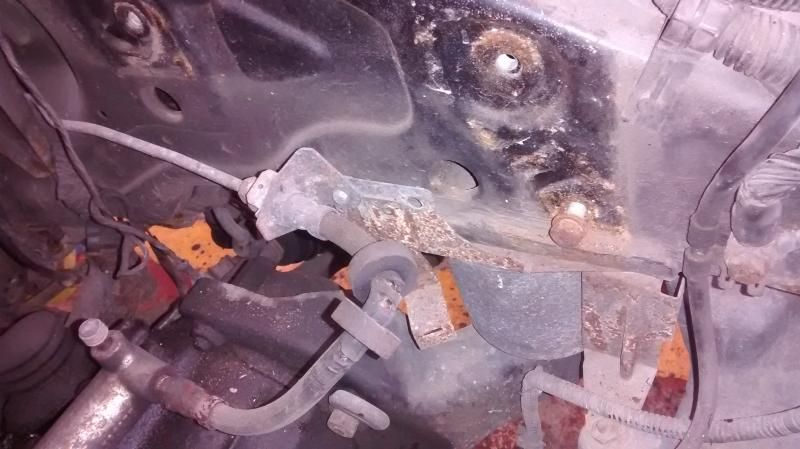 Brake pipe protective layers worn away by inlet piping: 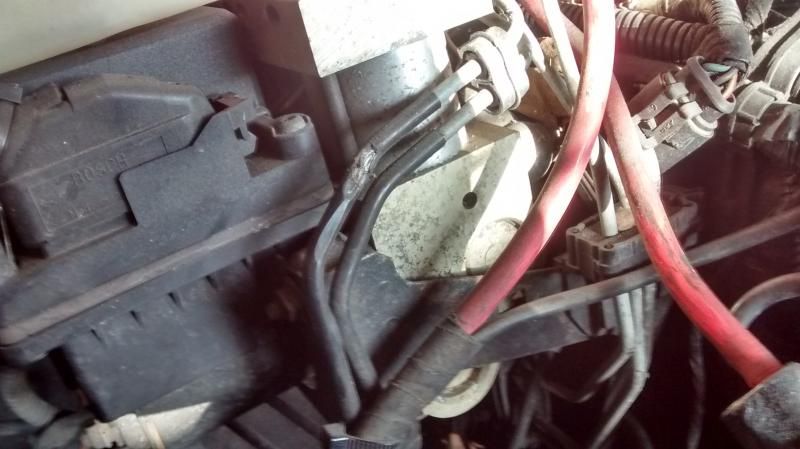 The fuel pipes go this way around! 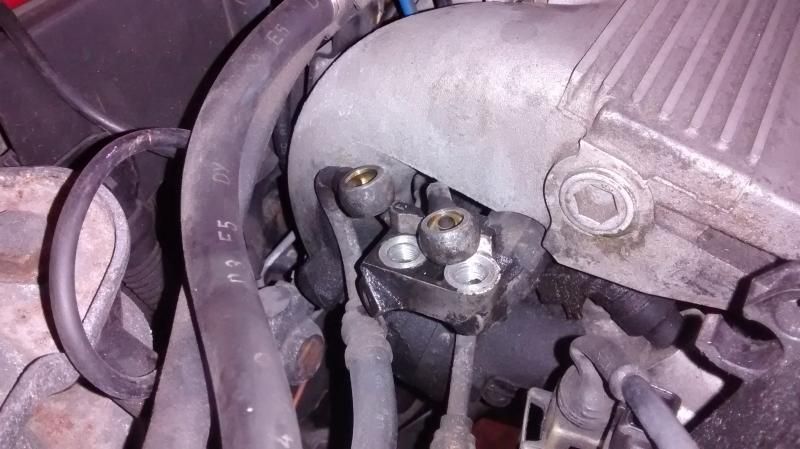 Outer CV gaiter still *just* intact: 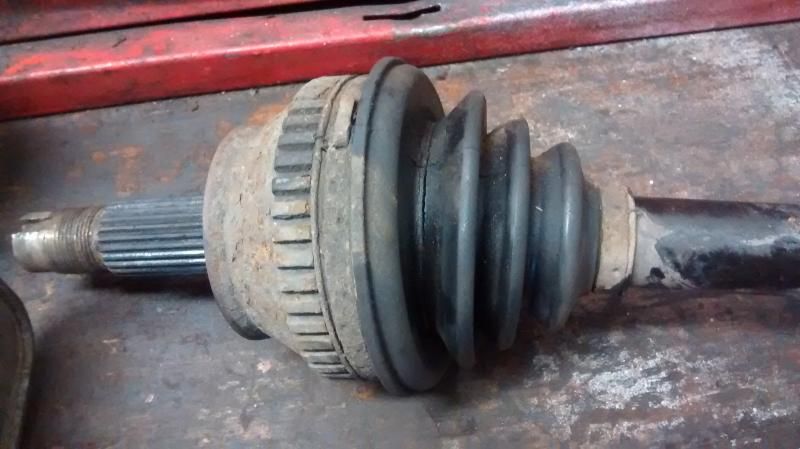 This is supposed to be clean and dry, not wet and oily: 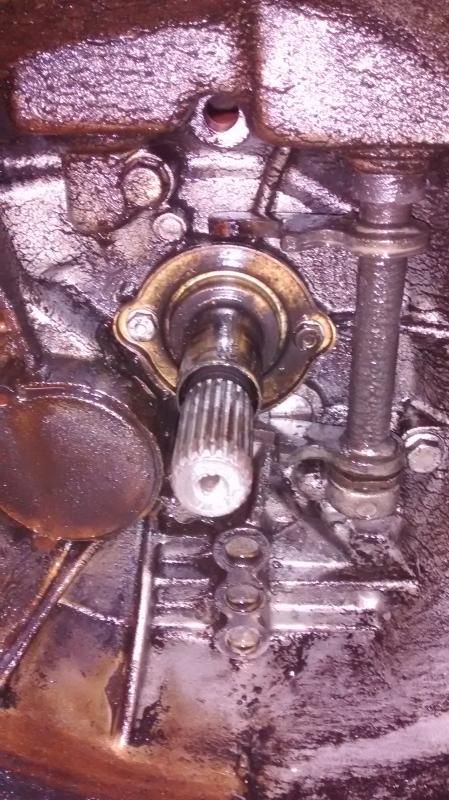 Awaiting my tender mercies next week: 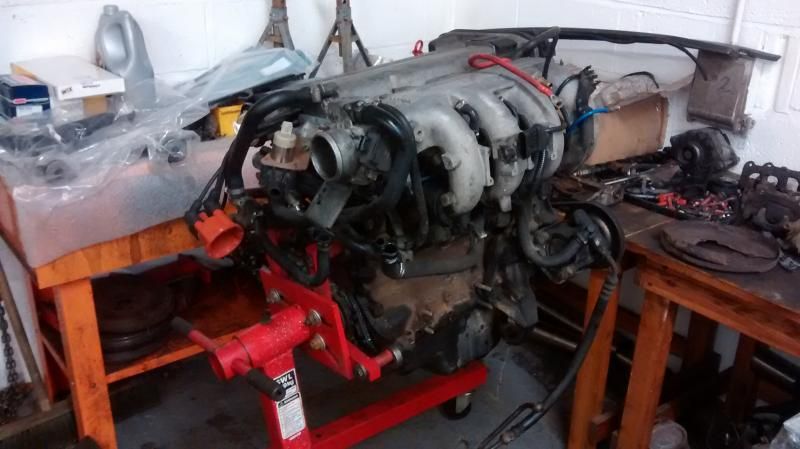 Hmmm. 16 inlet doughnuts don't seem to exist...
|
|
|
Re: Barnacle's Olde Original 16v Fettle
[Re: barnacle]
#1516321
23/11/2014 11:28
23/11/2014 11:28
|
Joined: Dec 2005
Posts: 33,628
Berlin
barnacle
OP
Club Member 18 - ex-Minister without Portfolio
|
OP
Club Member 18 - ex-Minister without Portfolio
Forum Demigod
Joined: Dec 2005
Posts: 33,628
Berlin
|
When looking at this restoration, you have to remember that this is a car which has driven seven times around the world, and is well on its way to an eighth. It's never had an easy life; commuting into London, cheerfully driving to Berlin or the north of Scotland without a thought. I recall one weekend when we thought "let's drive to Strasbourg for a couple of days" and did... It's on its second engine and gearbox - the original engine threw a belt at 45k (a fortnight before it was booked in to change it!) and it was never the same after; eventually it killed a big end and bent the conrod halfway up Glencoe on Christmas Eve... one of the very few occasions when it has 'failed to proceed'. The replacement was sourced from a crashed coupe of similar mileage in the days when you scoured the small ads rather than via the internet. So you'd expect a certain amount of wear and tear... We started with the gearbox. Before the 20th anniversary trip to Turin, a faint click had become obvious from underneath the car, once per rev of the right hand front wheel - obviously something with the differential. 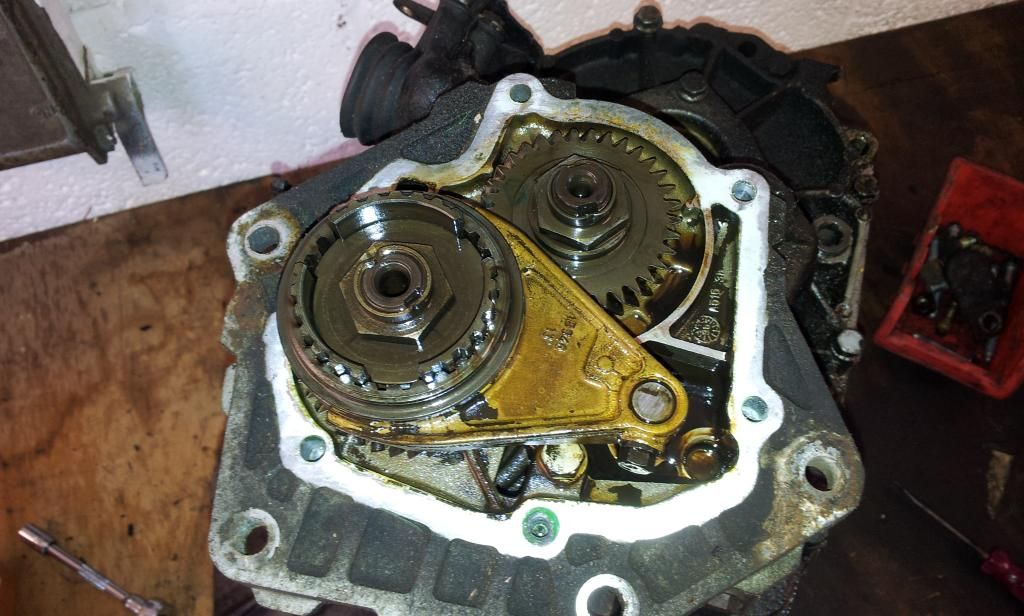 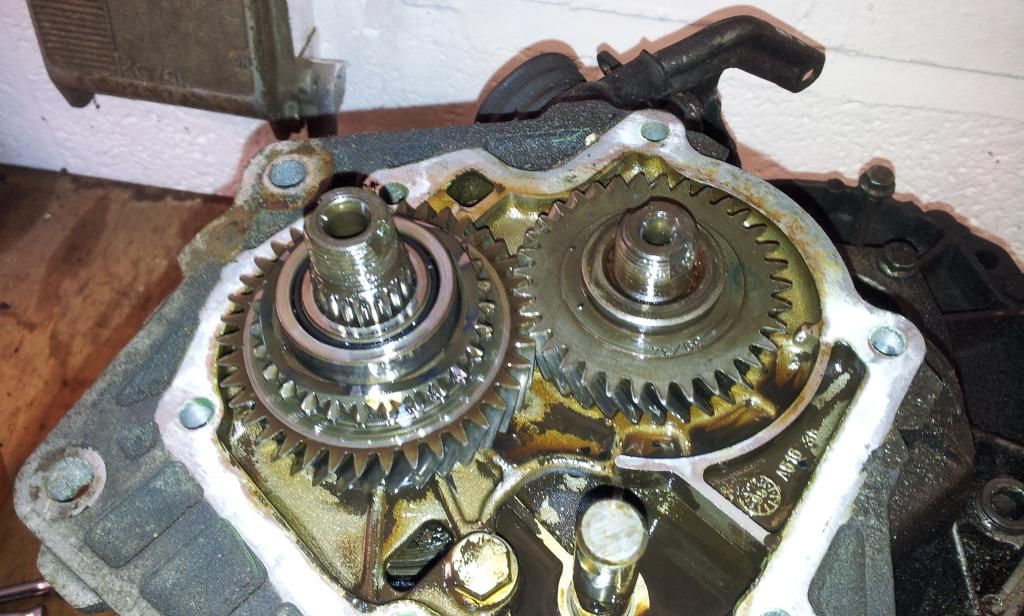 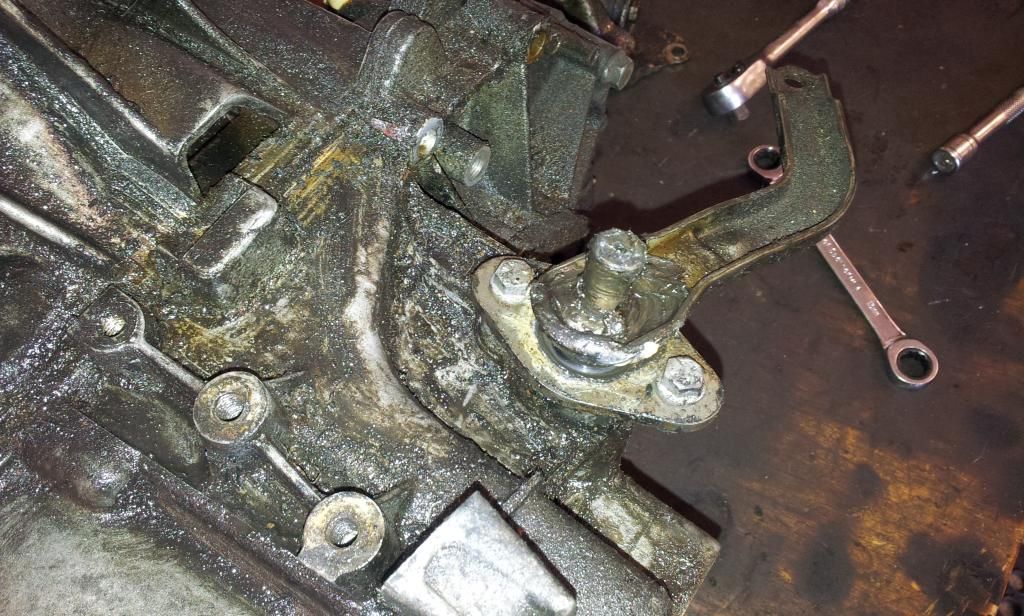 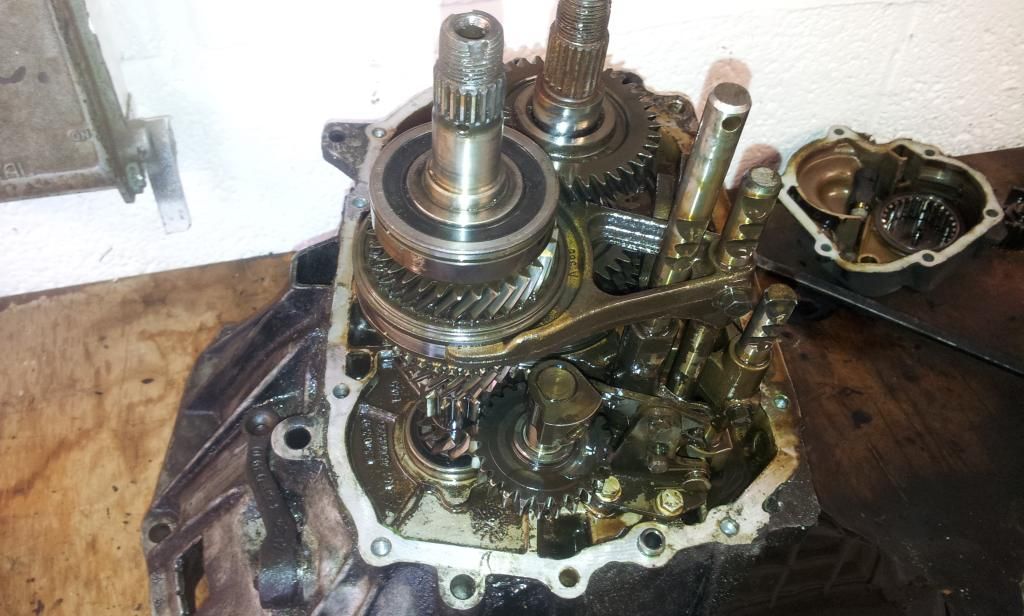 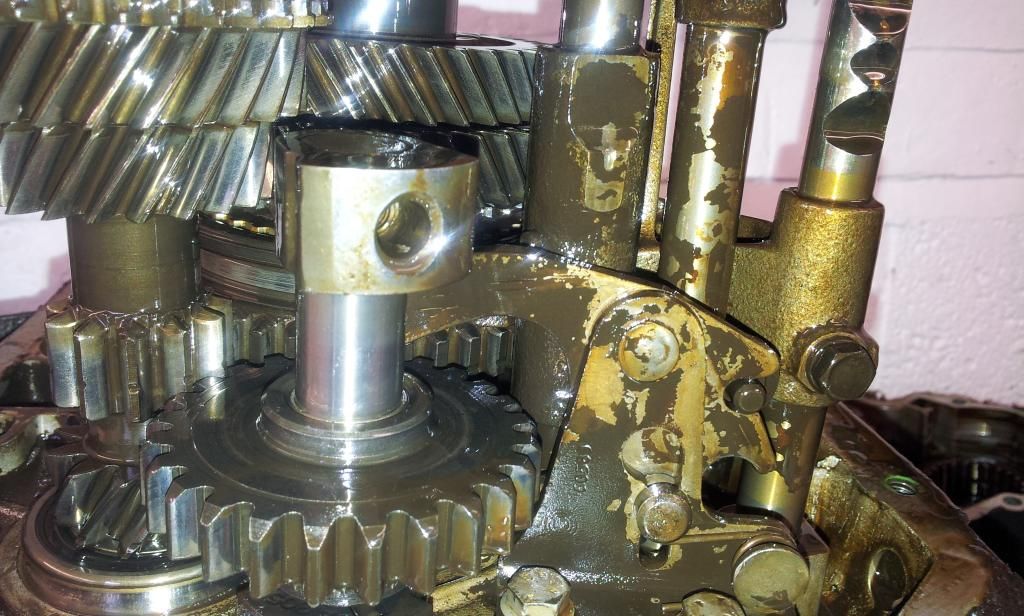 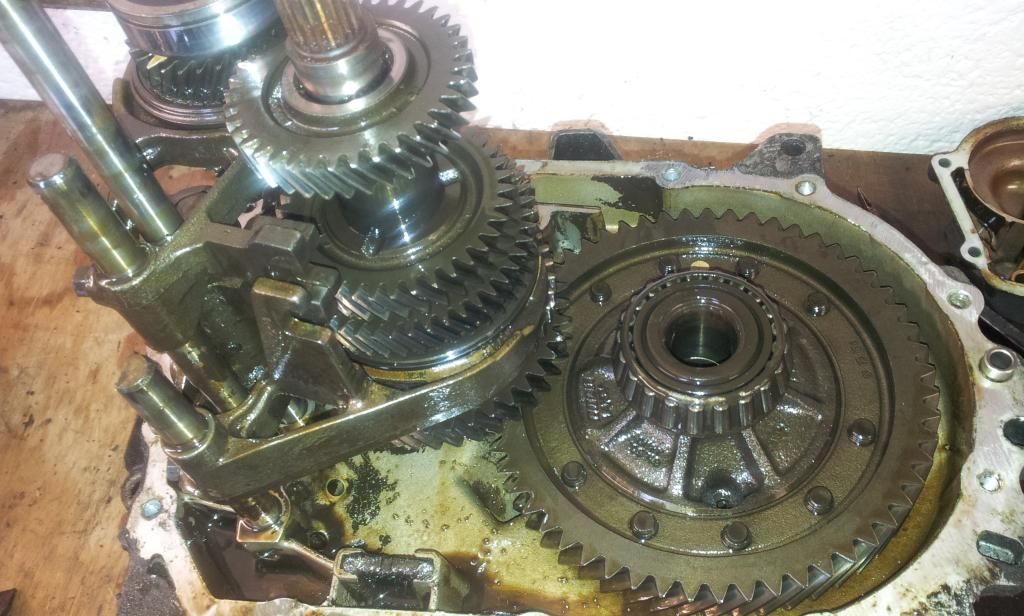 And eventually we get to the culprit: 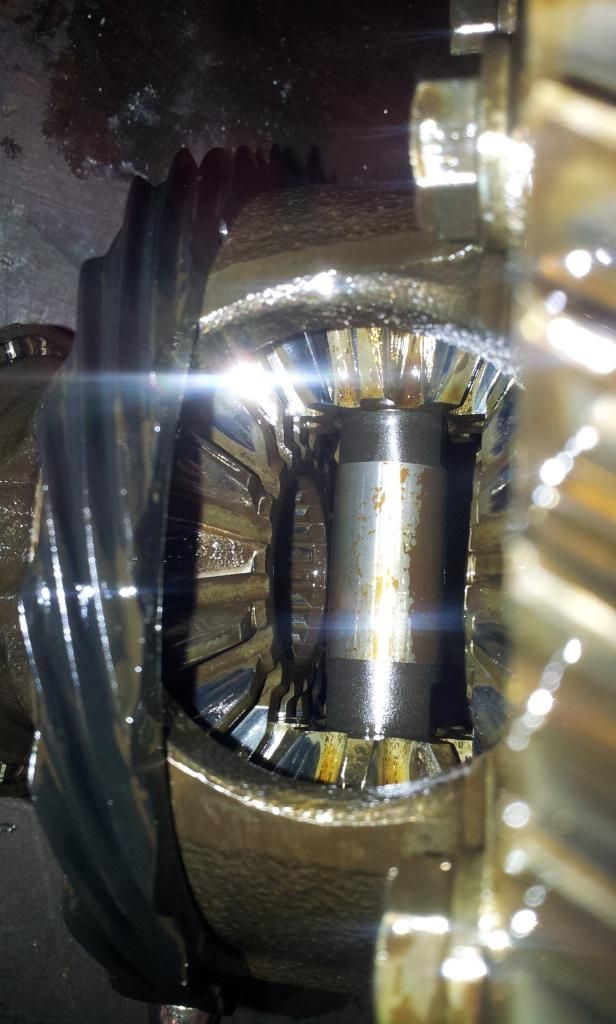 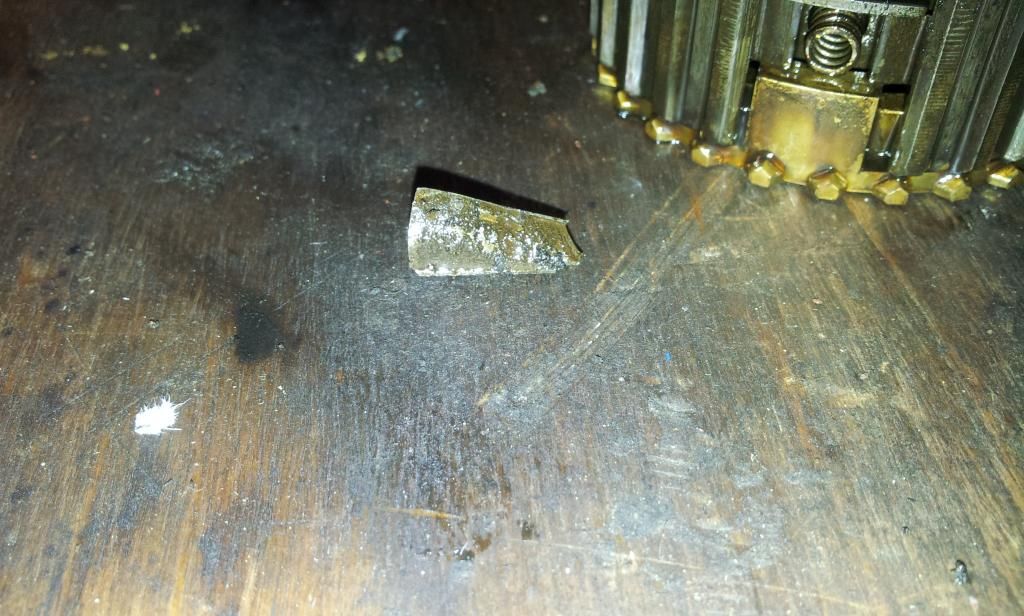 Actually, two broken teeth on the output drive pinion, for some reason at opposite sides of the gear. This has been cheerfully driven flat out for several thousand miles since it was first evident, and who knows how long before... The original plan had been to replace this differential with a 16vt diff and trade acceleration for improved fuel economy, but it requires changing the final drive spur gear which is right at the back of the cluster. Plan B was to drop in the diff from a replacement NA box, but it makes more sense just to replace the entire box; we'd have to strip the replacement as far as this one anyway and given the absence of any visible wear it's a pretty safe bet just to drop it in as is. So, on to the engine. We already know the exhaust cam shaft needs replacing, so off with the inlet manifold and the rocker cover: 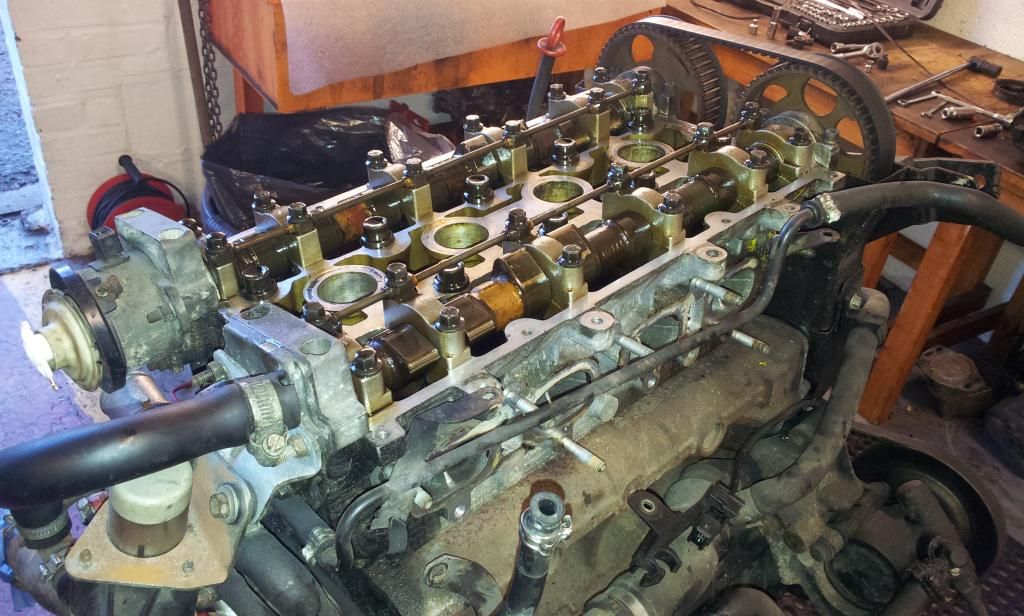 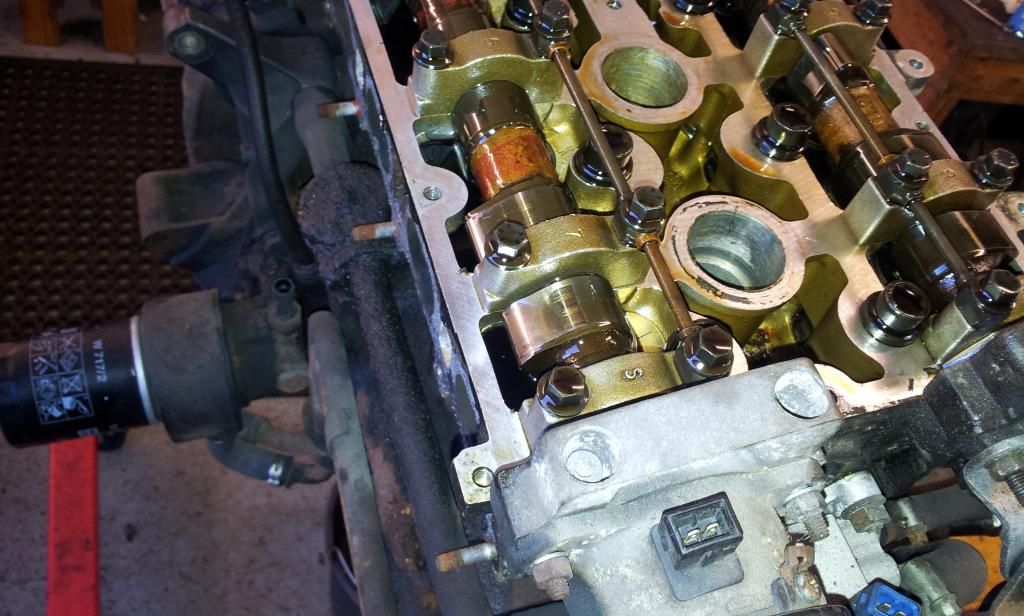 Over the years, both the sump and cam cover gaskets have seeped, though the head gasket and compression are excellent. Neither have been changed until now. 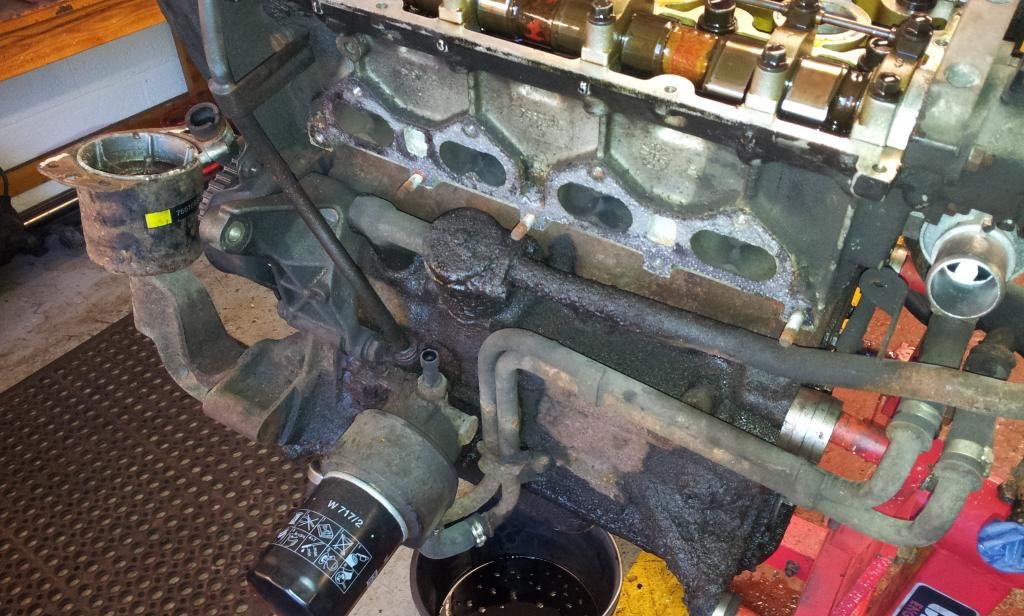 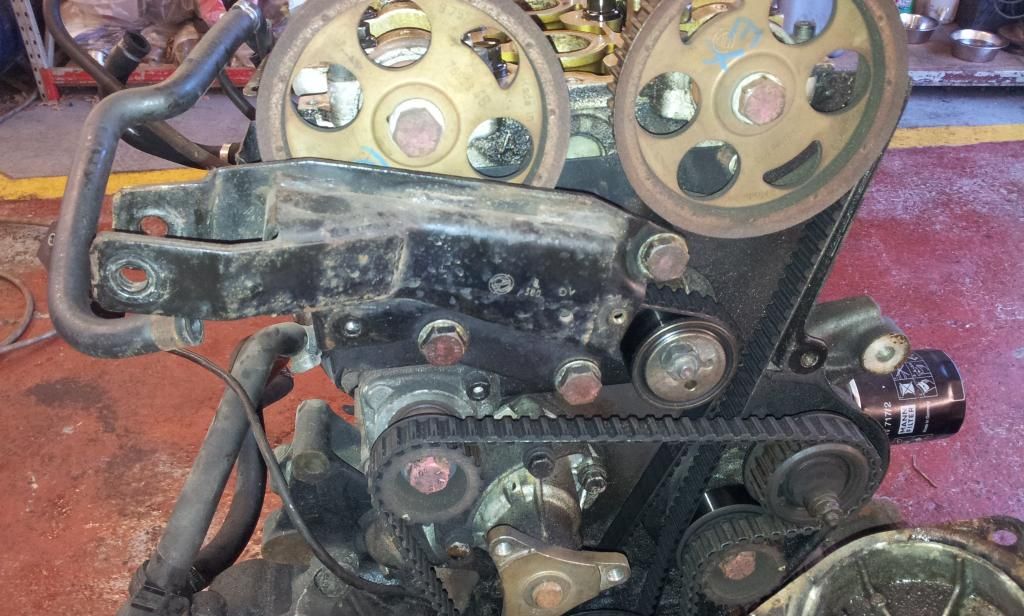 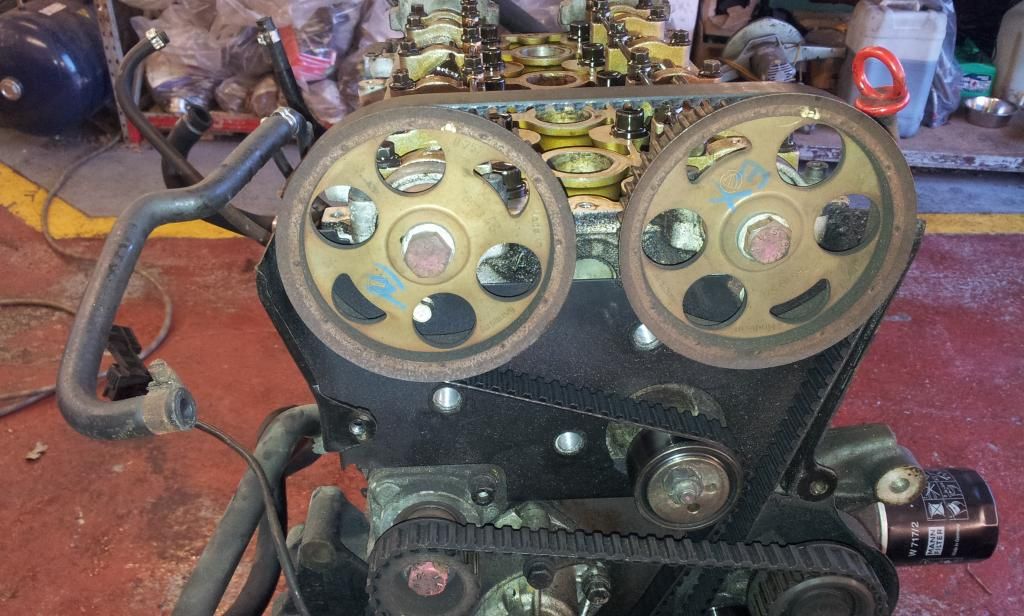 There are no bearing shells for the camshafts, just lots of machined carriers and a seal at the belt end. There was some very mild scoring on the inlet cam bearing surfaces but for now it's going back in; it can be changed without having to remove the engine. New exhaust cam is required, though. 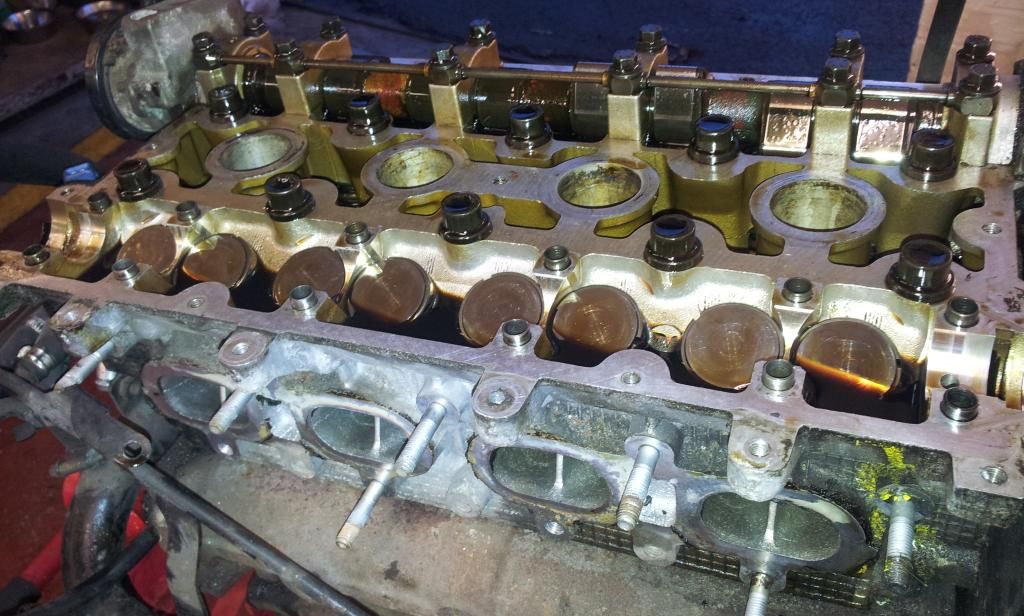 If we'd thought about this first, we'd have removed the crank *before* we removed the cams, because then we wouldn't have had to put the cams back in to stop the bucket followers and shims falling out. Doh. There are a lot of bolts holding the sump on; they're pretty tedious to remove. Driving along the same farm tracks as tractors to paragliding launch sites tends to have an impact on the shape of the sump... 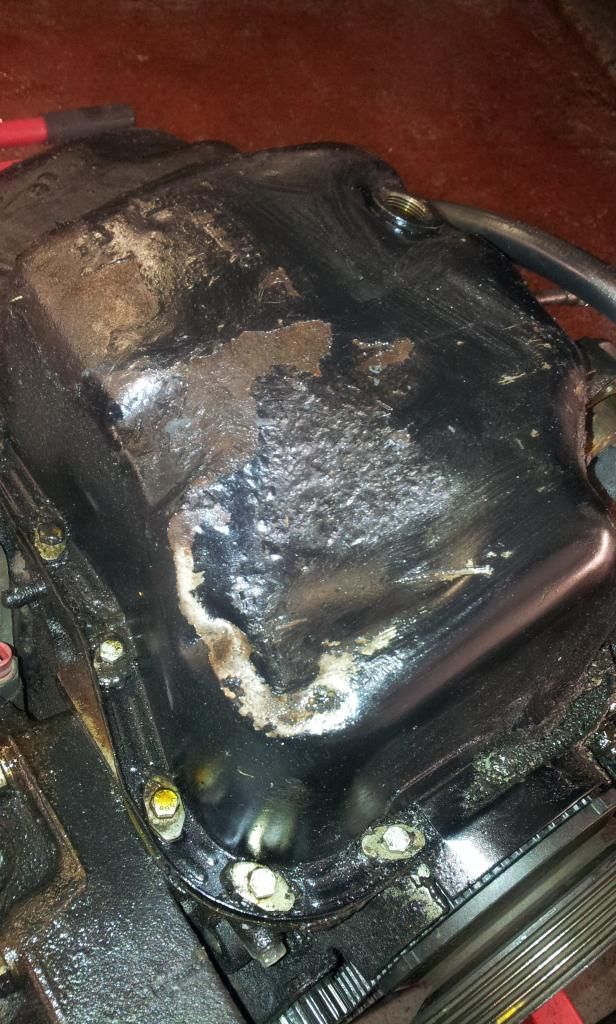 Not metal swarf but bits of sealant from somewhere or other. For the miles it's done, that's a really clean engine. Here's a question: where are the only 14mm headed bolts on a coupe? 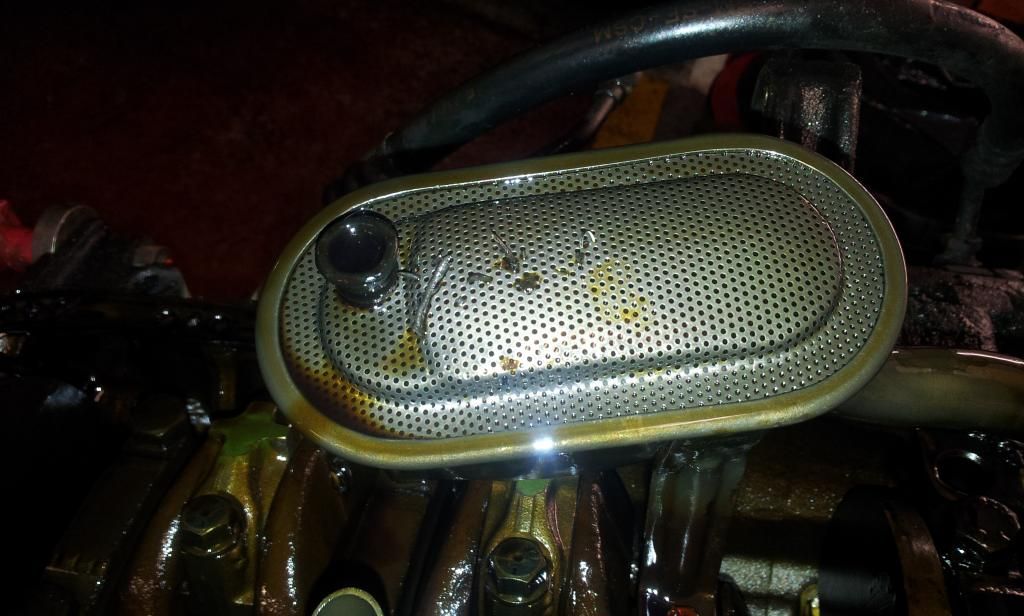 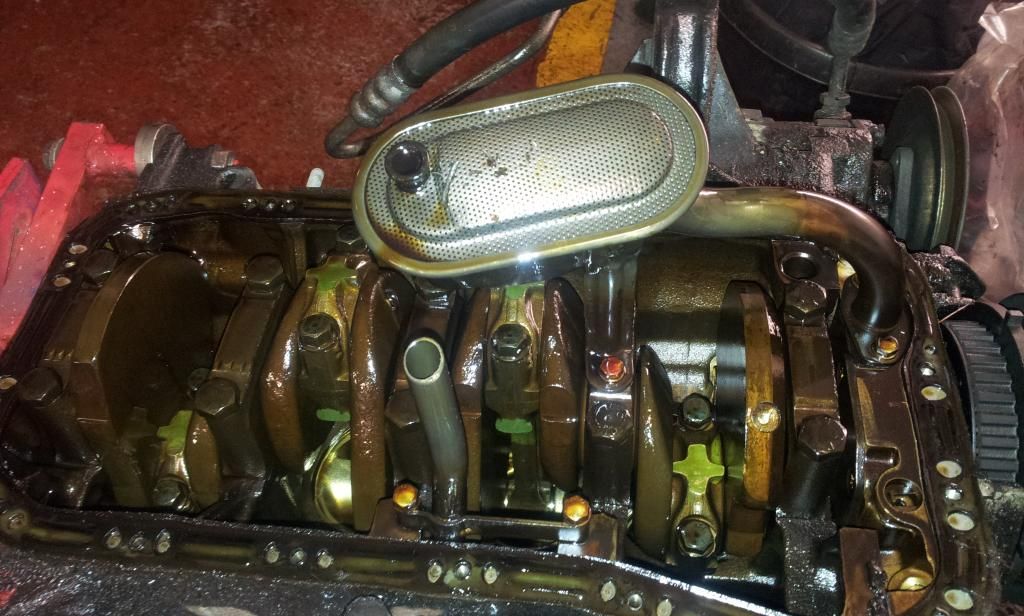 Crank removed along with main and big end bearing shells. The oil pump and clamping plate have to come off first - six bolts each, some well hidden in the grease (which has preserved the bolts as if new!). There are two thrust bearings at the gearbox end. 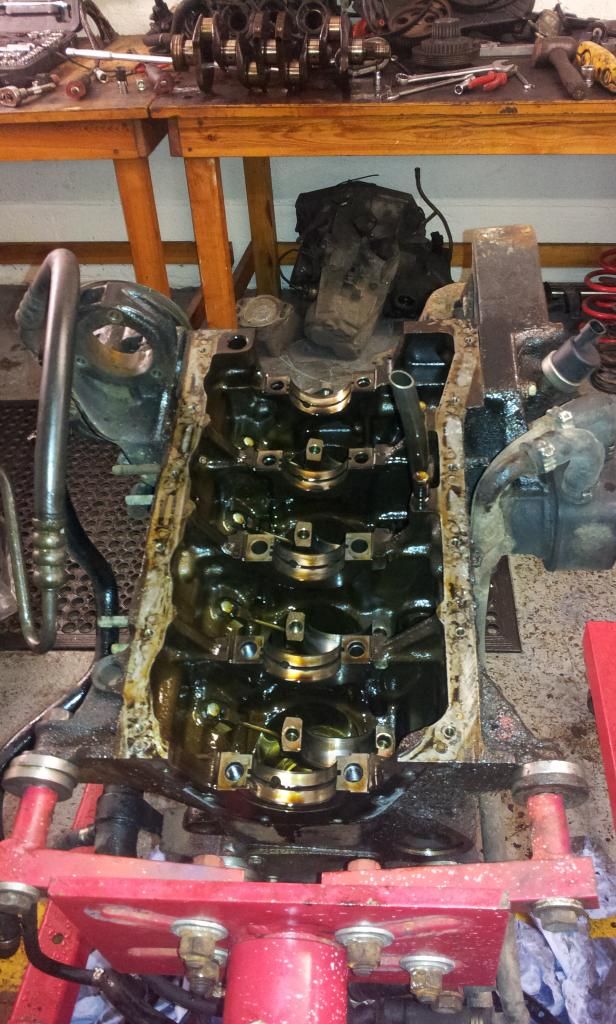 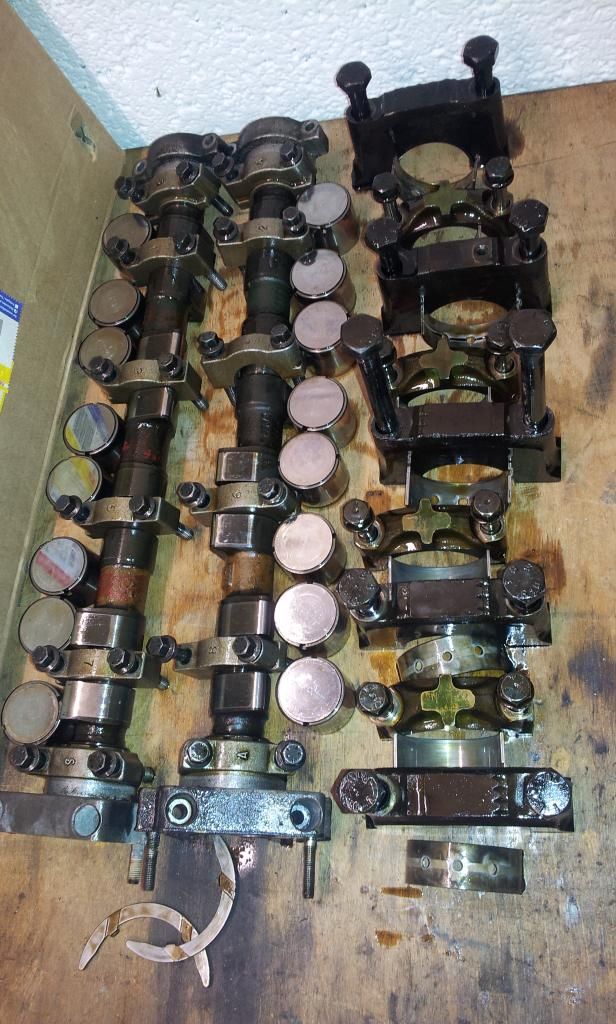 None of the big ends show anything other than expected wear; there is light scoring on the two outside mains which will be reground before refitting. One of the big end shells had an obvious high-spot (I forgot to photograph it) caused in the factory; there was a tiny bit of swarf stuck between the shell and casting which will had caused a high-spot of a couple of thou... 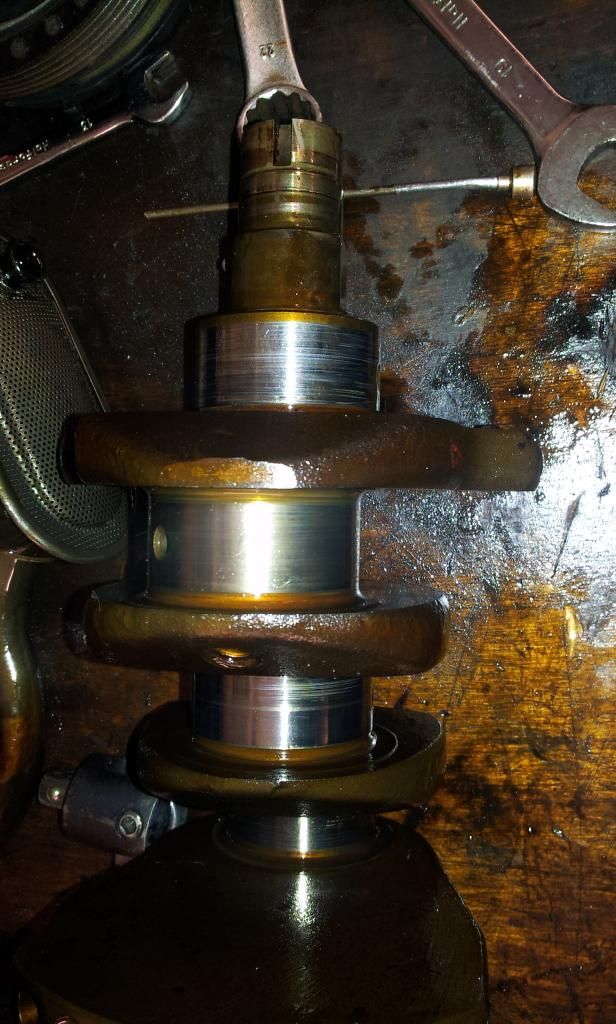 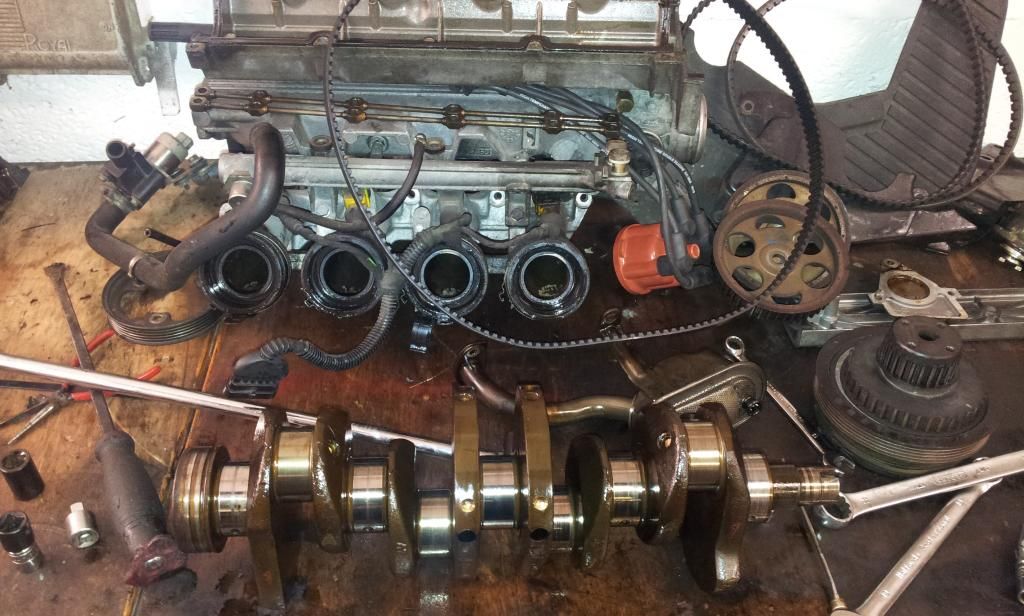 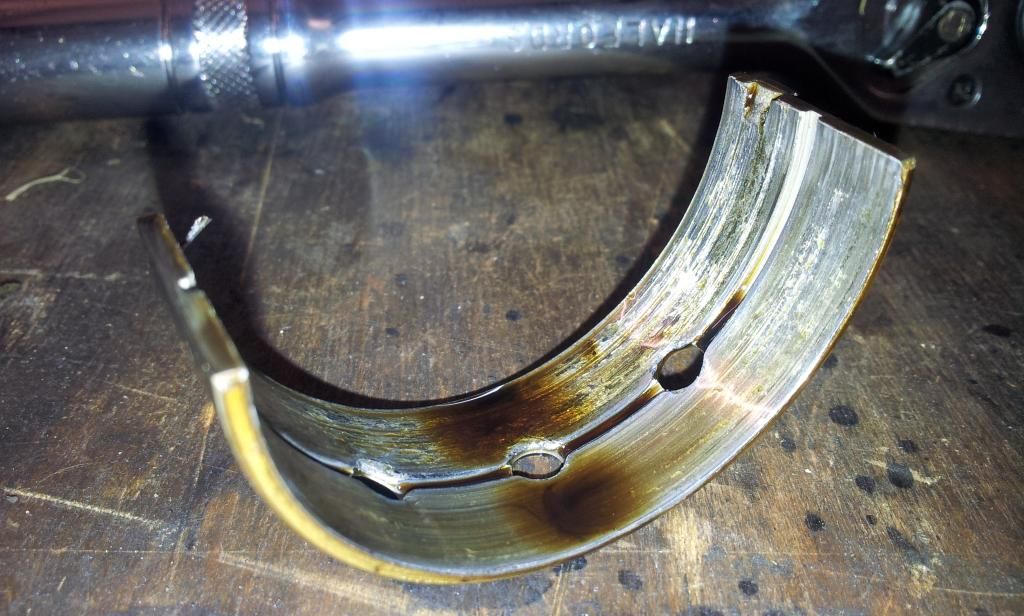 This many nuts and bolts go into a 16NA engine: 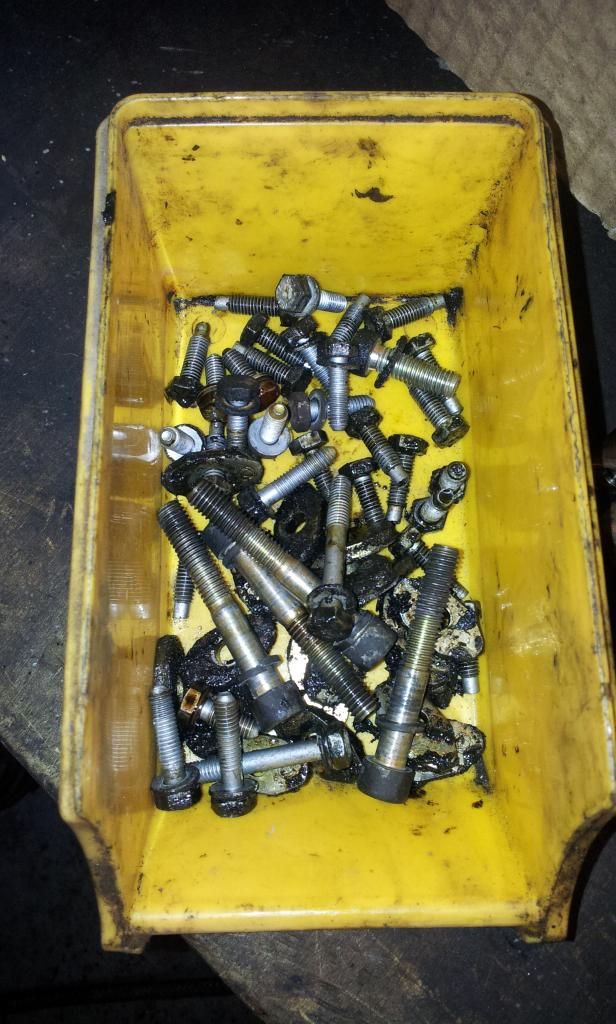 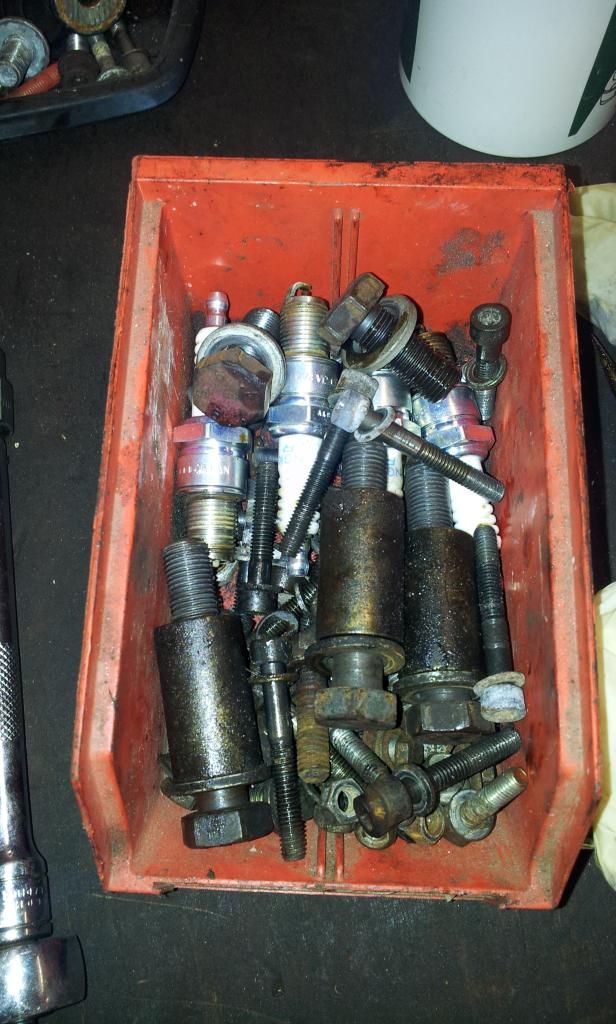 The oil pump is in excellent condition: 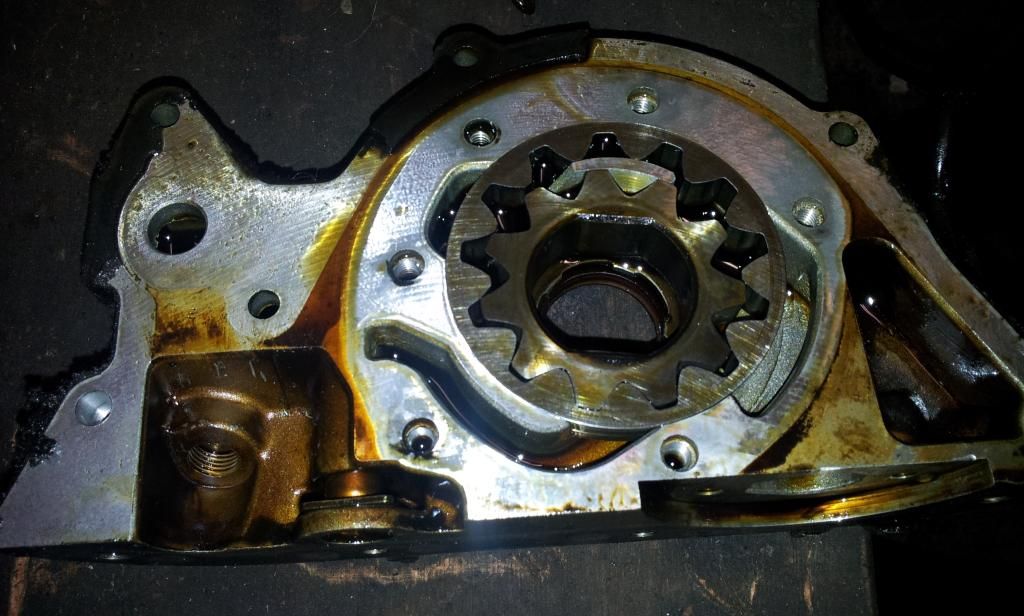 The plan of action The plan of actionEngine mounts are on their way to me; the existing mounts are submerged in releasing fluid in the hope that they might not need grinding off! Shopping list going together for replacement parts; we've sourced a camshaft and the inlet doughnuts but we need to add up all the gaskets required. The same source we hope can provide a couple of water pipes. The thermostat is only five thousand miles old. A couple of water pipes may be replaced with silicone as they're just right-angle bends. I'm looking largely for originality on the engine so don't expect any bling, but a number of parts will be airblasted and powder coated including the radiator support and the oil heat exchanger water pipes and the crankcase breather pipes, and anything else that looks as if would benefit from some rust-proofing. It will probably be a couple of weeks before the next update.
Last edited by barnacle; 23/11/2014 11:31.
|
|
|
Re: Barnacle's Olde Original 16v Fettle
[Re: barnacle]
#1522059
17/01/2015 22:28
17/01/2015 22:28
|
Joined: Dec 2005
Posts: 33,628
Berlin
barnacle
OP
Club Member 18 - ex-Minister without Portfolio
|
OP
Club Member 18 - ex-Minister without Portfolio
Forum Demigod
Joined: Dec 2005
Posts: 33,628
Berlin
|
Work has resumed on the engine rebuild; today the mains, big end, and thrust bearings were refitted along with (obviously!) the ground, hardened, and polished crank. The shell bearings were all 0.25mm (ten thou) oversize to fit the regrind while the thrust bearings were standard size as there has been no change to the crank there; the end-float is fine.
Everything is turning very nicely, though we did have one small issue: some sort of sealant had been used in the crank-end thread, presumably to keep the hardening effect there to a minimum, and it was a bit fiddly to get it out. Normally you'd just run a tap through, but this bolt is left handed...
The stubborn front right engine mount has been removed; an angle grinder removed the shell and then two of us with a meter of lever each sheared the bolt, to our annoyance, but that's not a major issue... we did establish that the front left mount is incorrect, so I'll need a new one. Never mind.
With the engine turned over, we replaced the inlet cam, complete with a new seal. A cunning move on Lancia's part is that the inboard cap bolts are too long to fit... if you happen to forget the oil bar. Doh...
With the original shims, the clearances are all as they should be (0.4mm +/- 0.04 - 16 thou +/- 1 thou) with the exception of the two endmost valves which were about a thou tight - obviously a little erosion of the valve seats. After a little thought, we decided to live with it, and keep an eye on it in a few thousand miles.
One oddity: on one of the big ends and one of the mains, the shells showed wear high-spots. In both cases, the cause was a tiny splinter of metal, lodged between the shell and the housing. I can't see how this could have got there without it being a manufacturing carelessness... anyway, the housings were scraped clean, which removed the embedded swarf, so I'm a bit happier about it now.
Pictures soon.
Last edited by barnacle; 17/01/2015 22:29.
|
|
|
Re: Barnacle's Olde Original 16v Fettle
[Re: barnacle]
#1523114
24/01/2015 22:28
24/01/2015 22:28
|
Joined: Dec 2005
Posts: 33,628
Berlin
barnacle
OP
Club Member 18 - ex-Minister without Portfolio
|
OP
Club Member 18 - ex-Minister without Portfolio
Forum Demigod
Joined: Dec 2005
Posts: 33,628
Berlin
|
Here is one of the original dodgy bearings, showing first the wear high spot and then the embedded swarf that caused it - that's been there 175k miles. 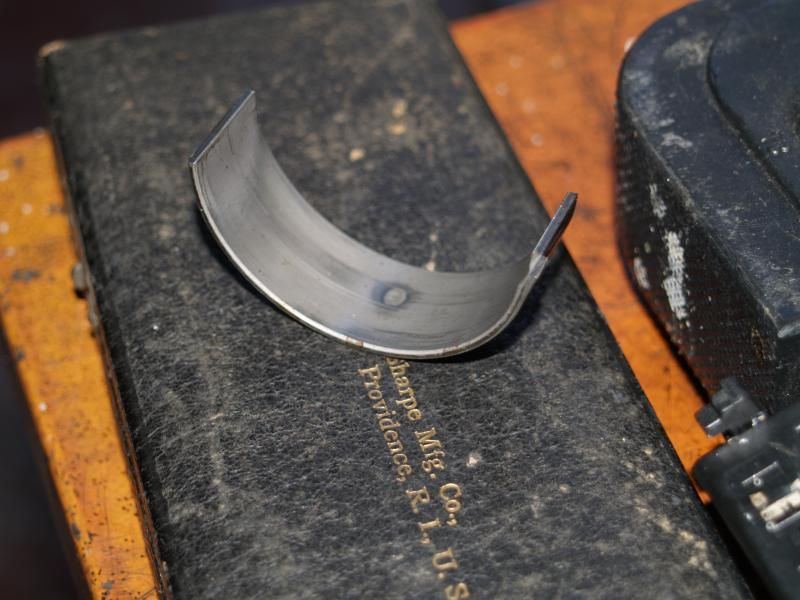 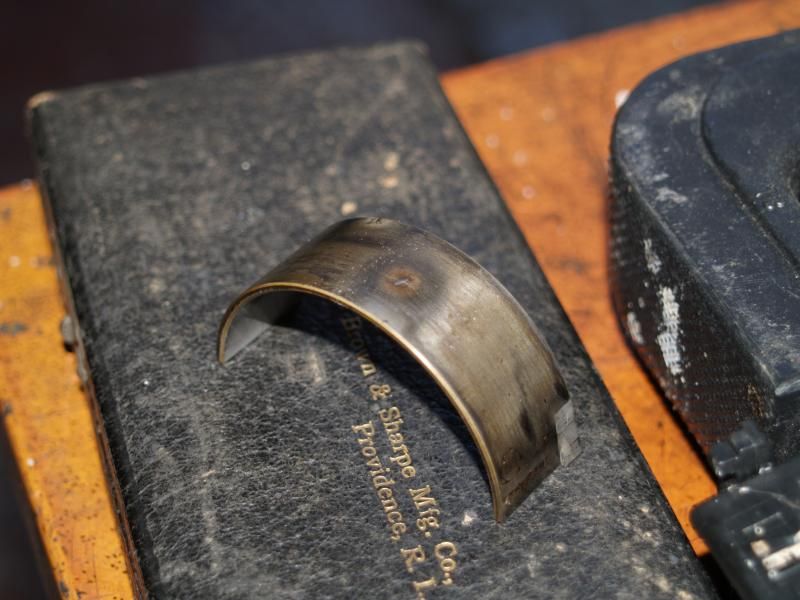 Hmmm... tough little beasts, these engines! Not a huge amount of work done this weekend, as I had to supervise Joe putting his other ramp up, but fitted the new cam - genuine NOS Fiat/Lancia Ricambi Originale  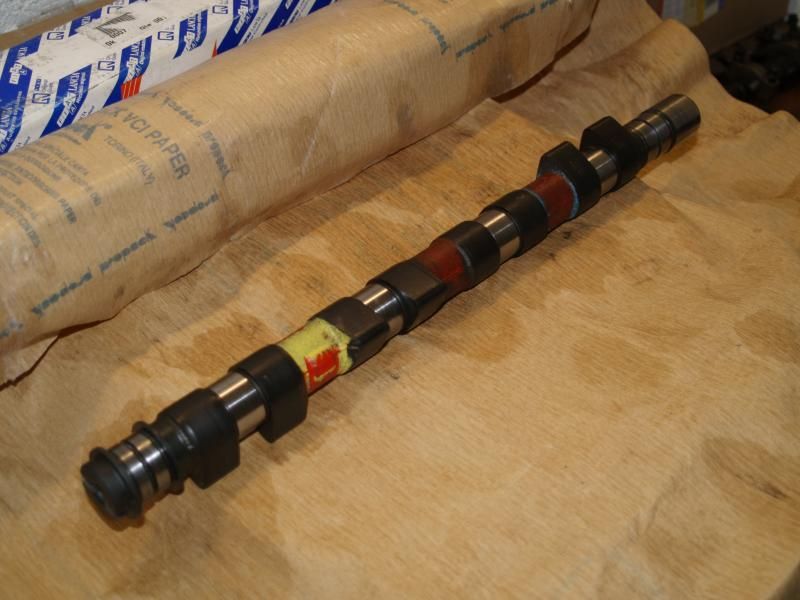  There was a little more valve seat wear on the exhaust so the gaps weren't as close as the inlets - they should be 0.50mm +/- 0.04mm. So after some careful measurement, out comes Joe's big box of shims, and the cam comes off again to replace bits. Two out of the eight shims were OK.
Valve   Pass  Block  Oversize  Shim  New shim
1a      0.35  0.40   +0.15     3.95  3.80
1b      0.35  0.40   +0.15     3.95  3.80
2a      0.35  0.40   +0.15     3.95  3.80
2b      0.40  0.45   +0.10     4.00  3.90
3a      0.40  0.45   +0.10     3.82  3.72
3b      0.45  0.50   pass
4a      0.45  0.50   pass
4b      0.40  0.45   +0.10     3.90  3.80
With the new shims in, all the clearances are correct at 0.5mm (3b and 4a are a little tight, but in specification). One bit of terrible news. The makers of the OEM shims have kindly written their name on the side of the shim. VOLVO! 
|
|
|
Re: Barnacle's Olde Original 16v Fettle
[Re: barnacle]
#1524769
08/02/2015 11:10
08/02/2015 11:10
|
Joined: Dec 2005
Posts: 33,628
Berlin
barnacle
OP
Club Member 18 - ex-Minister without Portfolio
|
OP
Club Member 18 - ex-Minister without Portfolio
Forum Demigod
Joined: Dec 2005
Posts: 33,628
Berlin
|
The end is starting to look as if it is in sight... I had hoped this week to complete the belt end rebuild, but found a couple of covers that were rustier than they looked at first sight, so they're on the pile to sand-blast and powder coat... Here are some parts that have been blasted and powdercoated - these should last another twenty years. In particular, I wanted a number of external oil and water pipes protecting. The sump has also had some dents knocked out and been coated. 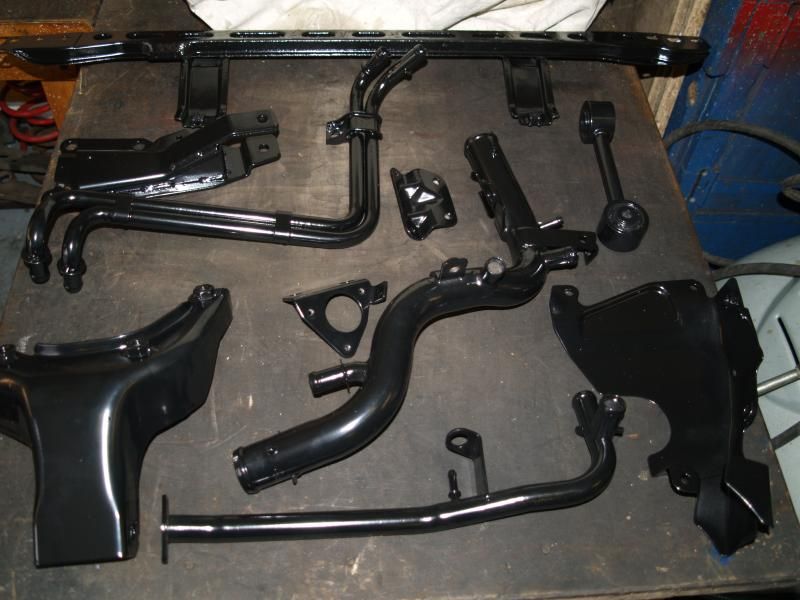 Twenty years of tiny oil leaks add up to a layer of crud 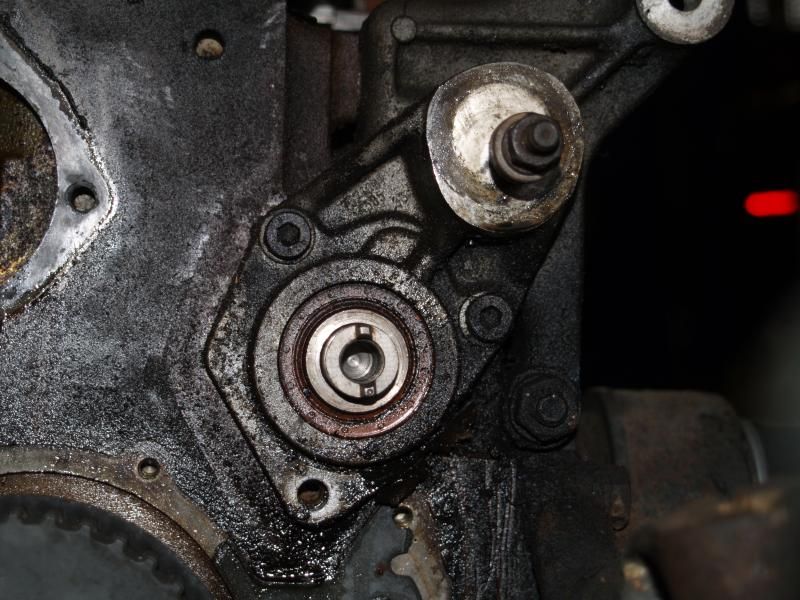 but after removing the seals for the balance shafts and the water pump 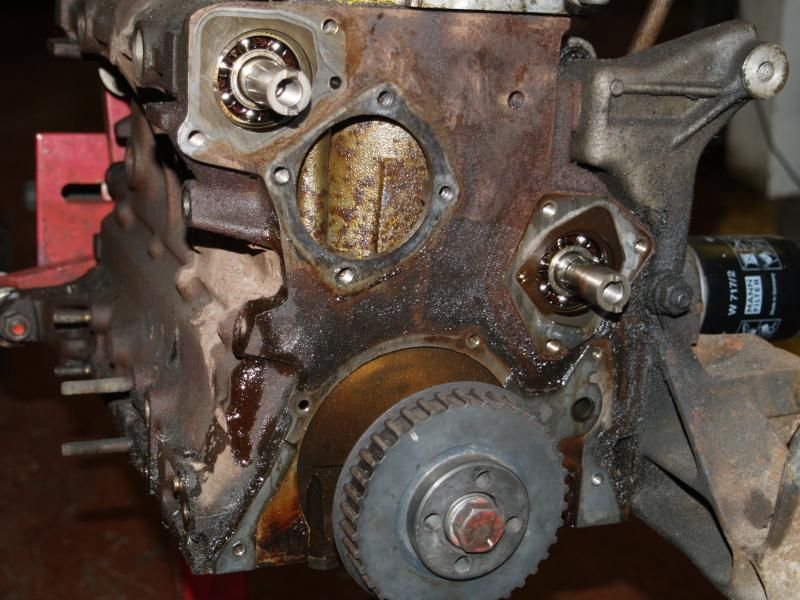 it cleans up nicely - and the interior waterways are not significantly rusty, which is nice. 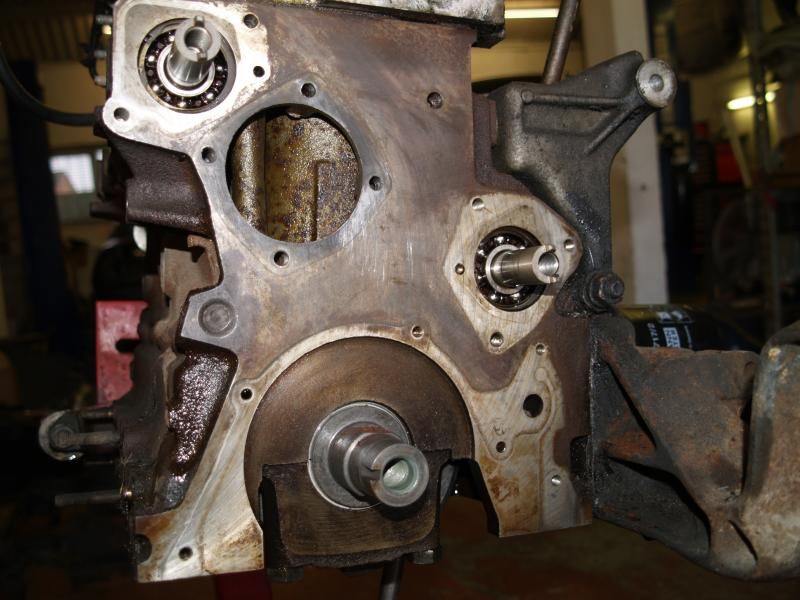 The balance shafts have a ball-bearing race, a sealing o-ring, and the rotary seal. The o-rings had set hard and weren't sealing properly, and weren't in the seal pack, but Joe had a couple. Replacement requires lots of lubrication and a hammer to drift the chamfered ring over them. 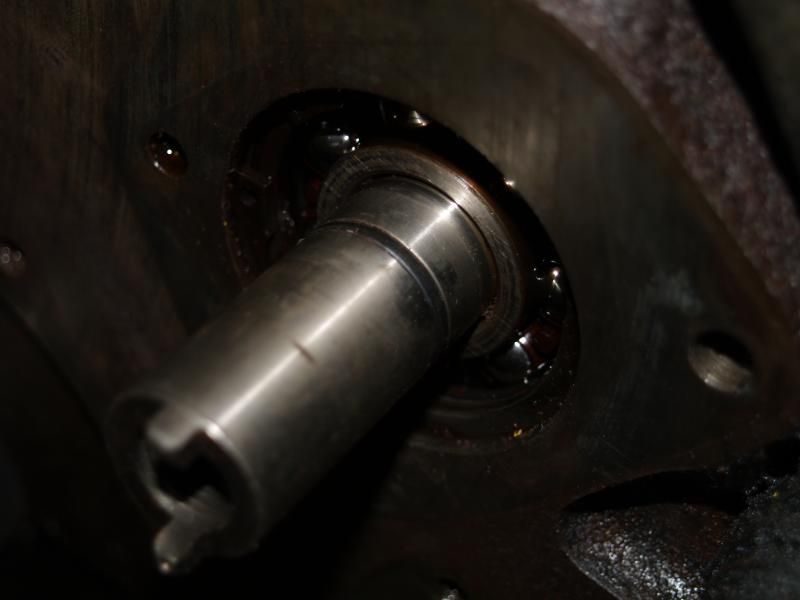 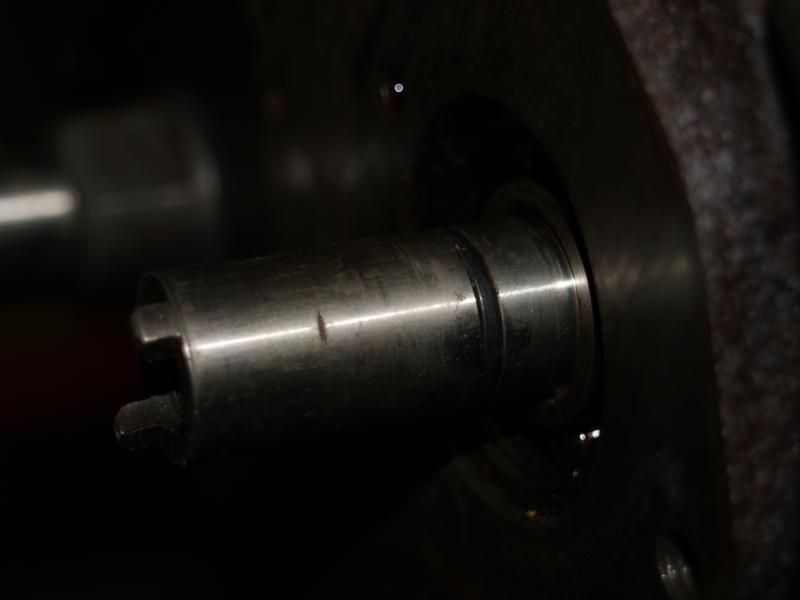 And with the gasket and new seal in the housing, refitted. A zizz gun is required to undo and do up the drive belt toothed wheel; on the front drive it was so tight it required a long lever and a pair of mole grips. 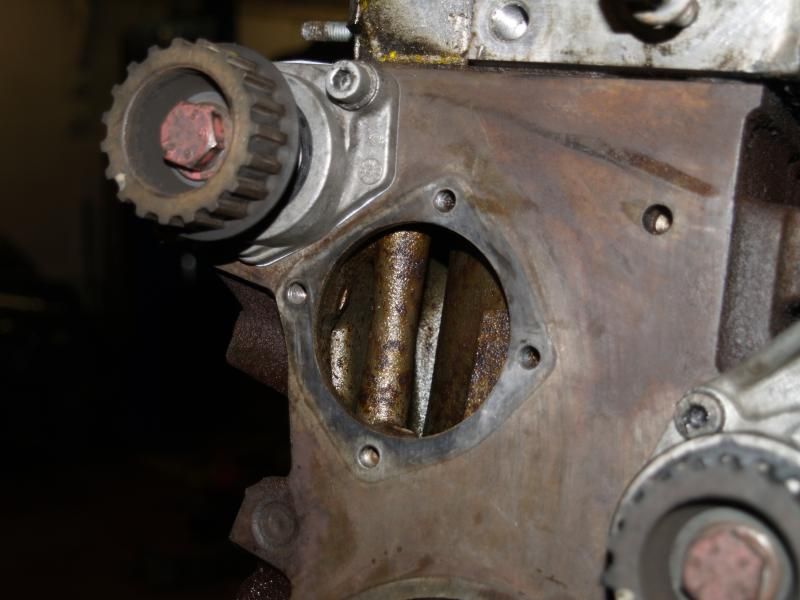 Meanwhile, in the engine bay (from which the slam panel has been removed for blast and coat), horrors are revealed... most of this is scab and will be sorted out with a wire brush, kurust, and paint, but some will need cutting out and replacing. This is under the washer water bottle, and the driver's side chassis leg. 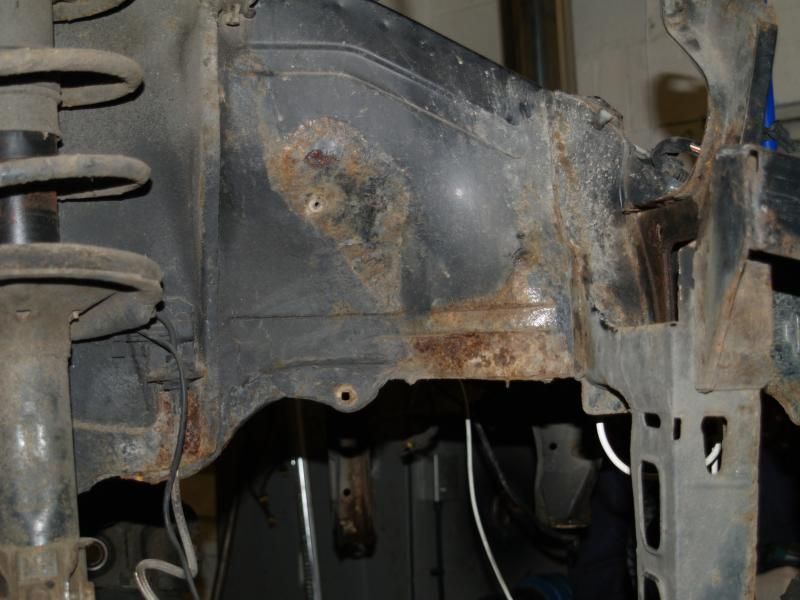 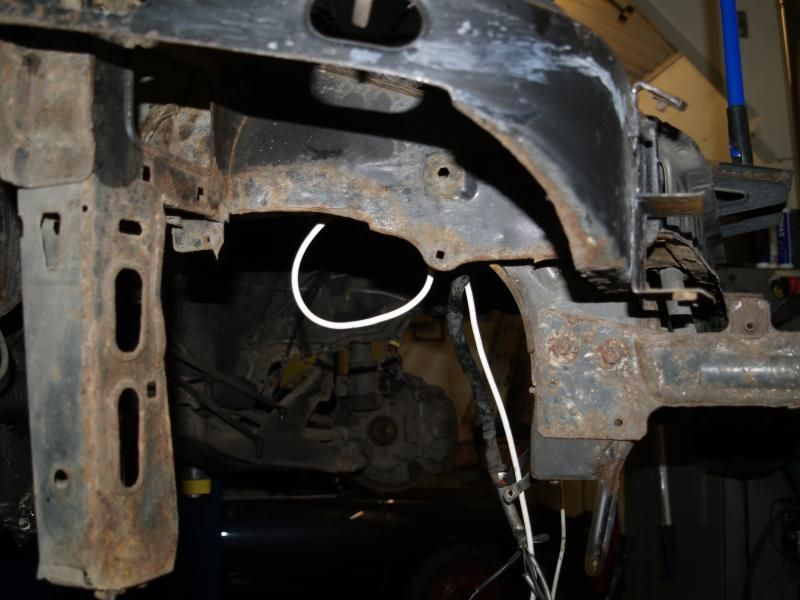 Passenger side is a little better but there's a hole behind the suspension leg, where the subframe bolts up. 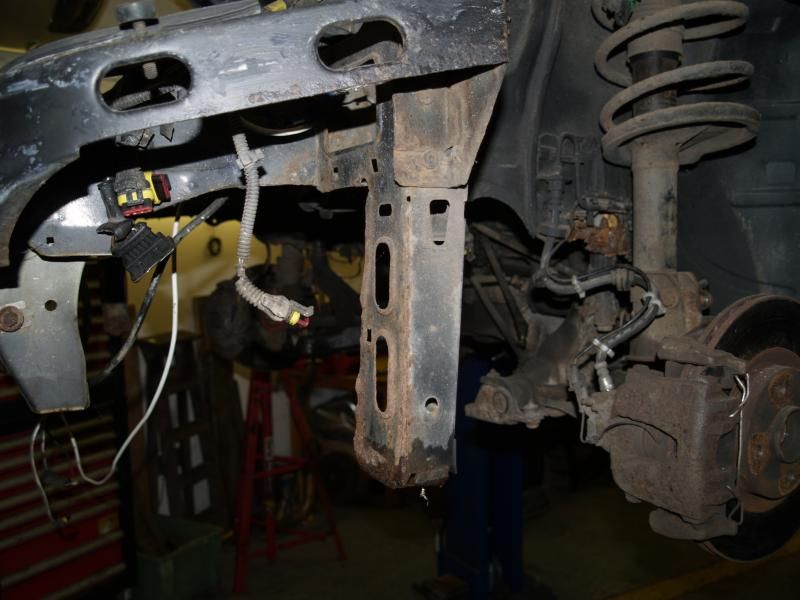 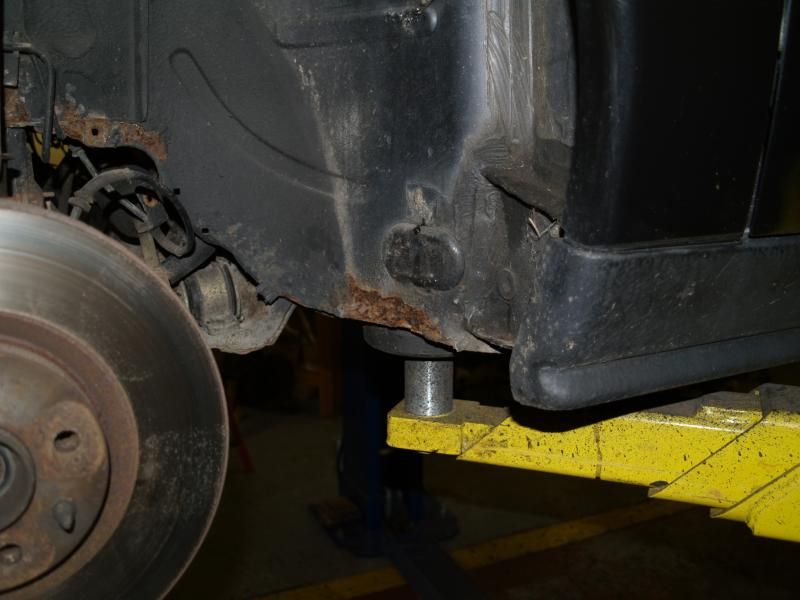 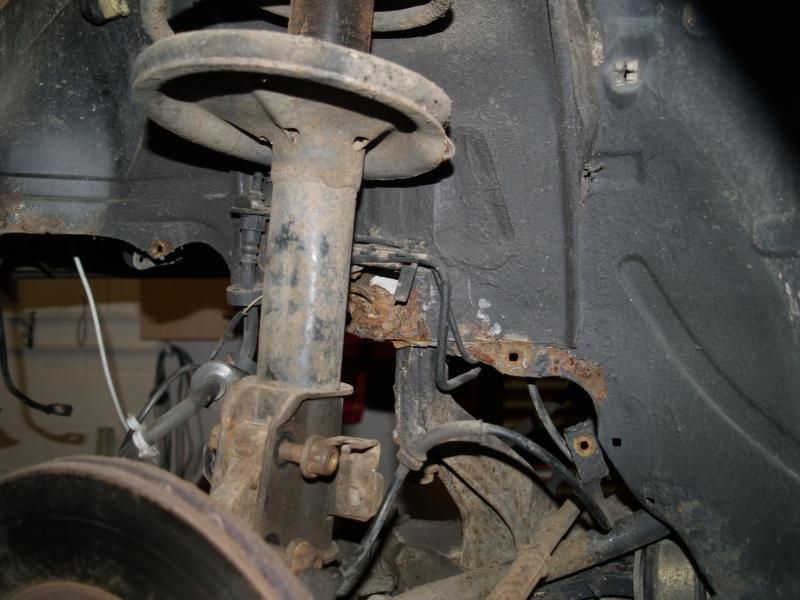 The engine bay on the whole though is dirty but in good condition - the benefit of gentle oil leaks! 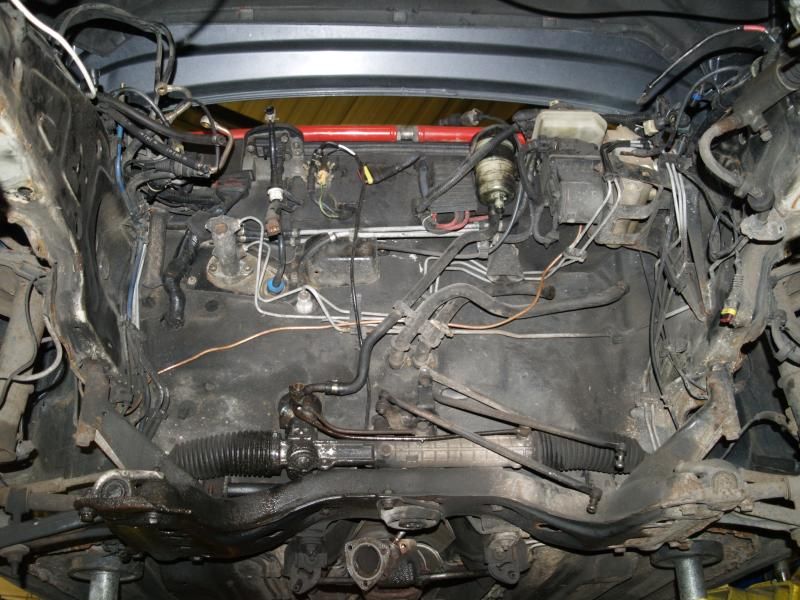 And finally, some of the bits that have been removed, and some that will be going to the powder coater. 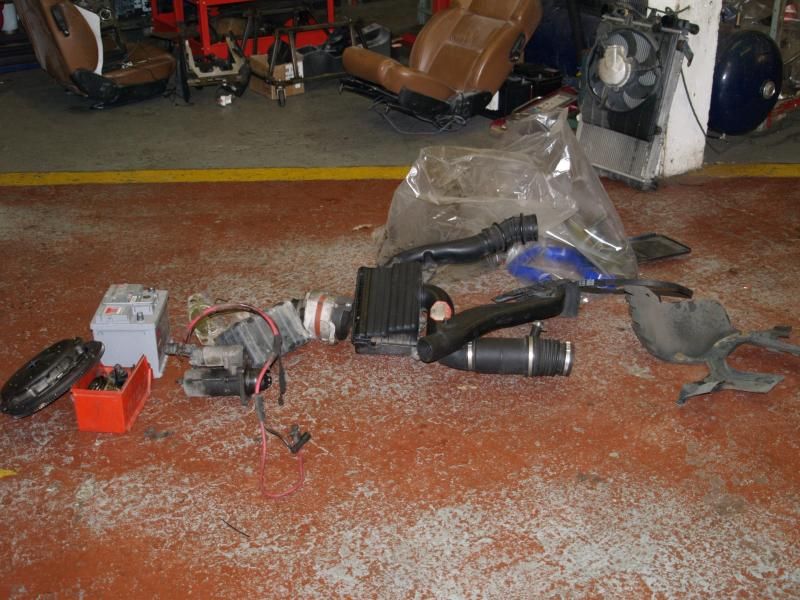 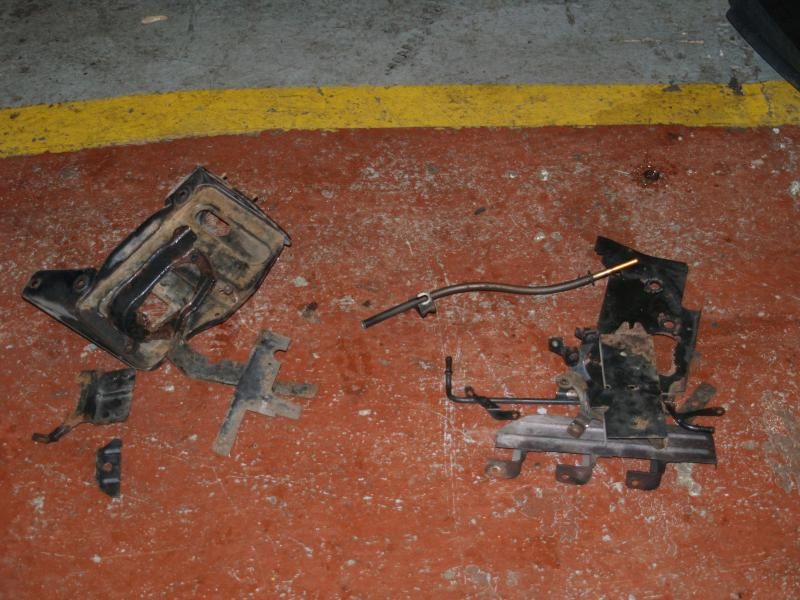
Last edited by barnacle; 08/02/2015 17:06.
|
|
|
Re: Barnacle's Olde Original 16v Fettle
[Re: barnacle]
#1525722
14/02/2015 21:41
14/02/2015 21:41
|
Joined: Dec 2005
Posts: 33,628
Berlin
barnacle
OP
Club Member 18 - ex-Minister without Portfolio
|
OP
Club Member 18 - ex-Minister without Portfolio
Forum Demigod
Joined: Dec 2005
Posts: 33,628
Berlin
|
|
|
|
Re: Barnacle's Olde Original 16v Fettle
[Re: barnacle]
#1525799
15/02/2015 15:38
15/02/2015 15:38
|
Joined: Dec 2005
Posts: 33,628
Berlin
barnacle
OP
Club Member 18 - ex-Minister without Portfolio
|
OP
Club Member 18 - ex-Minister without Portfolio
Forum Demigod
Joined: Dec 2005
Posts: 33,628
Berlin
|
The original engine number was 1653491, so it looks as if there should be another digit in there.
I had a brilliant idea to trawl through eper to see if I could find something matching, but it seems the original chassis number doesn't exist...
Last edited by barnacle; 15/02/2015 15:48. Reason: you don't exist - go away!
|
|
|
Re: Barnacle's Olde Original 16v Fettle
[Re: barnacle]
#1525802
15/02/2015 16:13
15/02/2015 16:13
|
Joined: Dec 2005
Posts: 33,628
Berlin
barnacle
OP
Club Member 18 - ex-Minister without Portfolio
|
OP
Club Member 18 - ex-Minister without Portfolio
Forum Demigod
Joined: Dec 2005
Posts: 33,628
Berlin
|
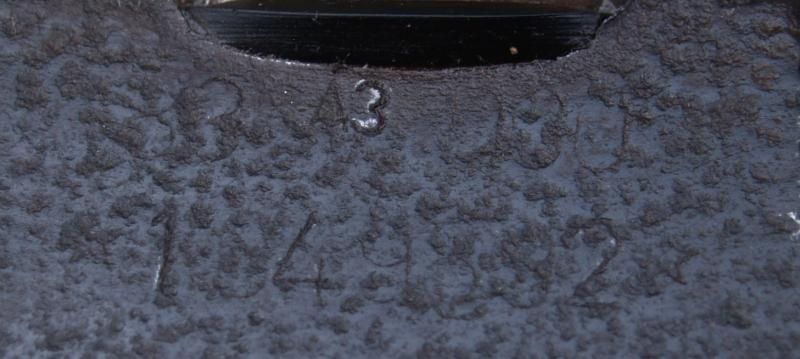 I played around with the gamma on the full sized image. I think the number looks most like 1649892 - which at least looks as if it matches the sequence; slightly older than my original engine. Edit - the numbers above are 836A3.000 which correctly identify the block as a non-turbo twin cam originally fitted to an NA coupe.
Last edited by barnacle; 15/02/2015 16:20.
|
|
|
Re: Barnacle's Olde Original 16v Fettle
[Re: barnacle]
#1527812
01/03/2015 00:17
01/03/2015 00:17
|
Joined: Dec 2005
Posts: 33,628
Berlin
barnacle
OP
Club Member 18 - ex-Minister without Portfolio
|
OP
Club Member 18 - ex-Minister without Portfolio
Forum Demigod
Joined: Dec 2005
Posts: 33,628
Berlin
|
It's starting to go back together. The holes in the front chassis arms and suspension towers have been cut out and new metal let in: 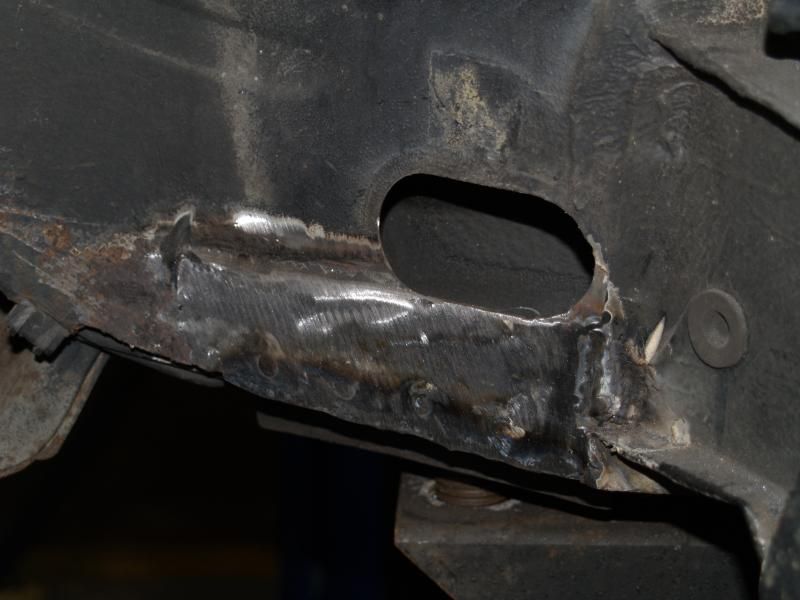 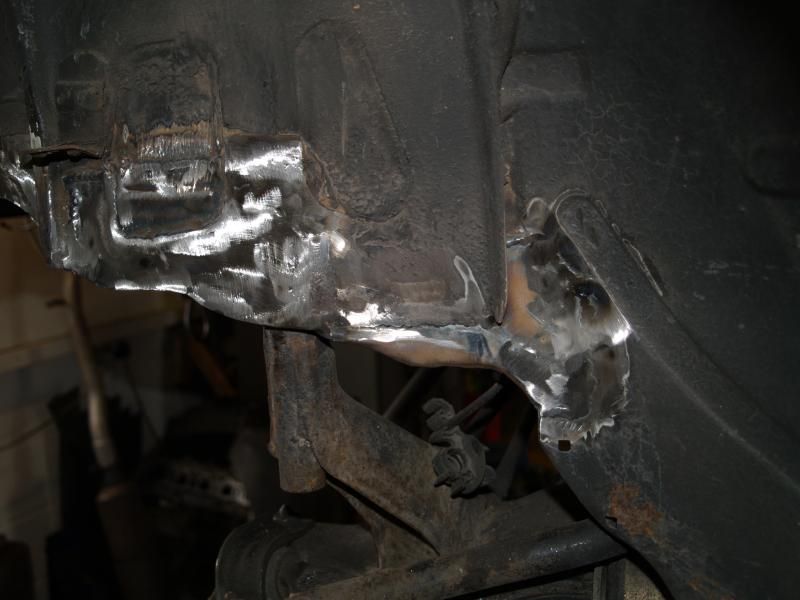 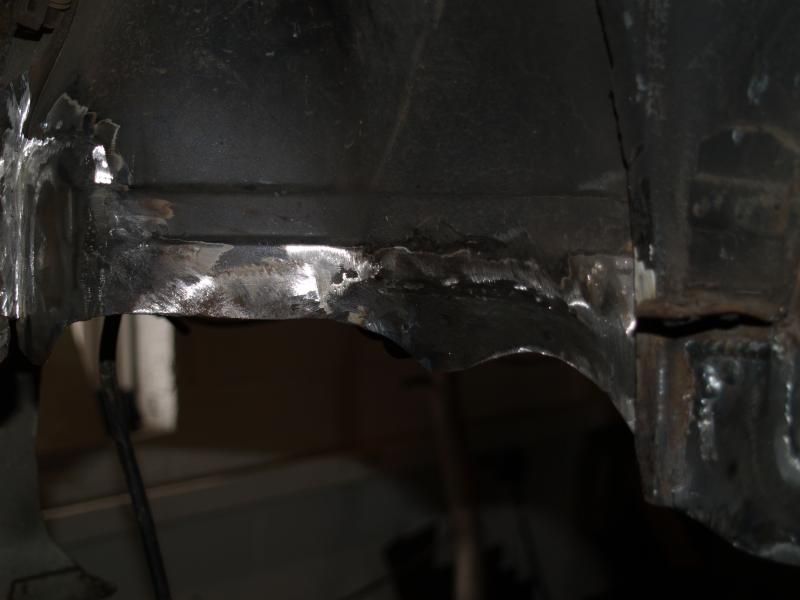 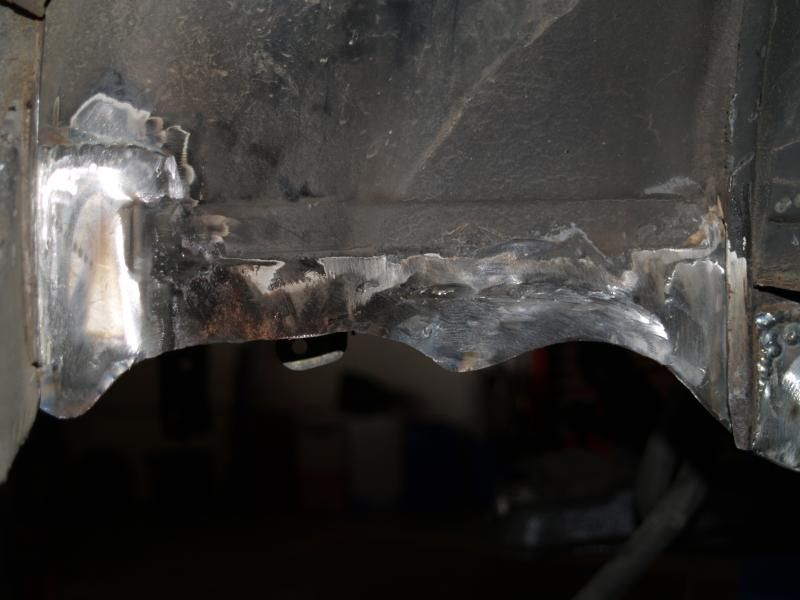 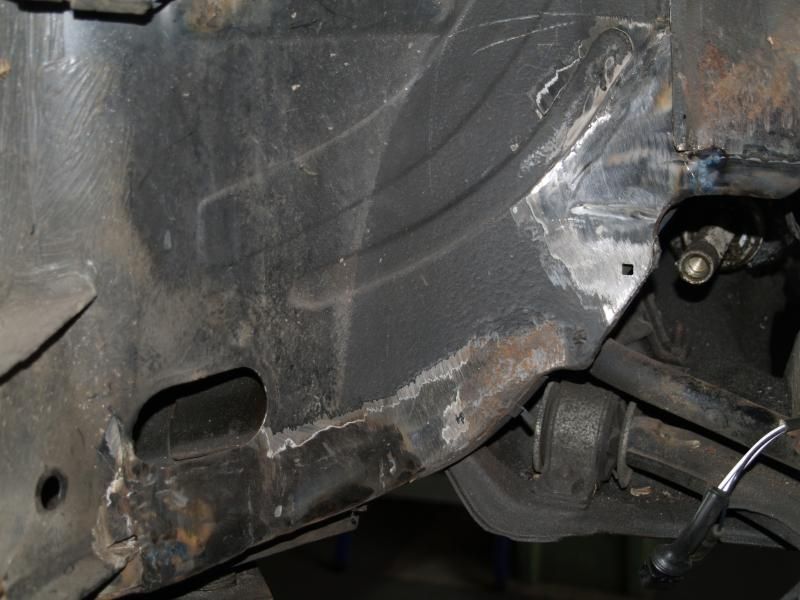 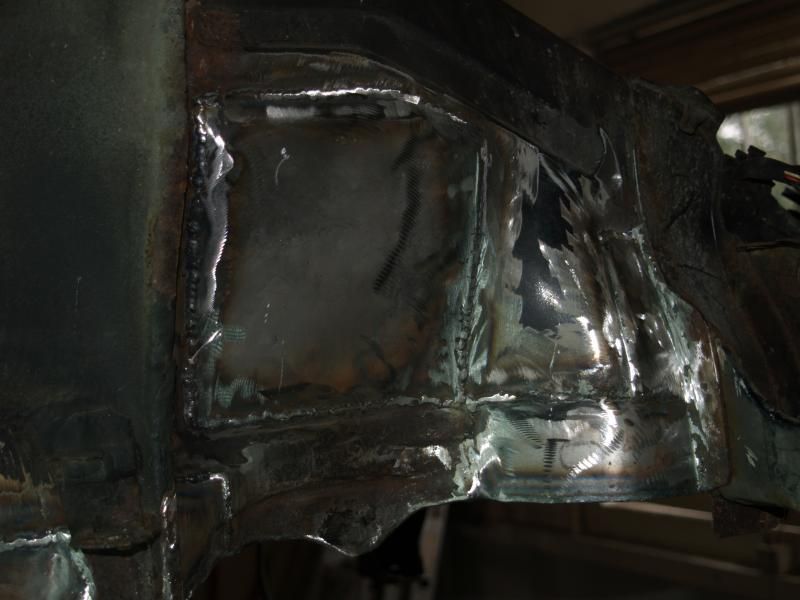 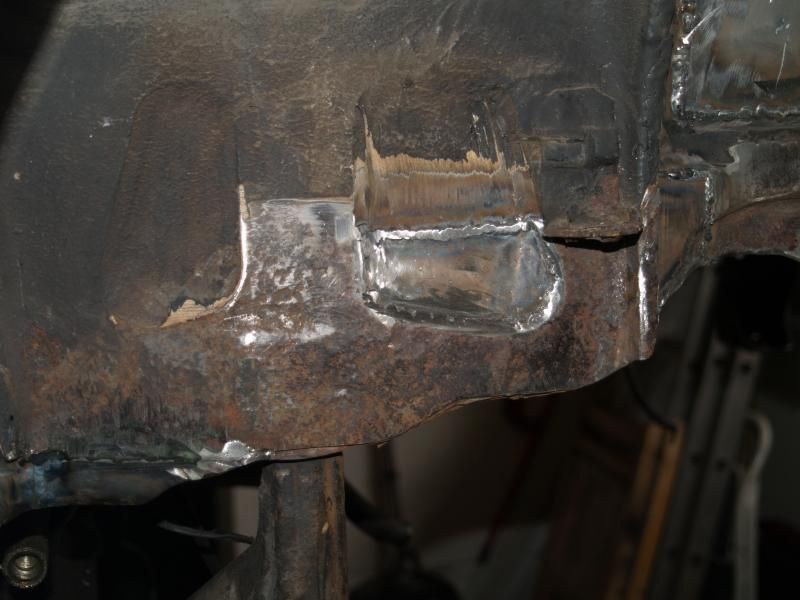 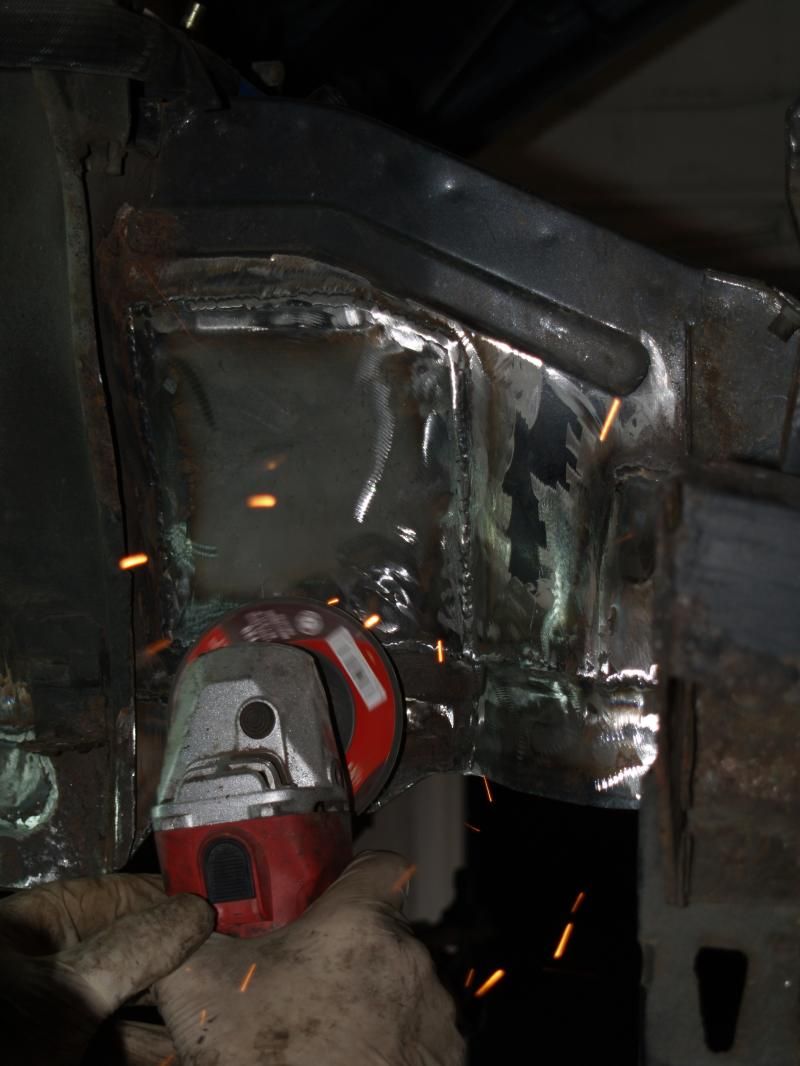 After that, the loose paint and surface rust was wire brushed off - just a couple of hours and four charges for the wire wheel. 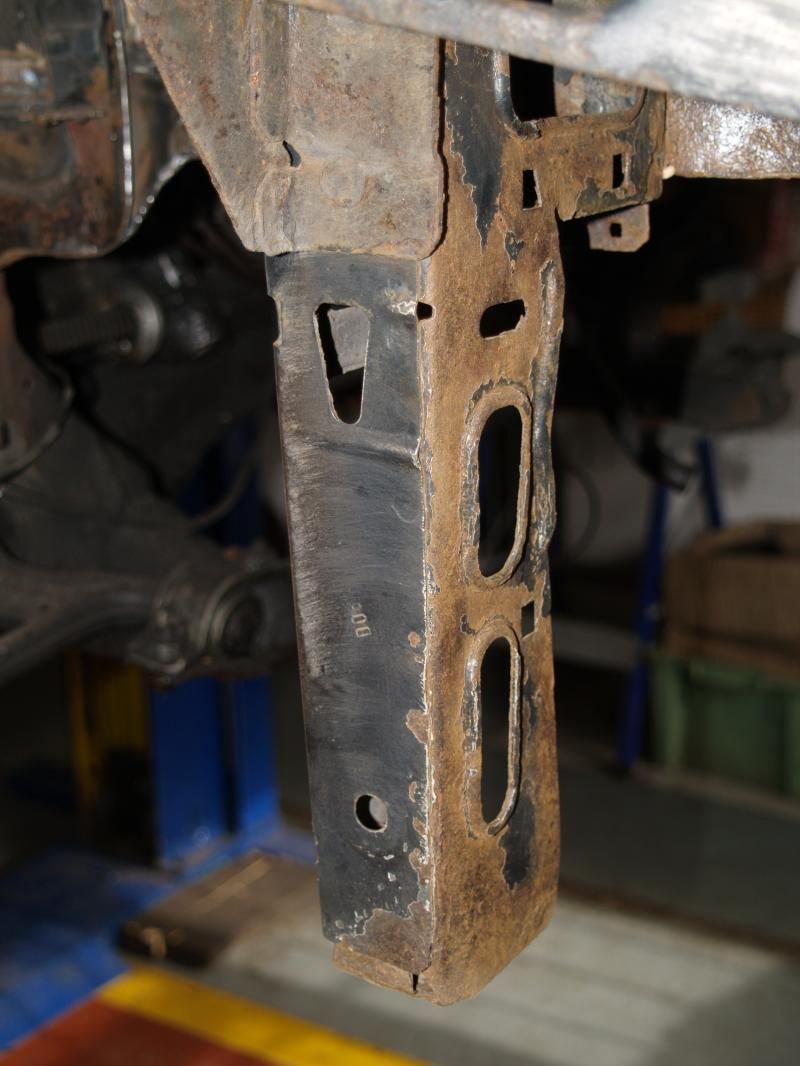 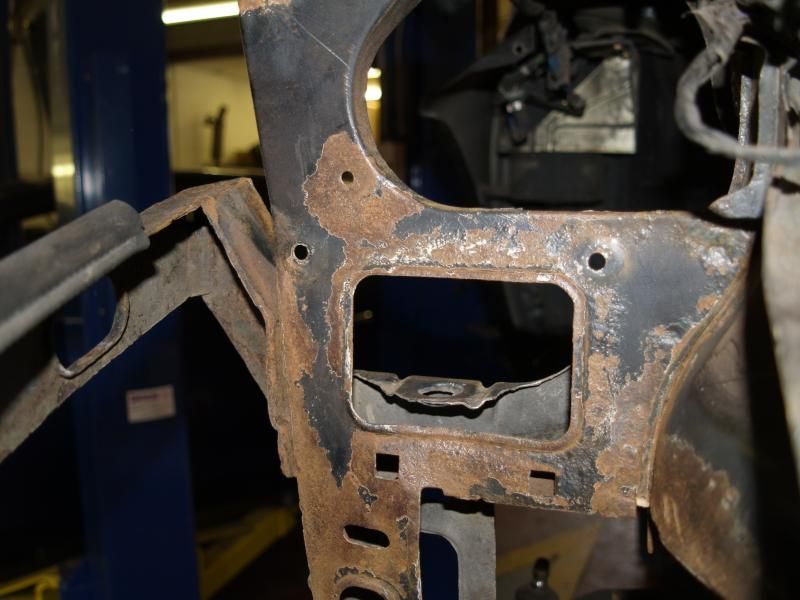 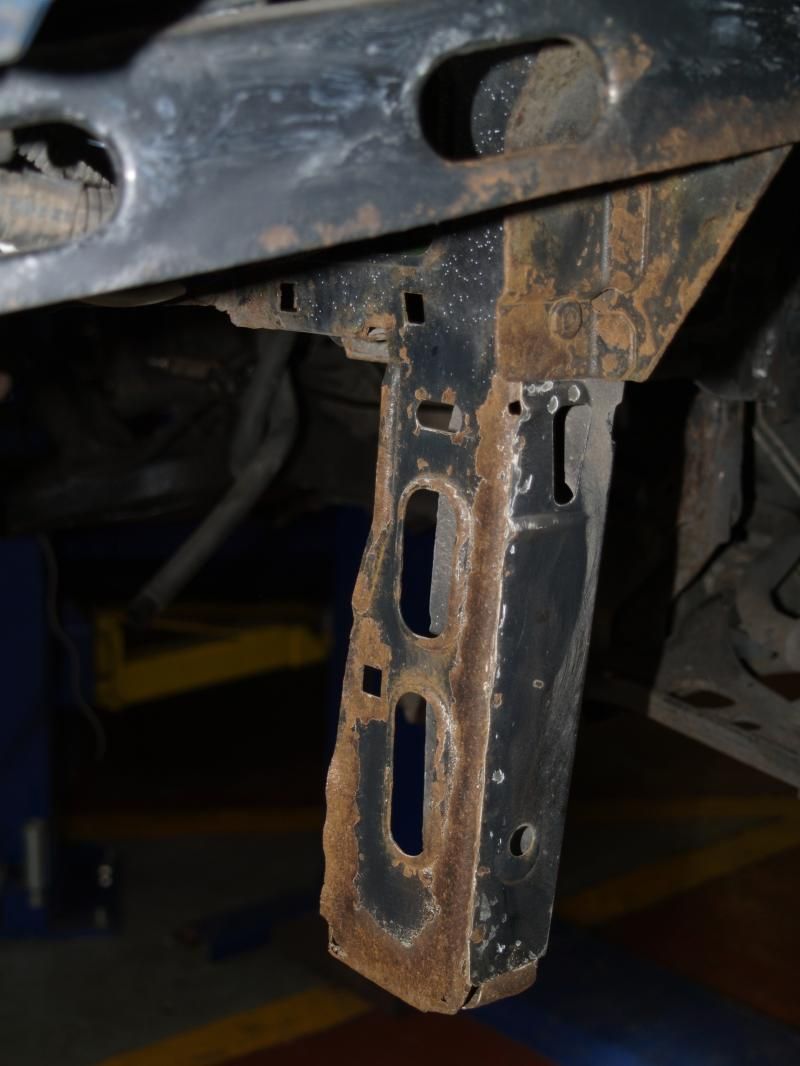 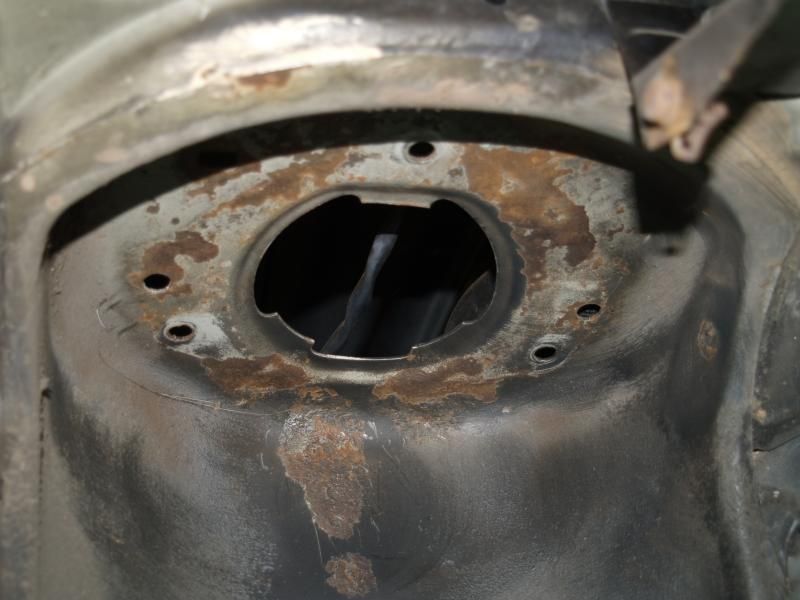 The whole area was degreased with POR Marine Clean diluted 5:1, which turns oil and grease into soap, rinsed down, dried, and then all the visible rust treated with POR metal ready brushed in and left to dry. While it did that, I turned the engine over and finished the bottom end build - refitted the oil pickup, the gearbox rotary seal carrier, and the sump - new gaskets and rotary seal, of course. Care needed with the seal carrier since there is enough movement on the bolts to position it half a millimetre or so out of line, which will allow a leak. The sump gasket compresses as it's fitted, so you need to tighten things up two or three times. 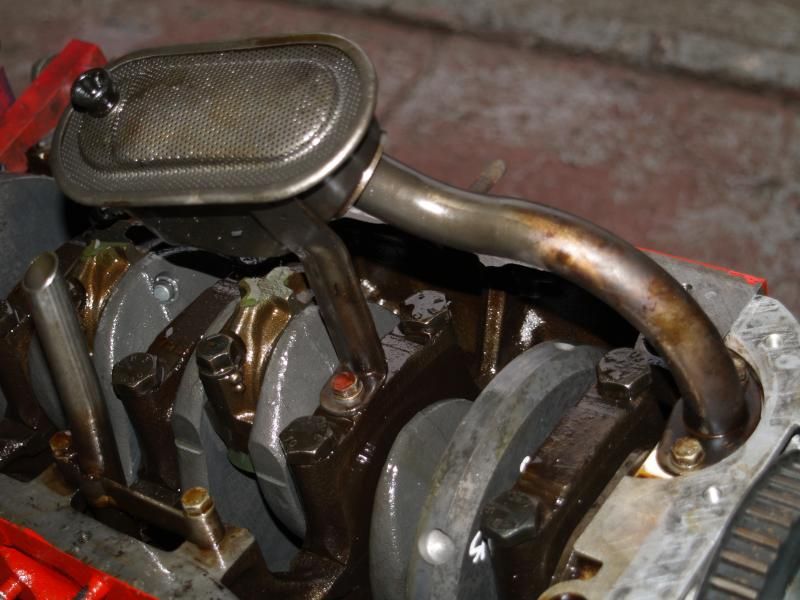 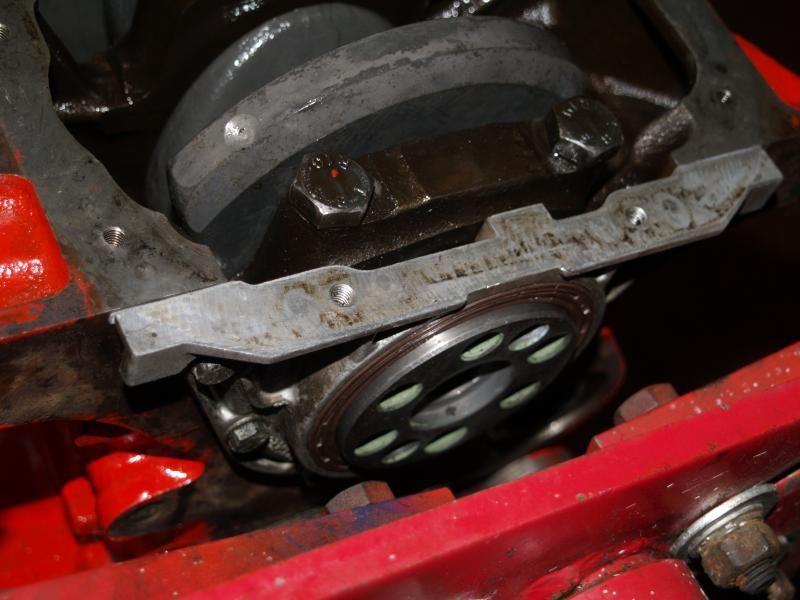 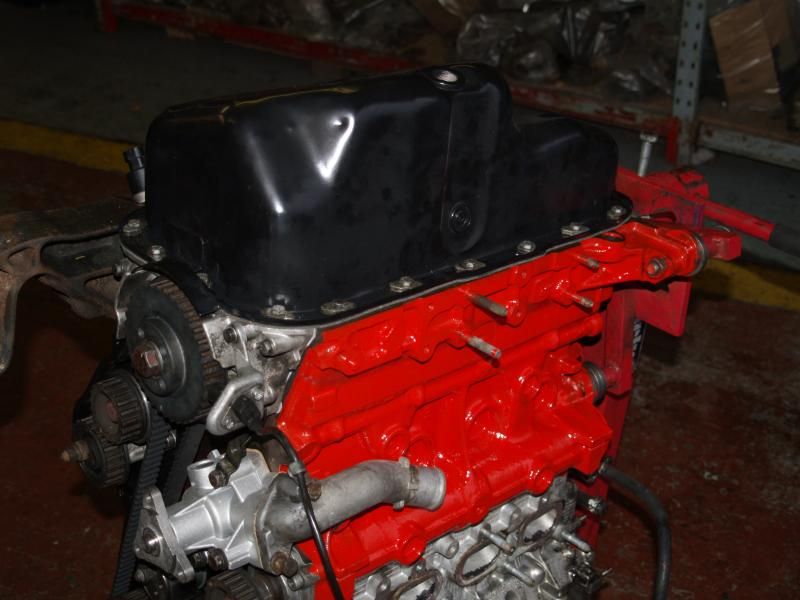 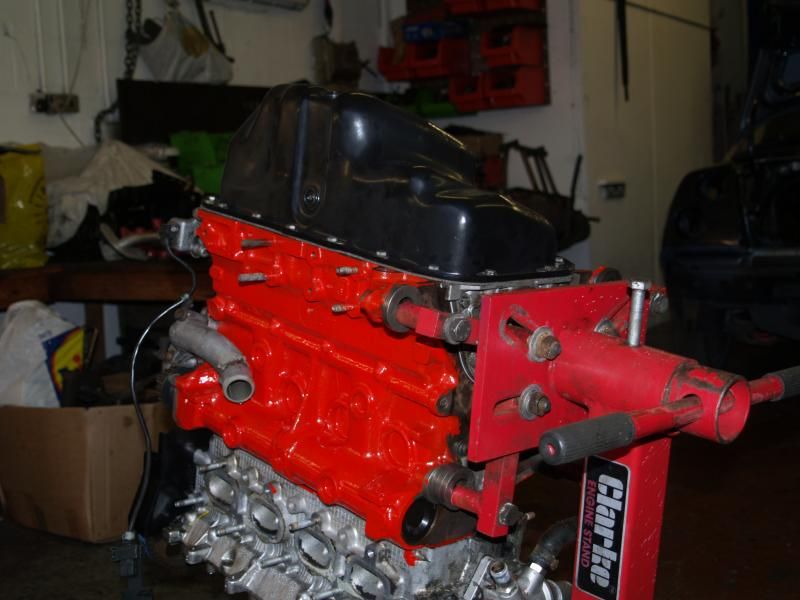 Finally, back to the body: POR15 painted over all the new metal and converted rust. It's bloody expensive but it goes on a lot better than Hammerite and it has a hell of a reputation - we shall see. (I'm trying to organise an FCCUK discount with the supplier). 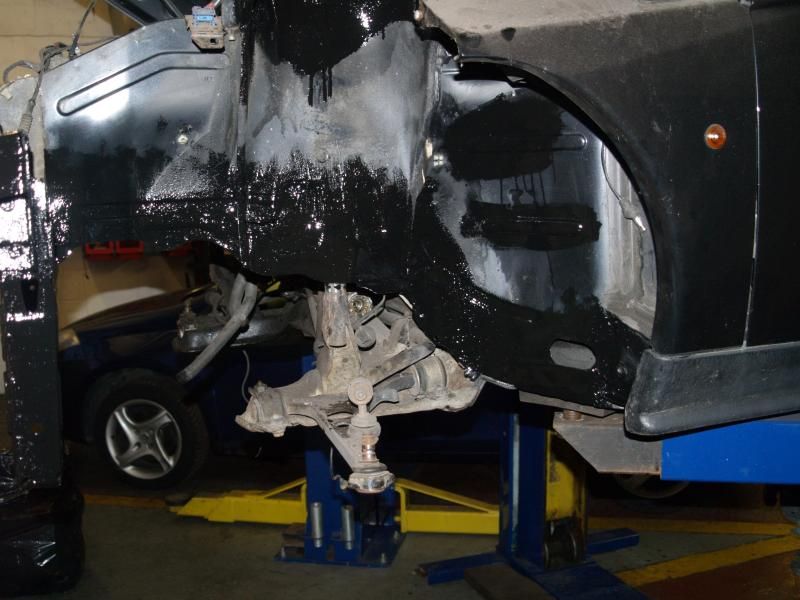 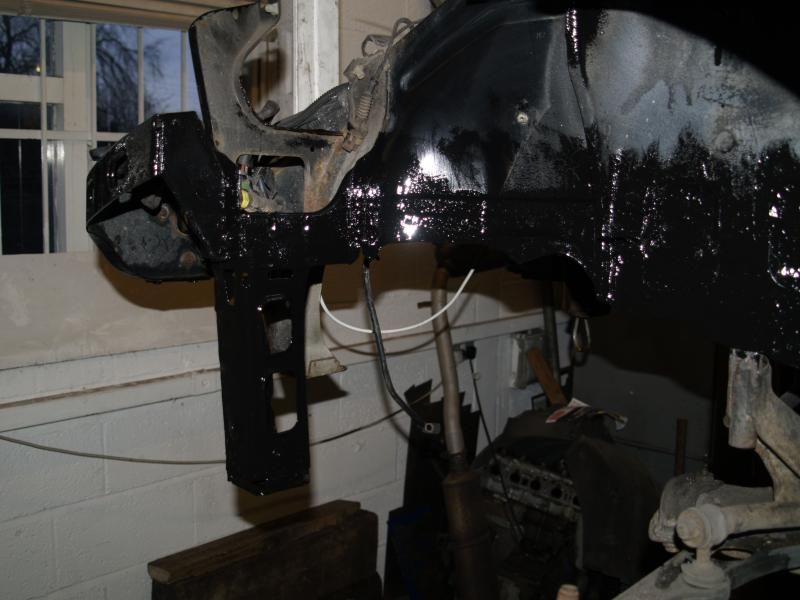 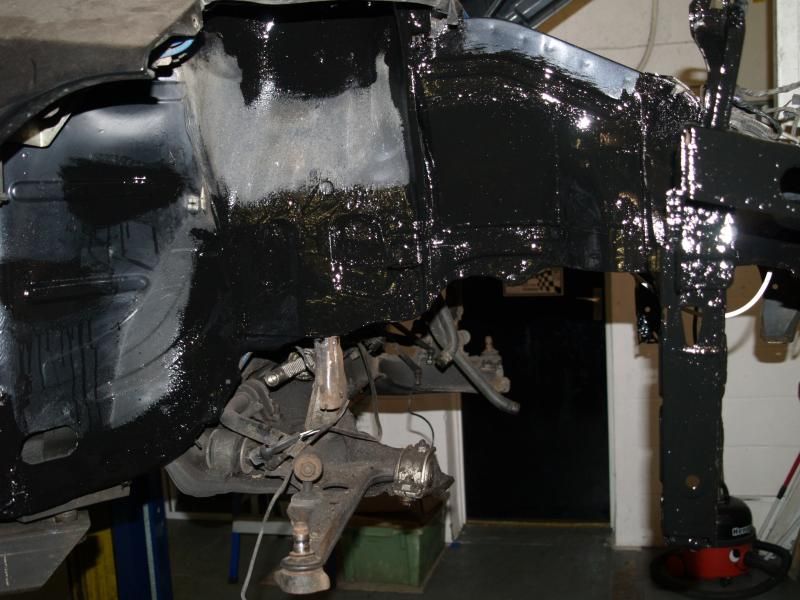
|
|
|
Re: Barnacle's Olde Original 16v Fettle
[Re: barnacle]
#1528692
07/03/2015 23:52
07/03/2015 23:52
|
Joined: Dec 2005
Posts: 33,628
Berlin
barnacle
OP
Club Member 18 - ex-Minister without Portfolio
|
OP
Club Member 18 - ex-Minister without Portfolio
Forum Demigod
Joined: Dec 2005
Posts: 33,628
Berlin
|
Decided that there was rather more surface scab in the engine compartment than was immediately obvious last week, so got busy again with the clean/rust bust/POR15 again. It would be a shame to spoil the ship for a ha'porth of tar, as they say... (We also found a couple of places on the undertray which needed attention, but we can't do them until we can get the car on the ground since we need to wheel it to open the door so the carpet above can be removed... if it's not one thing, it's another. 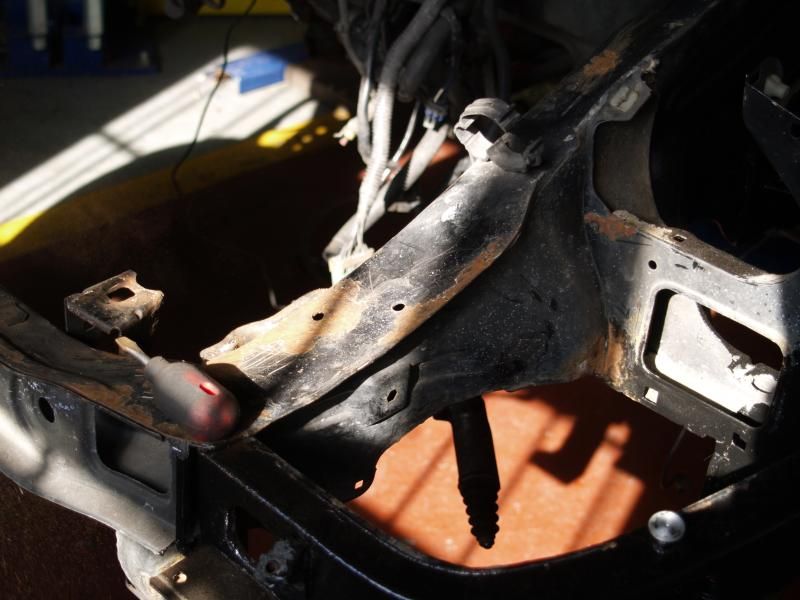 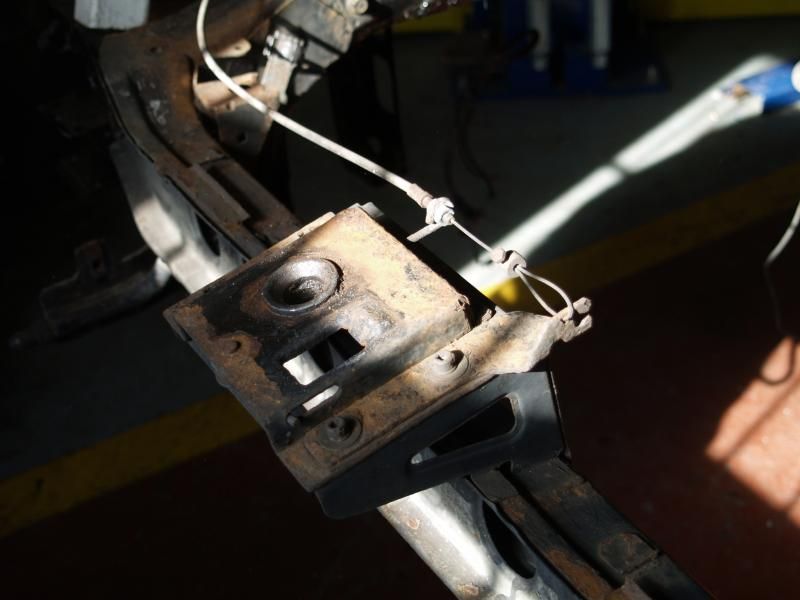 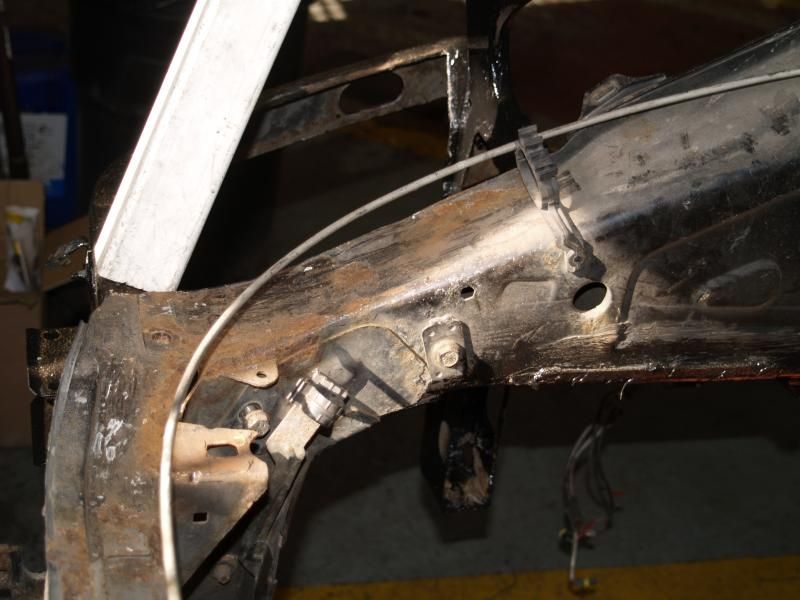 The author as the architect of his own misfortunes! 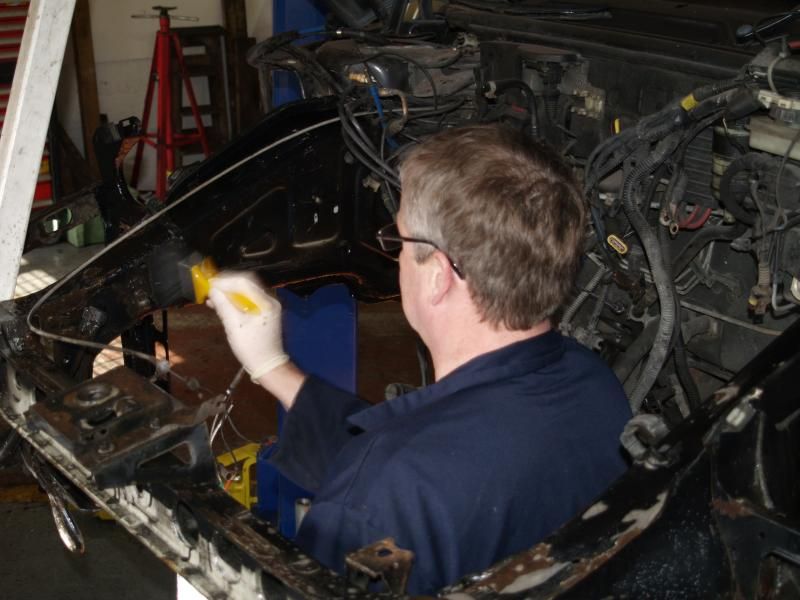 Back to the engine. The balance belt is on, with the correct phasing (see the marks) for TDC. Keep an eye on that water pump... the stay bracket is fitted, along with the first shield, which was a little tricky since the holes didn't want to line up. 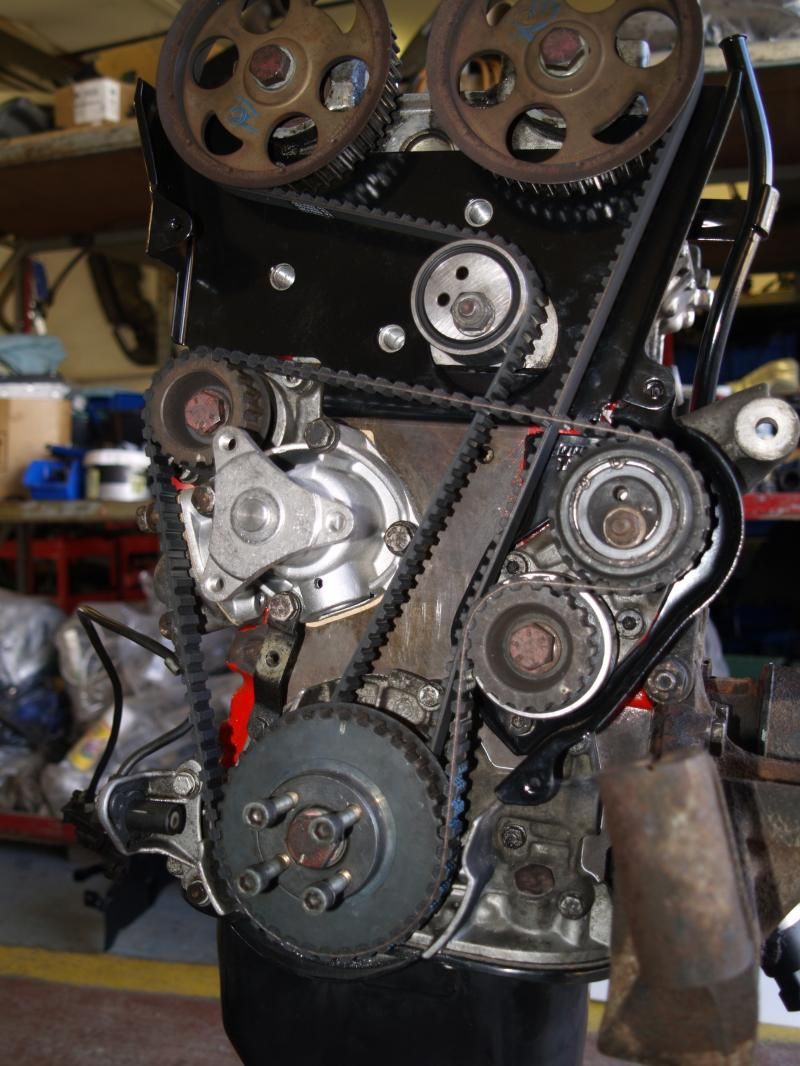 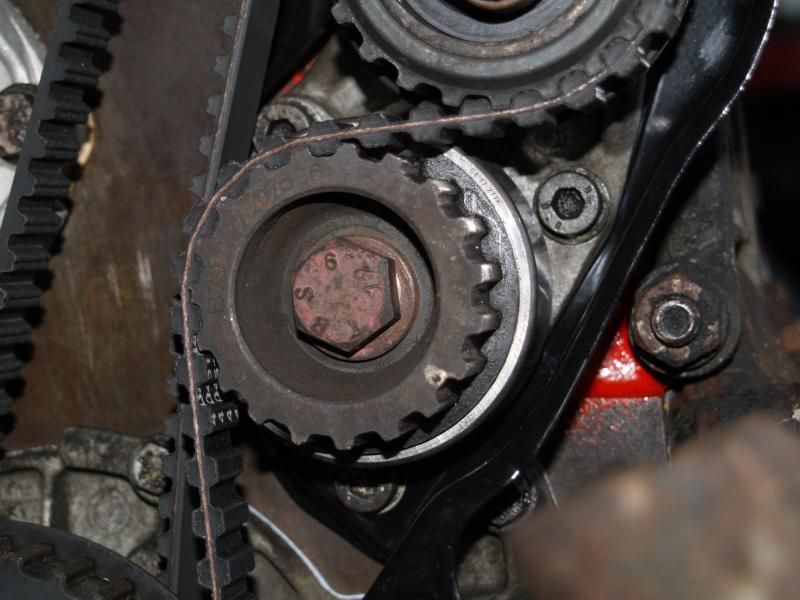 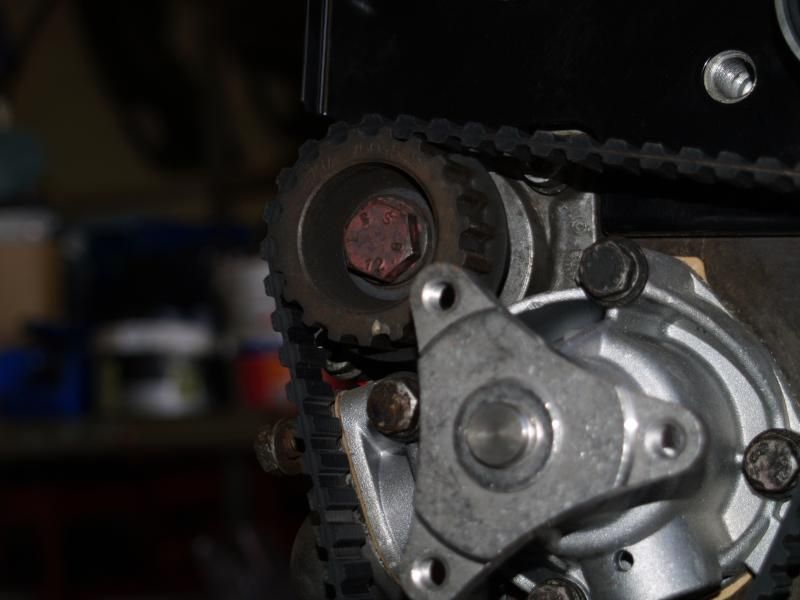 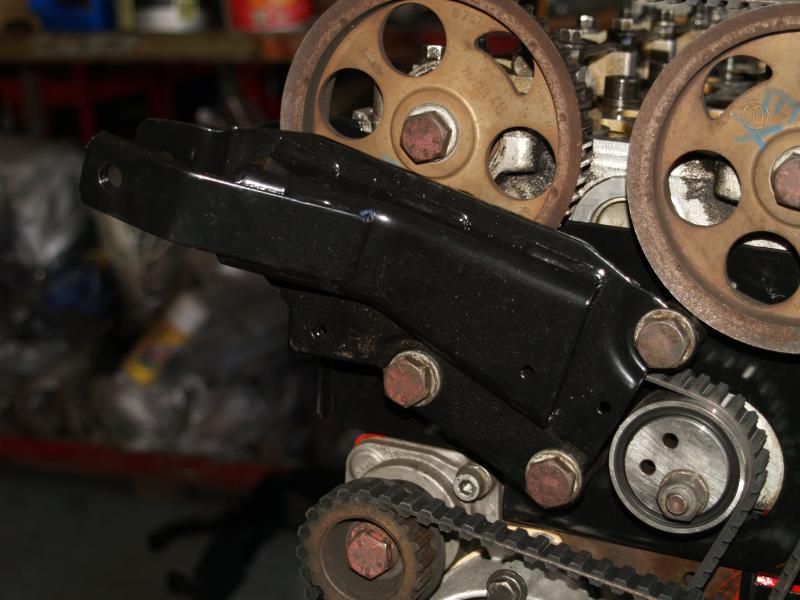 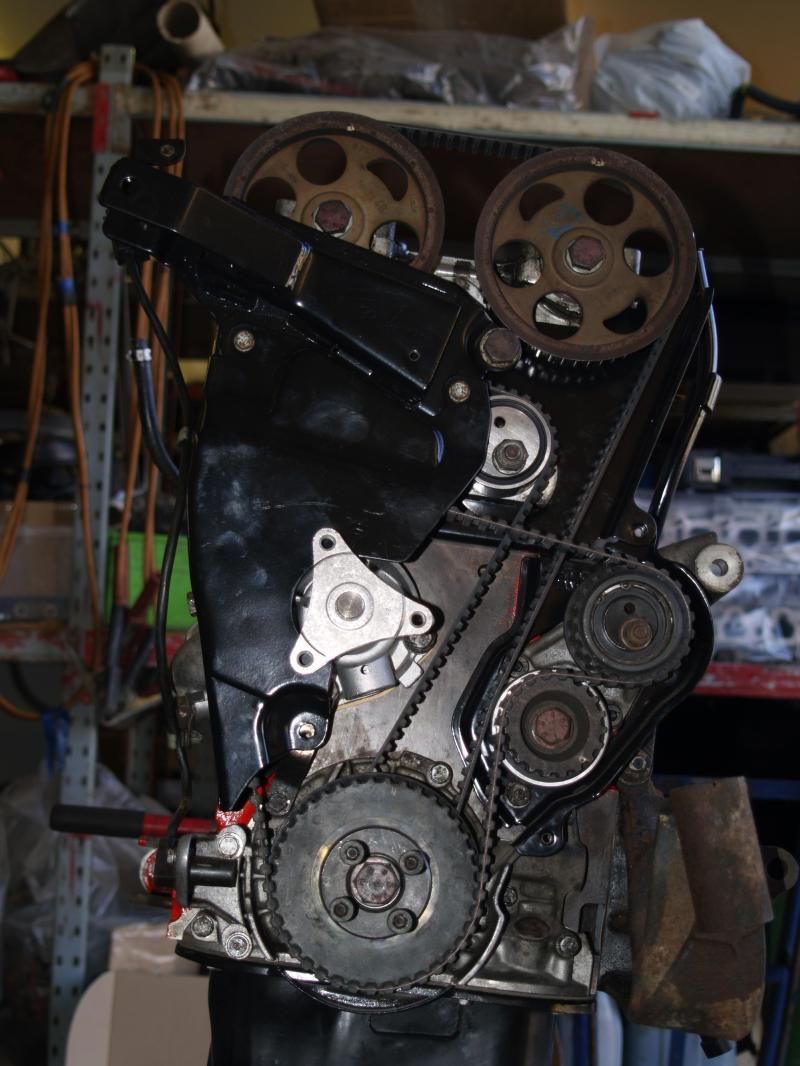 The finished cam cover, along with sundry pipework (powder coated). 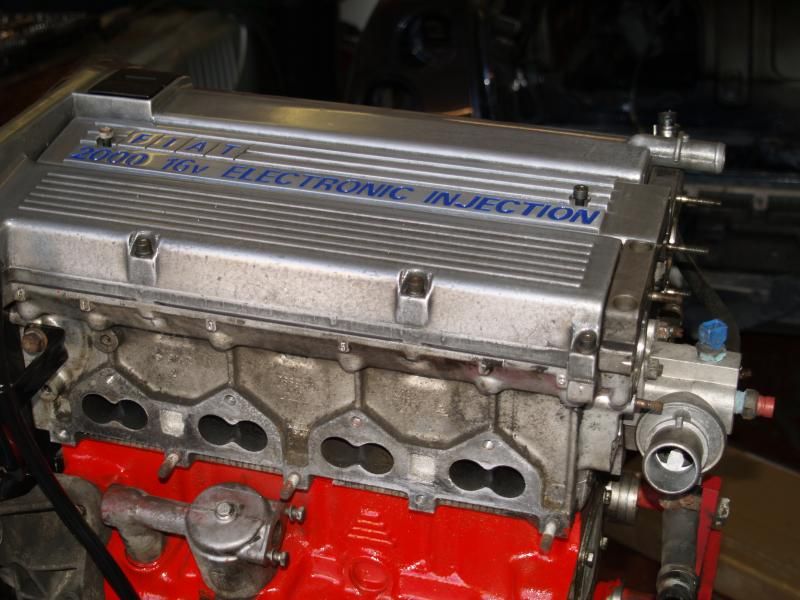 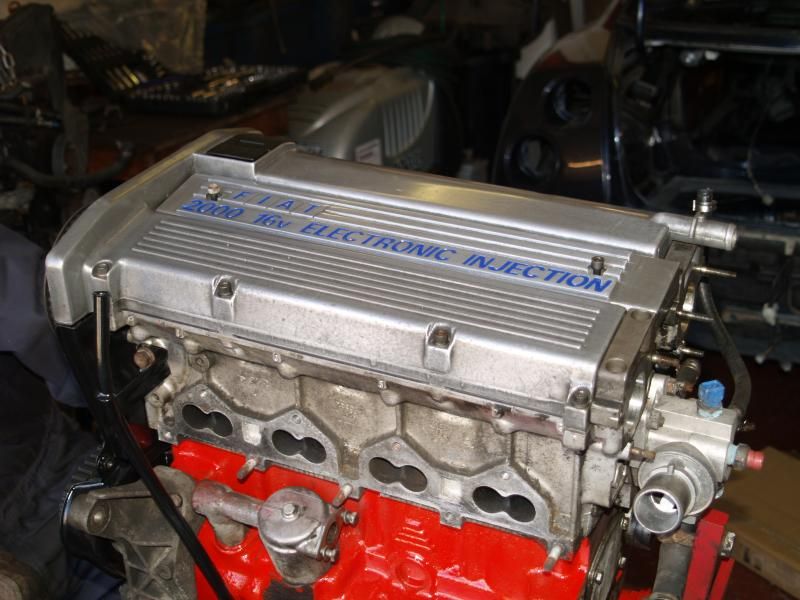 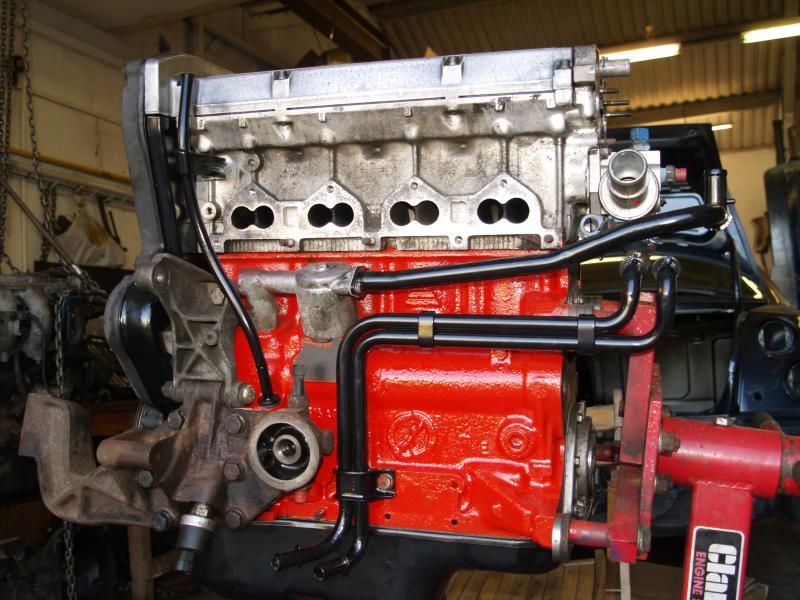 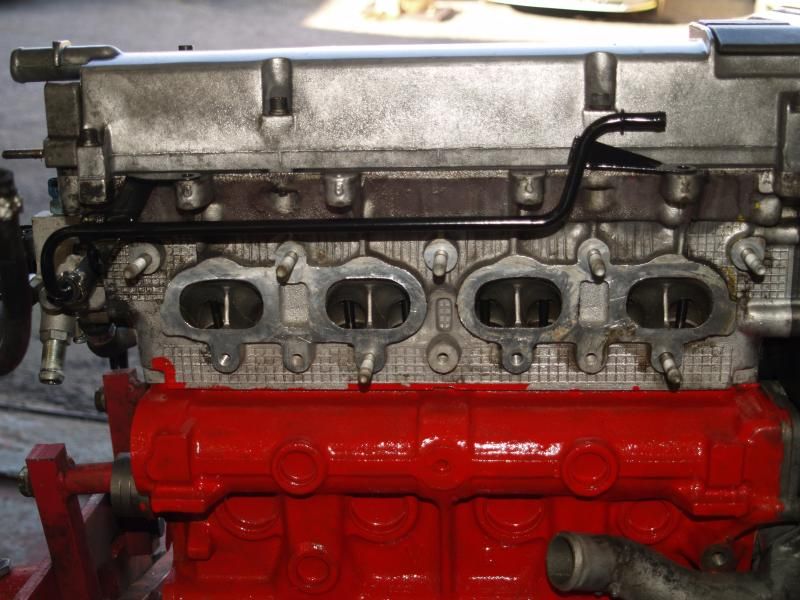 The belt end is now finished... or is it? The power steering bracket would not fit over the water pipe, which is attached to the water pump, and which for some reason was about four millimeters out of position. Reversion to an older plastic impeller type resolved the issue - one to complain about to the supplier. The second photo is a little unclear, but shows the correct position for the water pipe. With that pump fitted, the shield, which bolts onto one of the outlet pipe bolt, dropped straight into place... 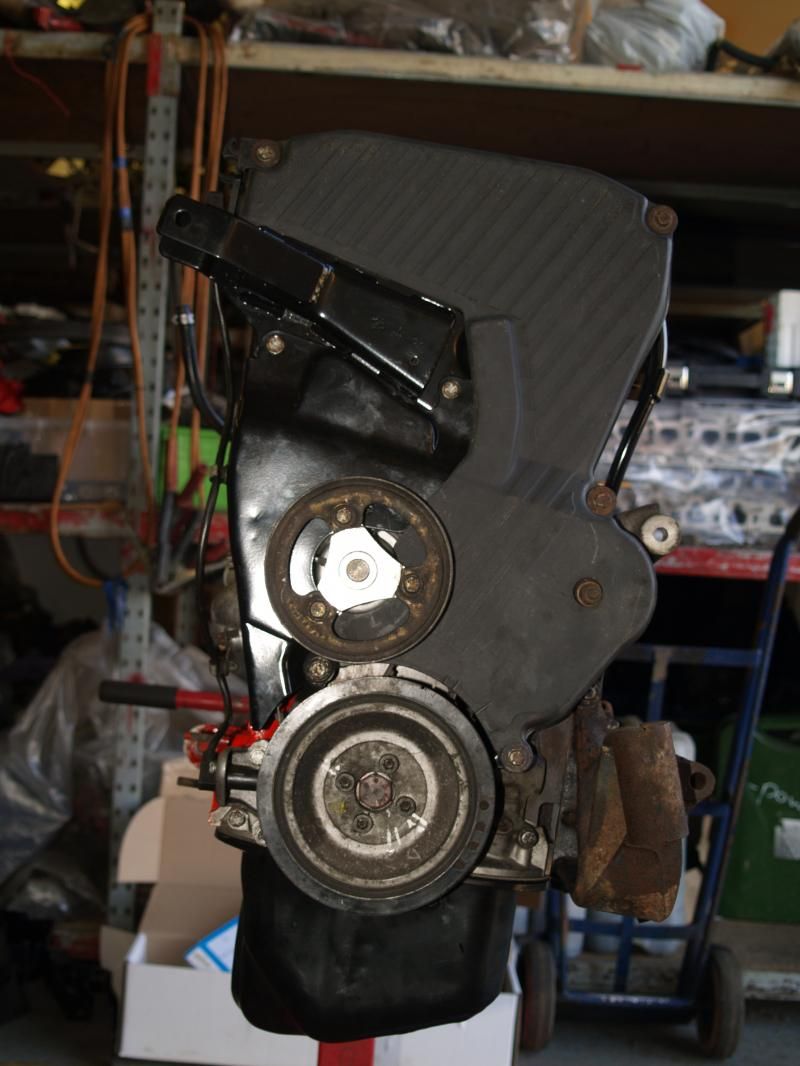  The steering pump fitted, and the ICV, and then we're ready for the clutch, right? 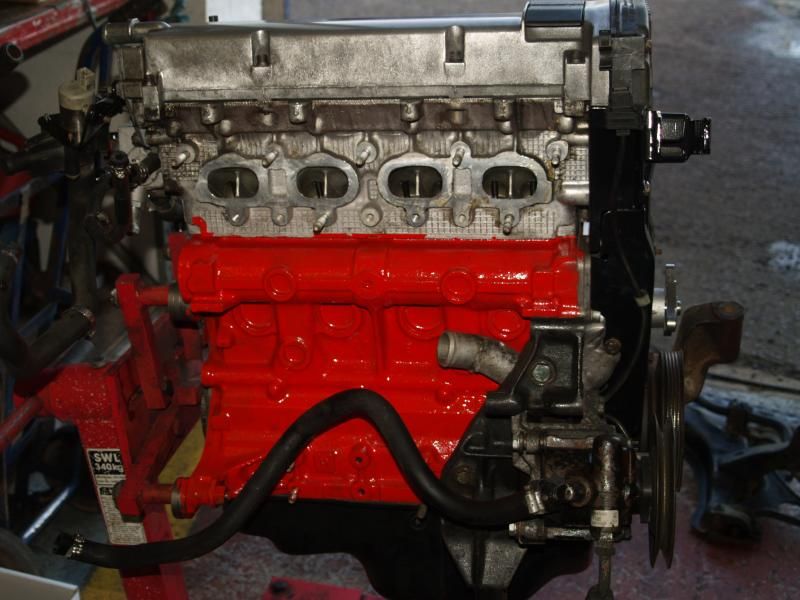 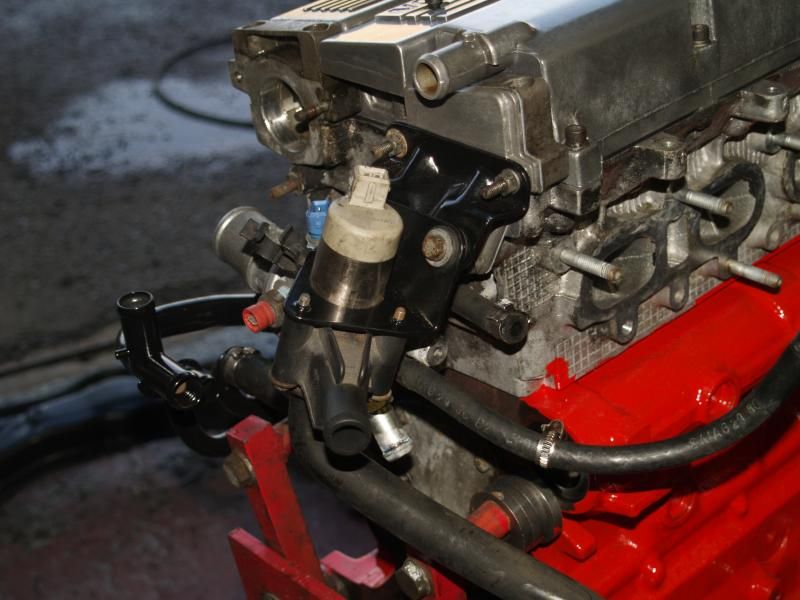 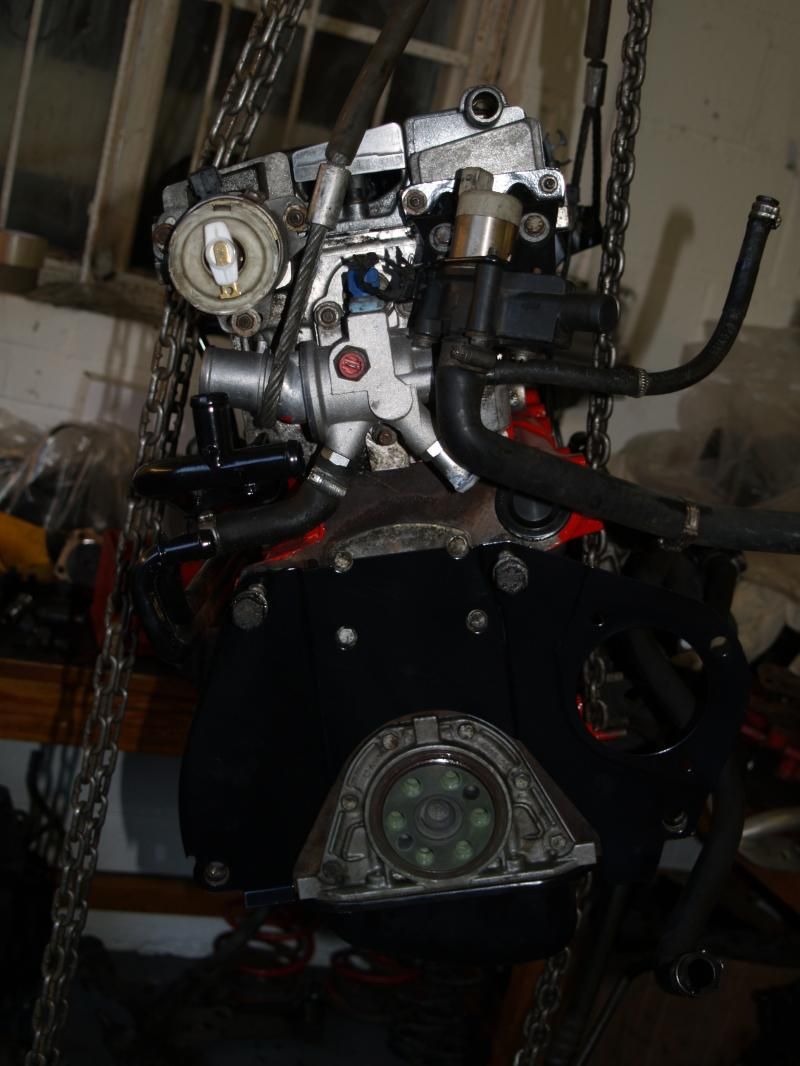 Well, we would be, if only we had the advertised release bearing. Look at what's written *under* the 'three part clutch kit with bearing' label... not a happy bunny, and rude phone calls will be the order of the day on Monday. 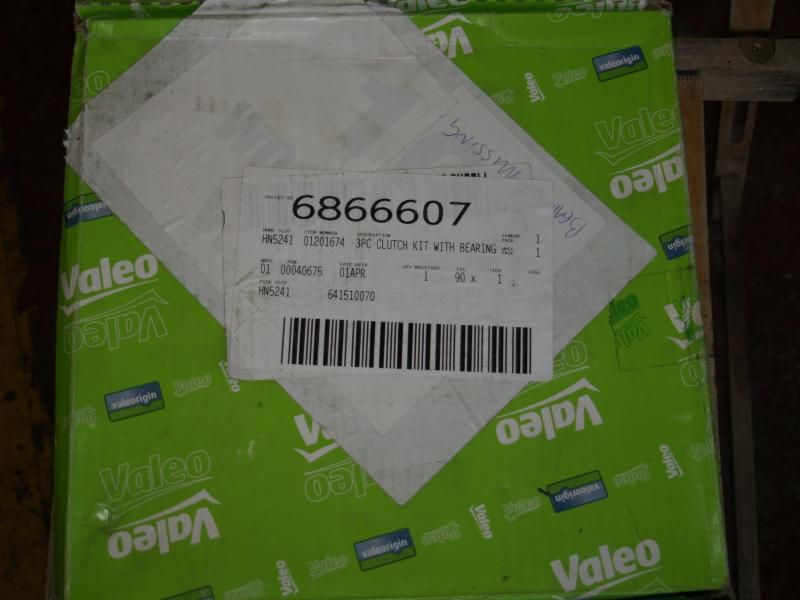 So the engine has gone to bed for a couple of weeks, and we finish with some curious cut-off parts on the front frame. It's been noticed before that this chassis is very early, and it looks as if someone in the factory changed their mind about something... 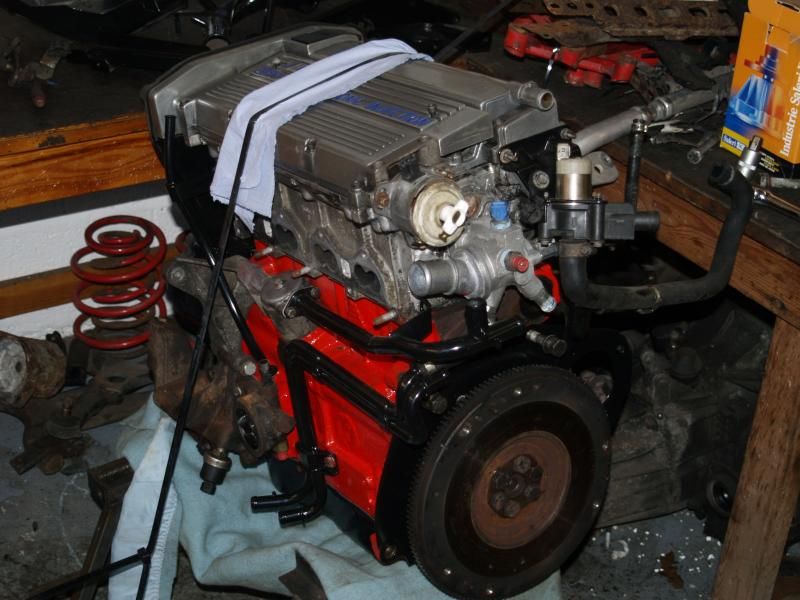 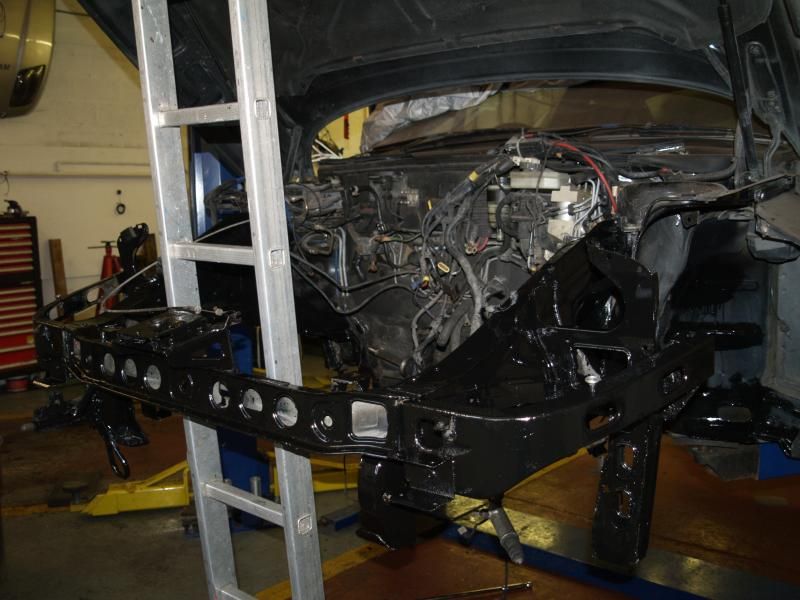 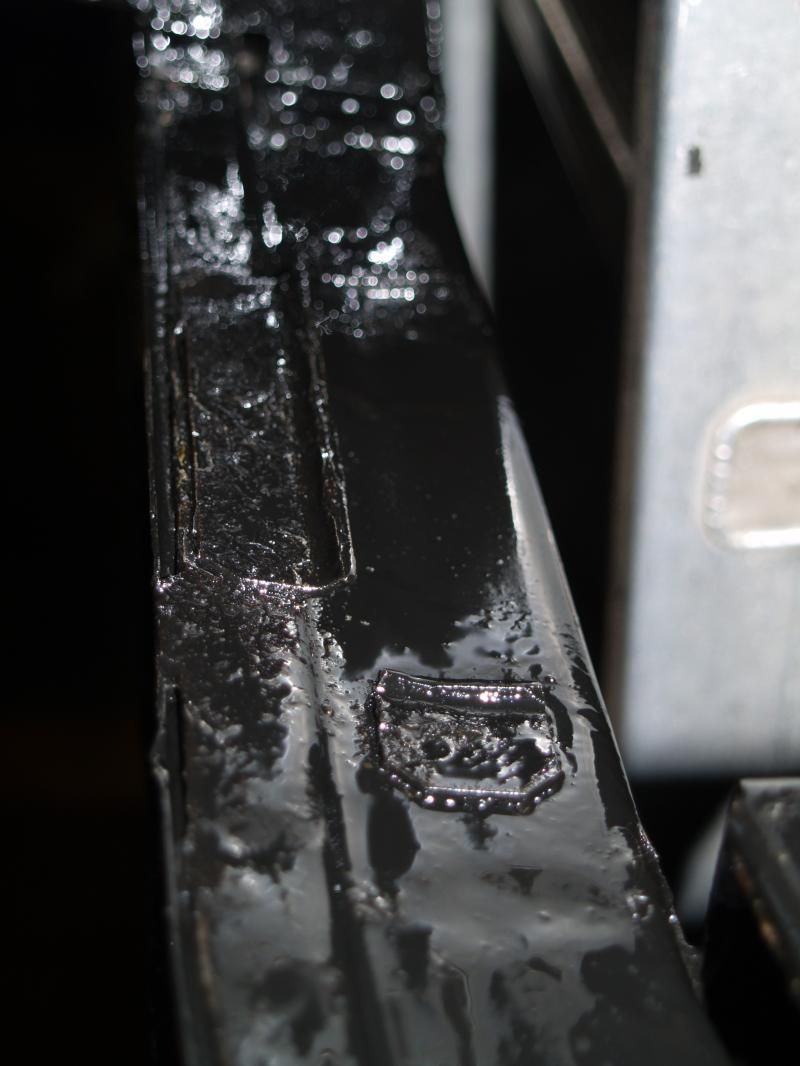 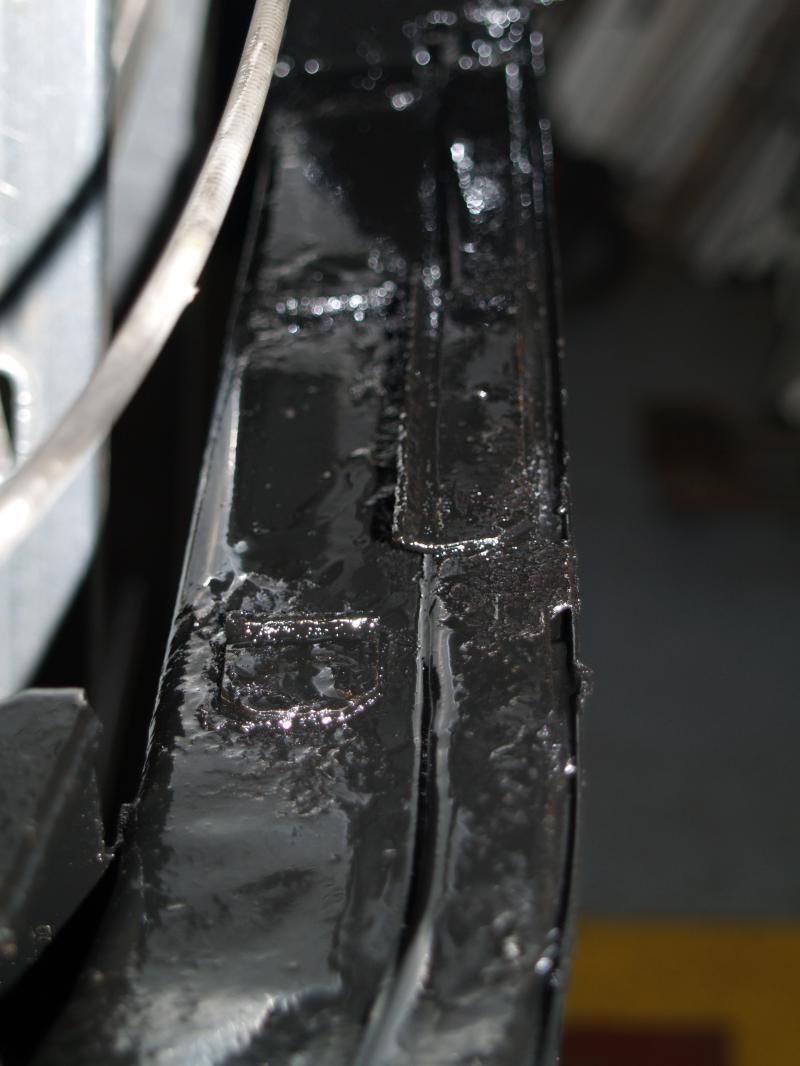
|
|
|
Re: Barnacle's Olde Original 16v Fettle
[Re: barnacle]
#1530906
21/03/2015 23:52
21/03/2015 23:52
|
Joined: Dec 2005
Posts: 33,628
Berlin
barnacle
OP
Club Member 18 - ex-Minister without Portfolio
|
OP
Club Member 18 - ex-Minister without Portfolio
Forum Demigod
Joined: Dec 2005
Posts: 33,628
Berlin
|
After some persuasion ("You should have told us within ten days") the supplier delivered a replacement clutch release bearing, and with a new input shaft seal, Joe's got the gearbox finally on the engine. He's also been busy replacing the brake lines with shiny new cupro-nickel lines: 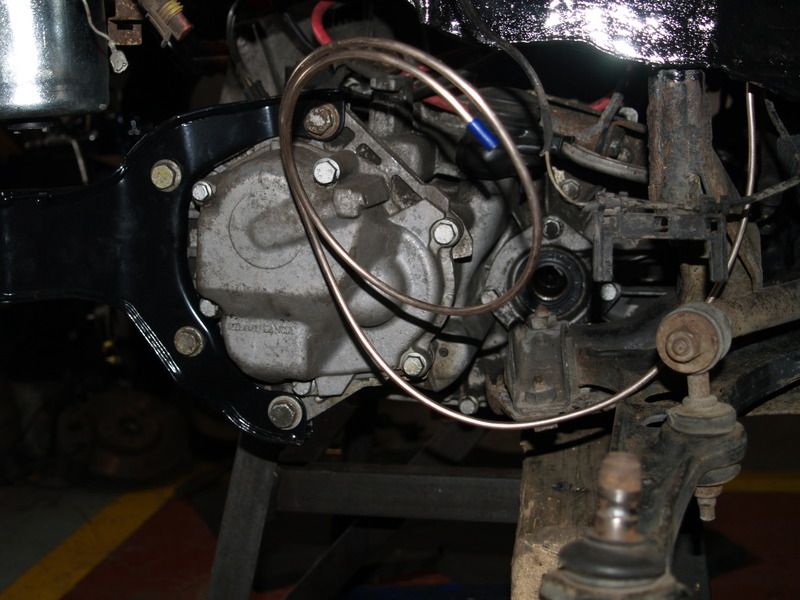  Then the engine and box goes back in the bay: 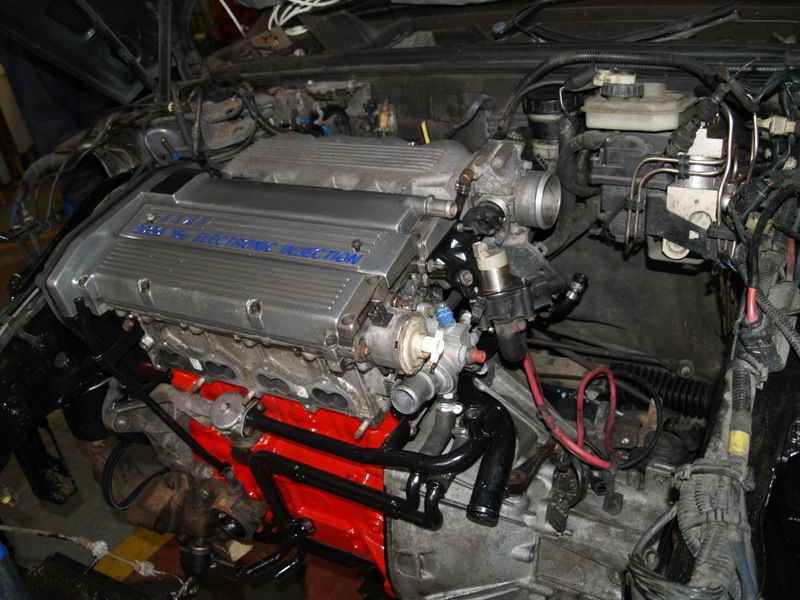 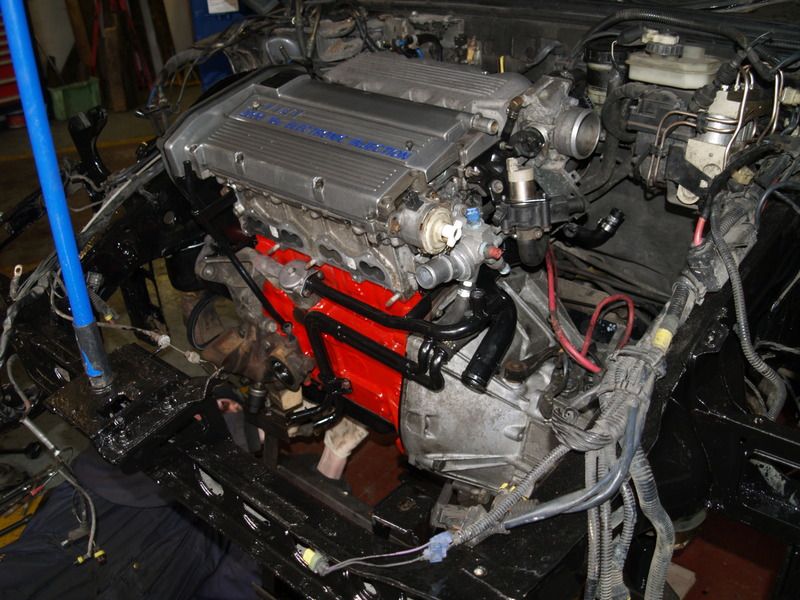 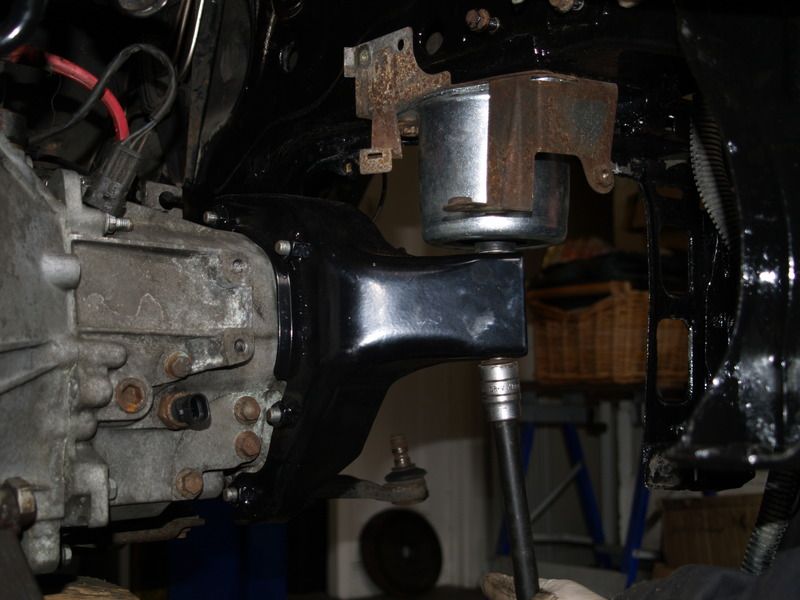 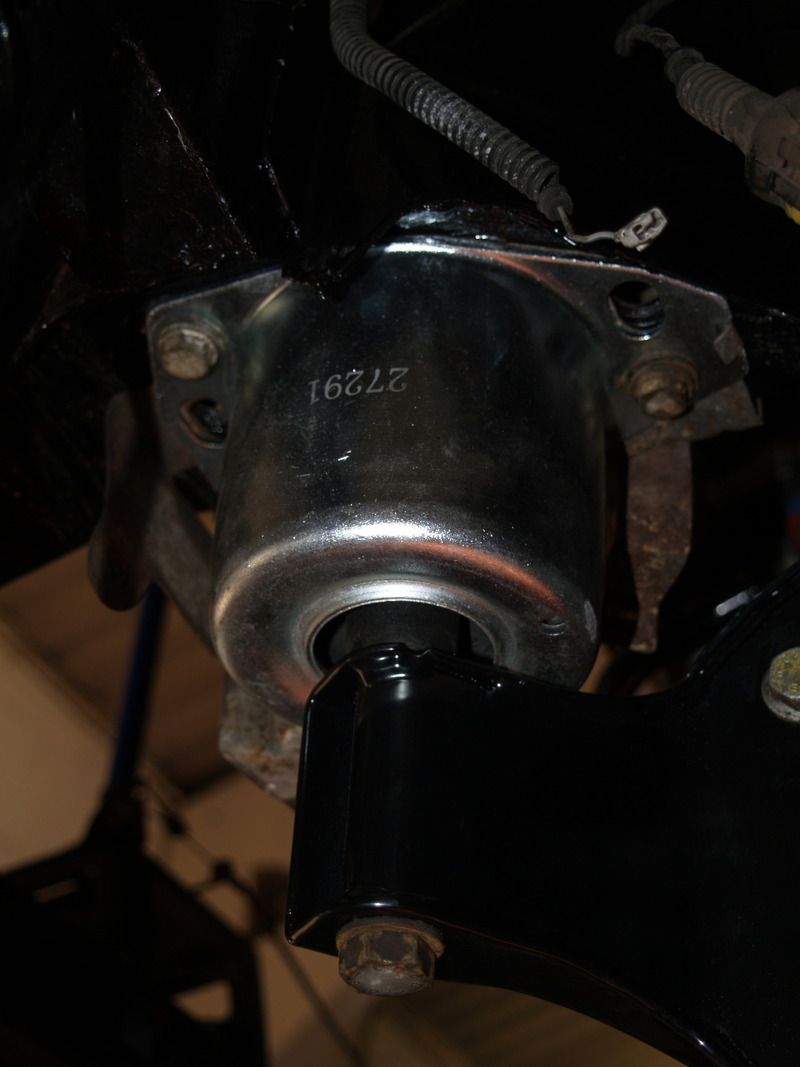 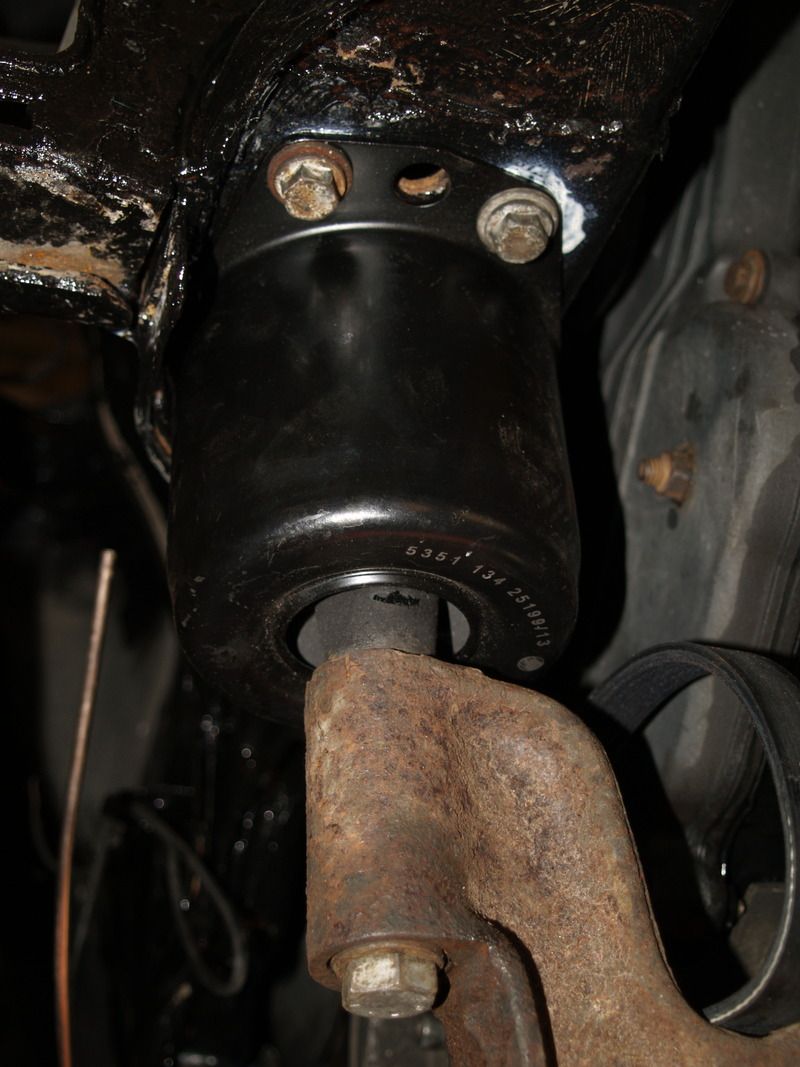 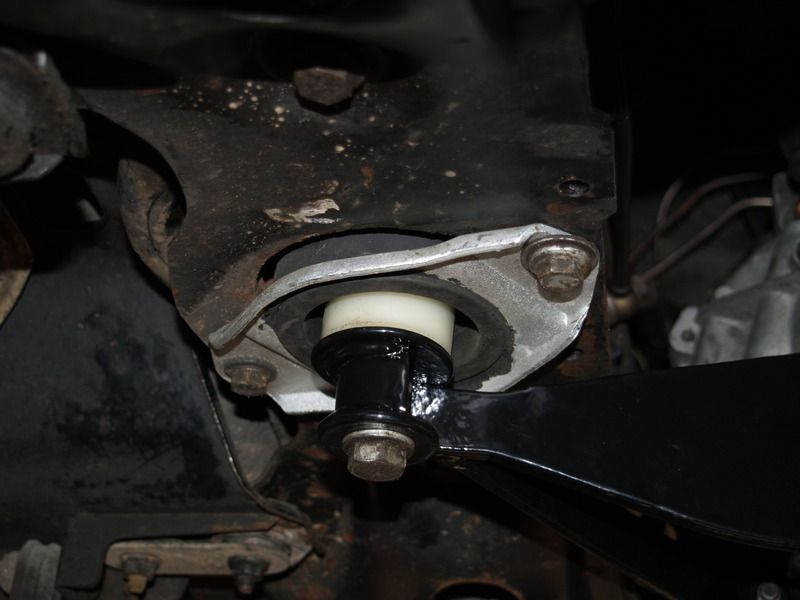 The bolts holding the subframe up were a little thinner than they should have been, so were replaced:  The plumbing around the thermostat is installed: 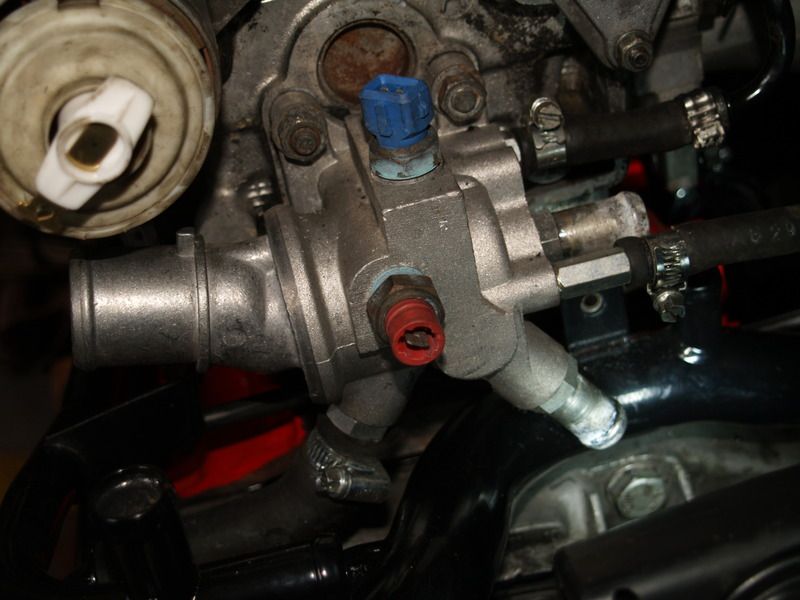 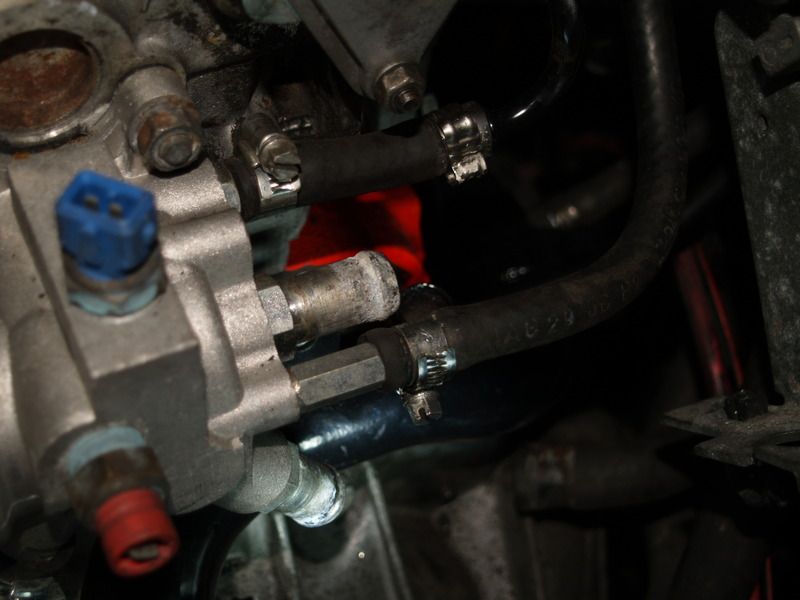 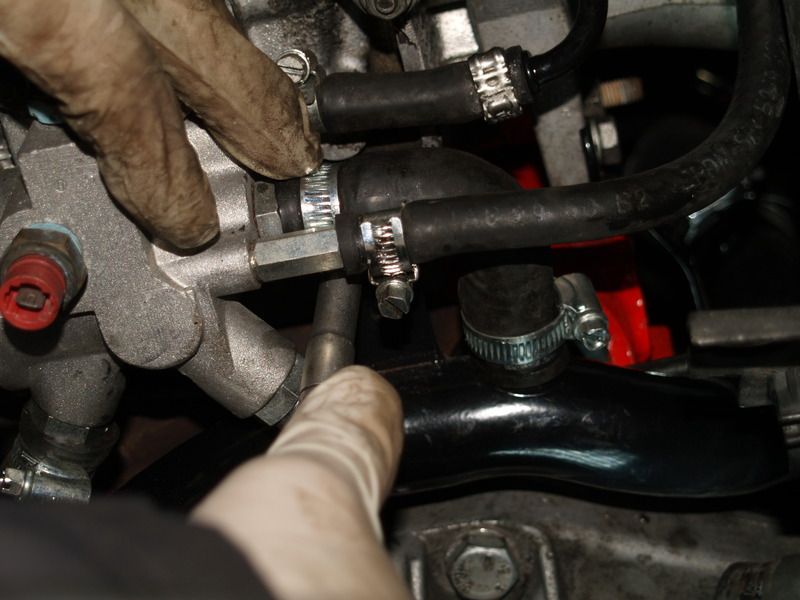 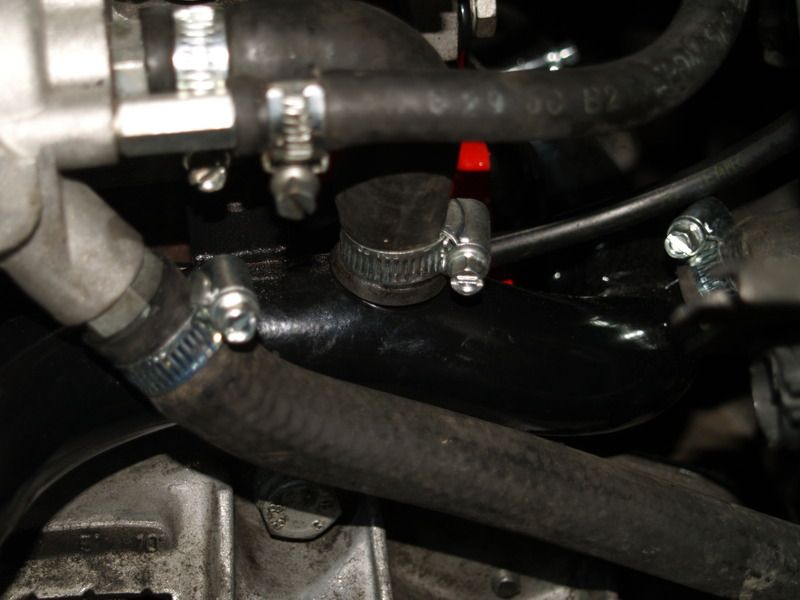 Then the heat exchanger, alternator, and associated wiring: 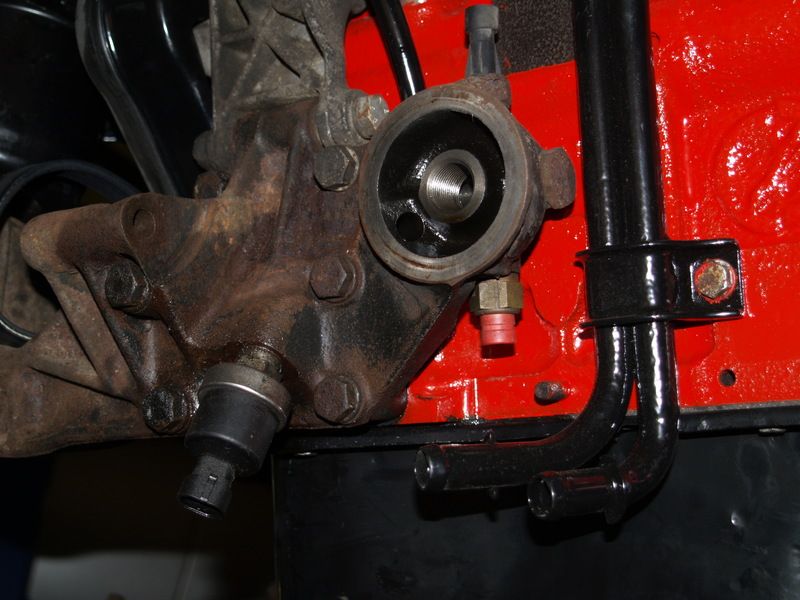   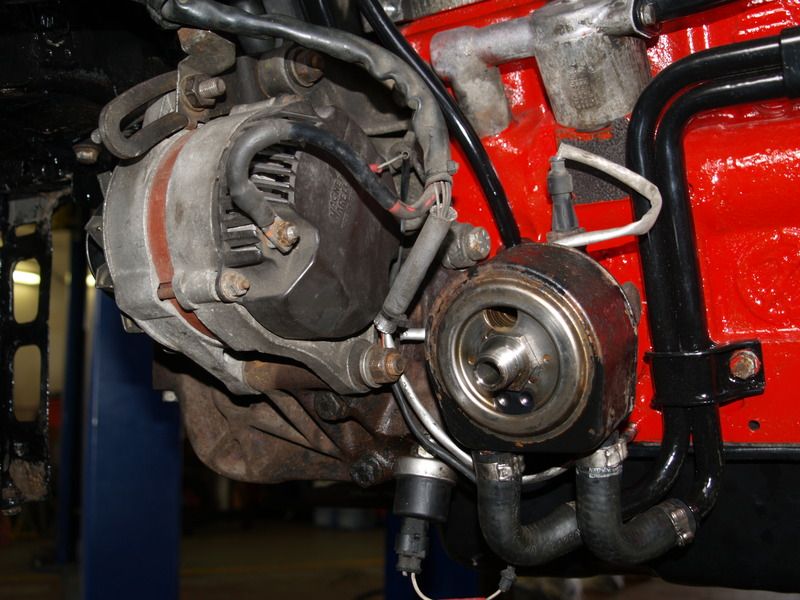 Essential earthing points: 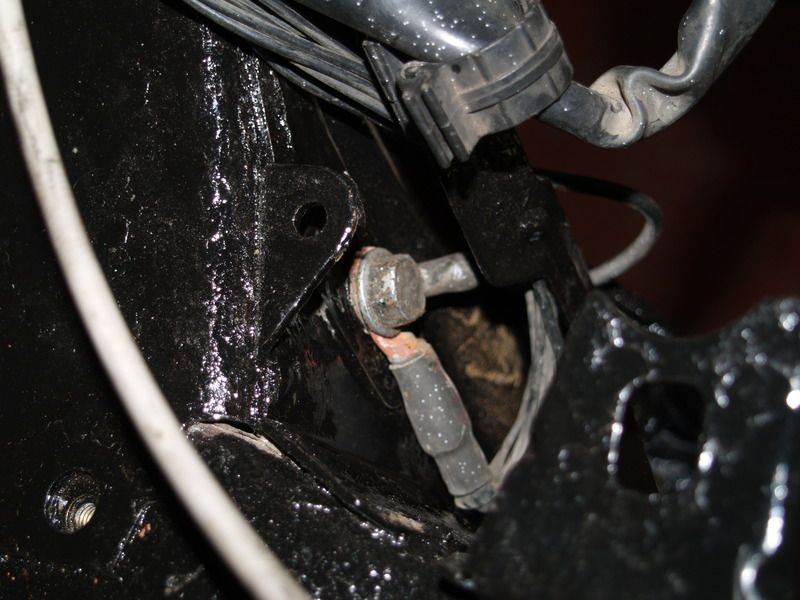  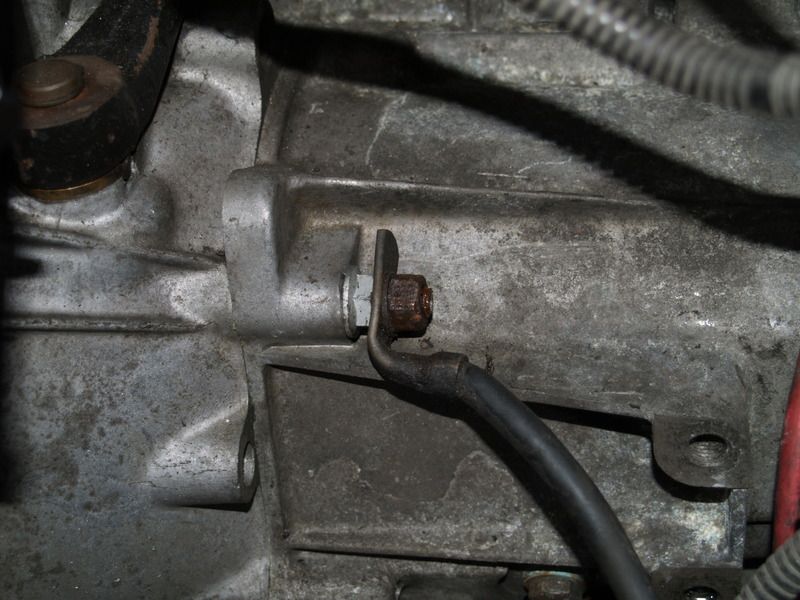 The idle control valve (ICV) and wiring 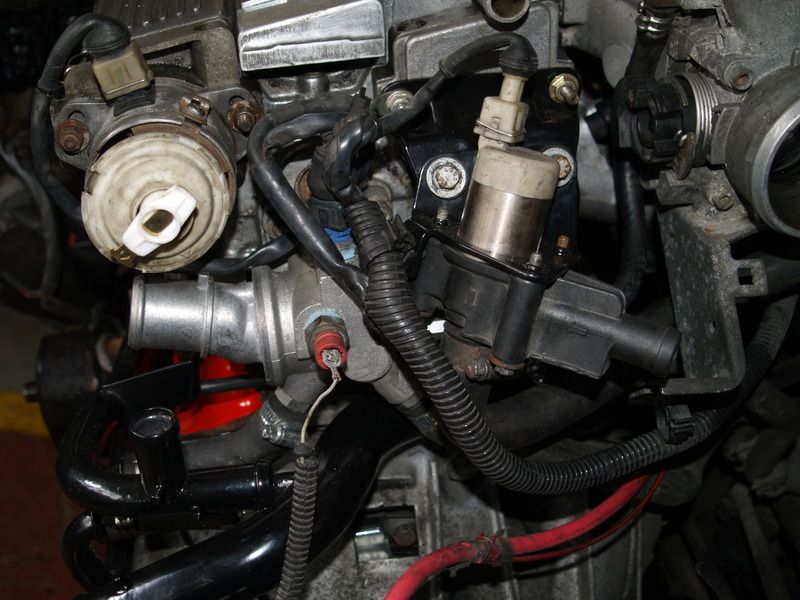 Four into two into one (shame we accidentally powder coated the heat shield... oh well.) 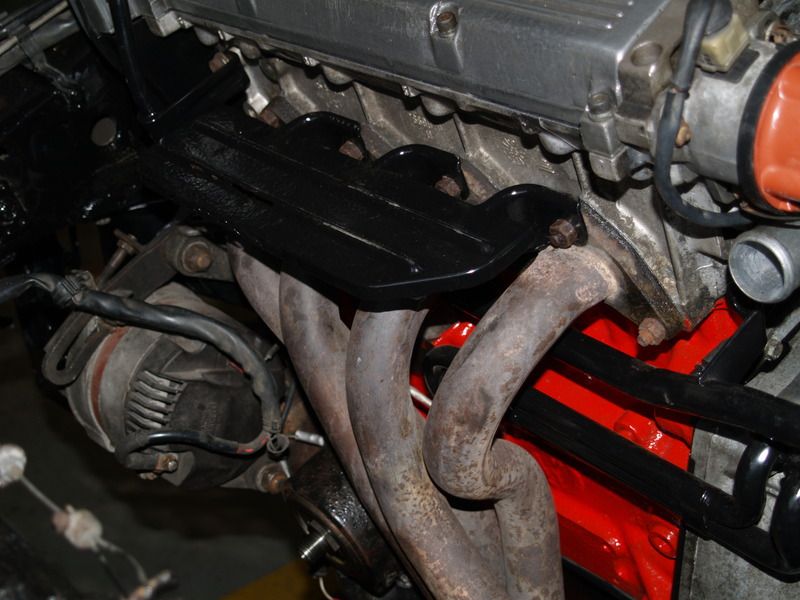 And the clutch slave servo - bolted in on a 16NA. We'll be making a single braided pipe from the master to the slave, given the difficulty of obtaining either new slave hard pipes or pipes to make as new. 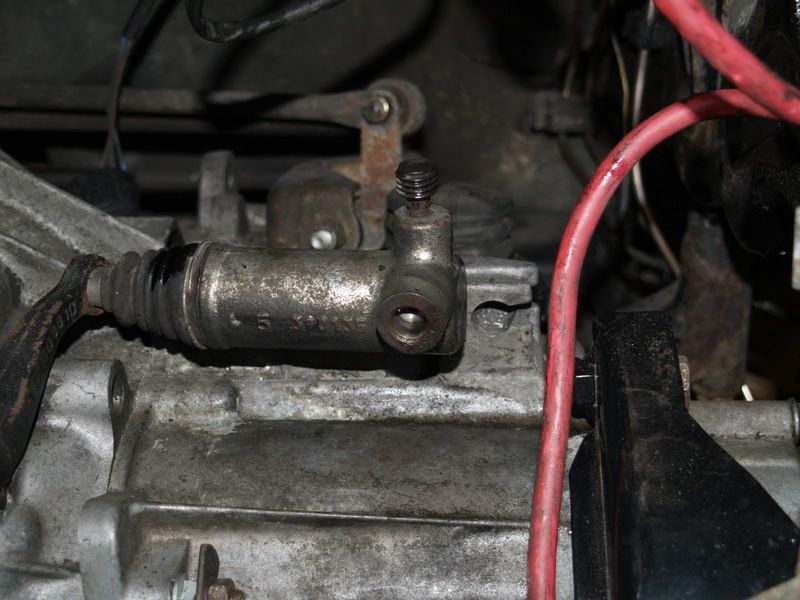 The powder coated radiator support bar, the radiator, and we're good to go. 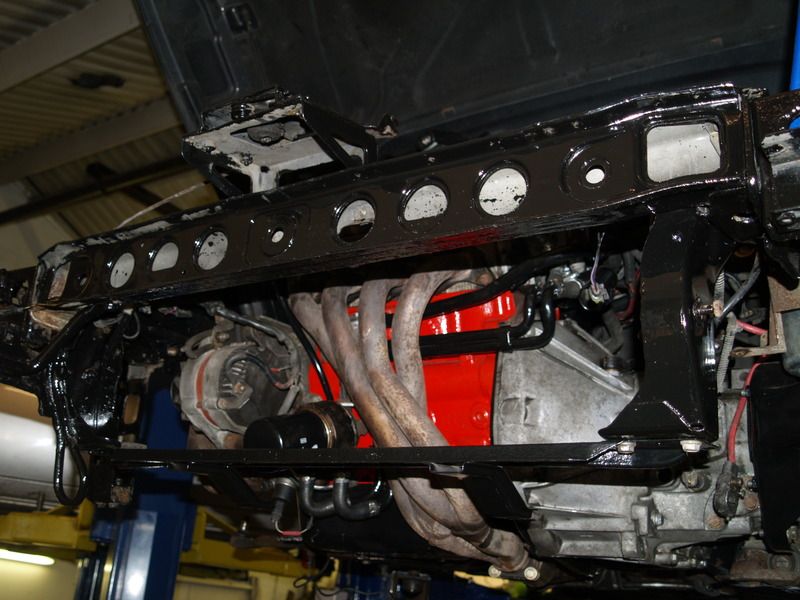 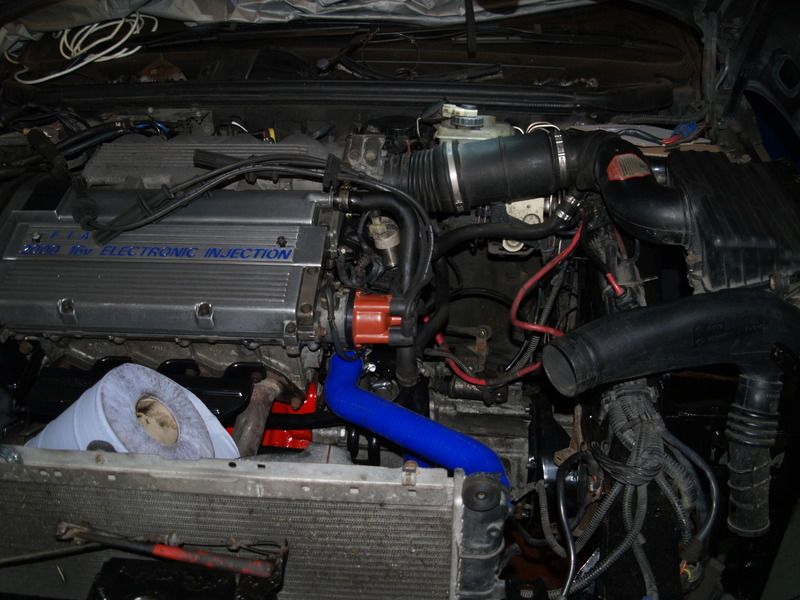 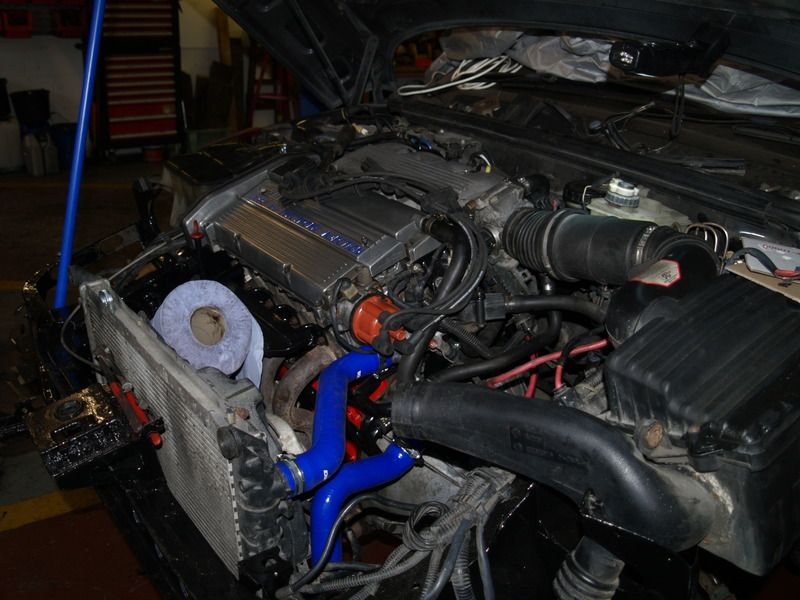 Filled the gearbox, the engine (using a cheap 10W-40 for the first thousand miles or so), and the cooling system. Time to see if it starts. First, prime the oil; plugs out and the injectors disconnected, and let the engine turn over on the starter for a couple of minutes. This isn't quite fast enough to maintain a pressure indication on the gauge, but ensures that the oil gets to everywhere it needs to. Checking through the filler hole shows the oil is getting pumped around. Plugs in, connect the HT, and the injectors. Does it start? No. Investigate... no spark. Some muppet has inadvertently connected the spark coil to the sidelight cluster loom. Oh well. Now does it start? No. Hmm, perhaps we got the fuel go and return lines the wrong way round? No... ah, wait, petrol isn't coming out of either pipe and we can't hear the pump. Turns out some *other* muppet has removed the inertia switch connector. To access this one need only open the door, but the two-post lift won't allow this, and as we haven't put the front wheels on, we can't drop it off. So there is much amusement as we take turns dangling in through the driver's window and try to connect this plug and socket, upside down and legs waving. Eventually we succeed. The pump priming now works, and makes horrible noises as it blows air through the pressure regulator. After half a dozen primes it runs quietly, so we try and start again. Woohoo. It runs, and the pressure is right where it should be. Which is nice.
Last edited by barnacle; 22/03/2015 00:19.
|
|
|
Re: Barnacle's Olde Original 16v Fettle
[Re: barnacle]
#1531912
28/03/2015 23:11
28/03/2015 23:11
|
Joined: Dec 2005
Posts: 33,628
Berlin
barnacle
OP
Club Member 18 - ex-Minister without Portfolio
|
OP
Club Member 18 - ex-Minister without Portfolio
Forum Demigod
Joined: Dec 2005
Posts: 33,628
Berlin
|
We're getting there... let's start with an end view of the gear box, with the new plumbing and (this side only) a replacement OEM wishbone. 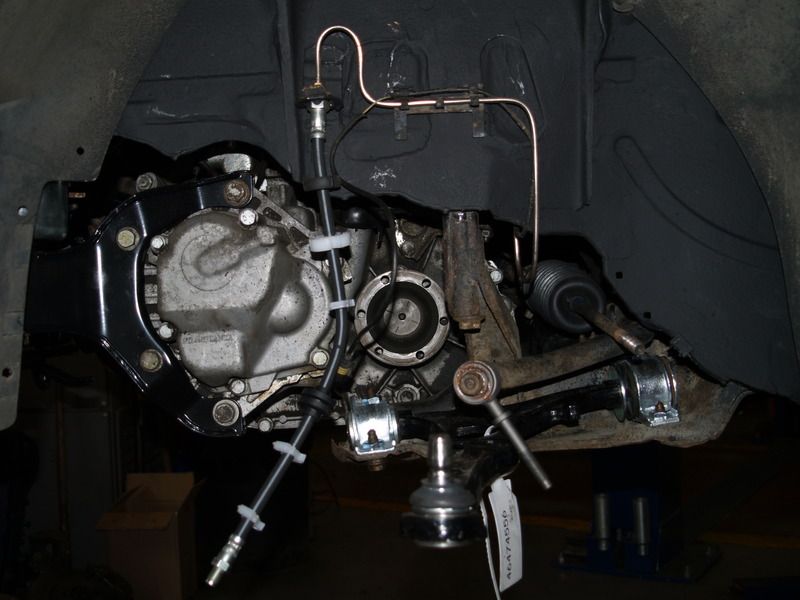 One of the nastiest stickiest jobs on a car is changing the CV joint gaiters. It's *much* easier if (a) the correct gaiters are provided, (b) it's not necessary to take the joint to bits to clean it out of dried grease, and (c) the splines aren't rusted into the joint. It turned out though that the shaft with the rusted splines had some nasty wear at the other end, so a s/h from Joe's collection went in on that side. 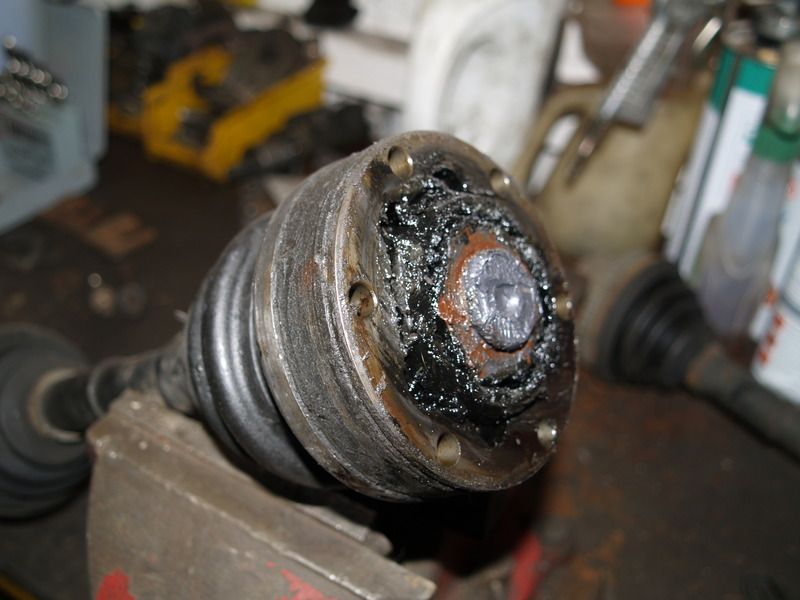 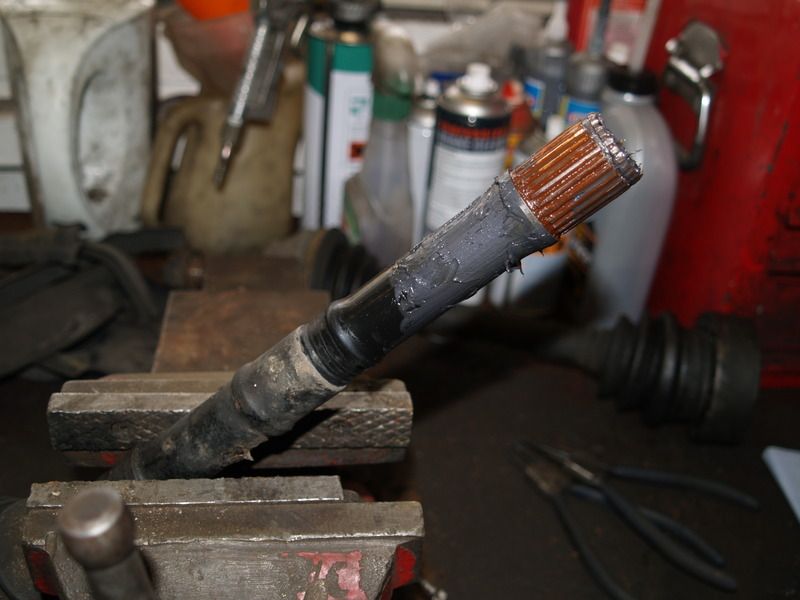 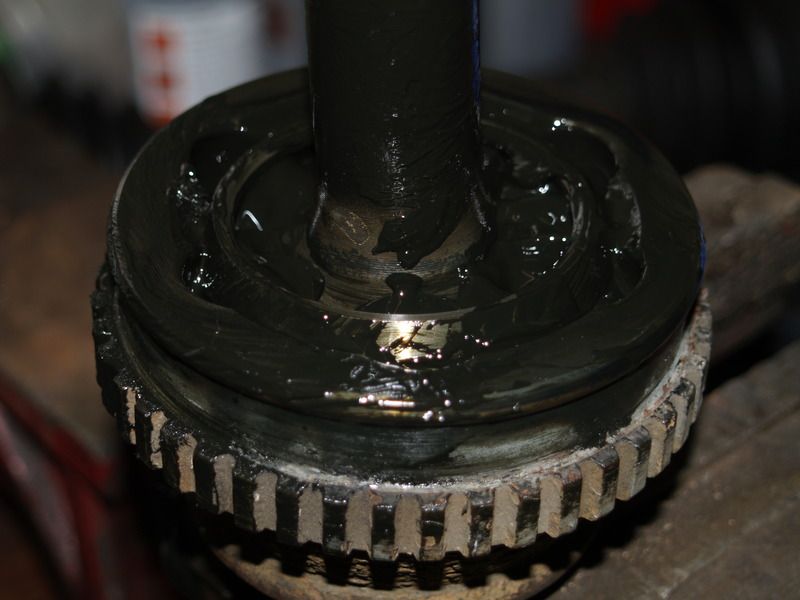 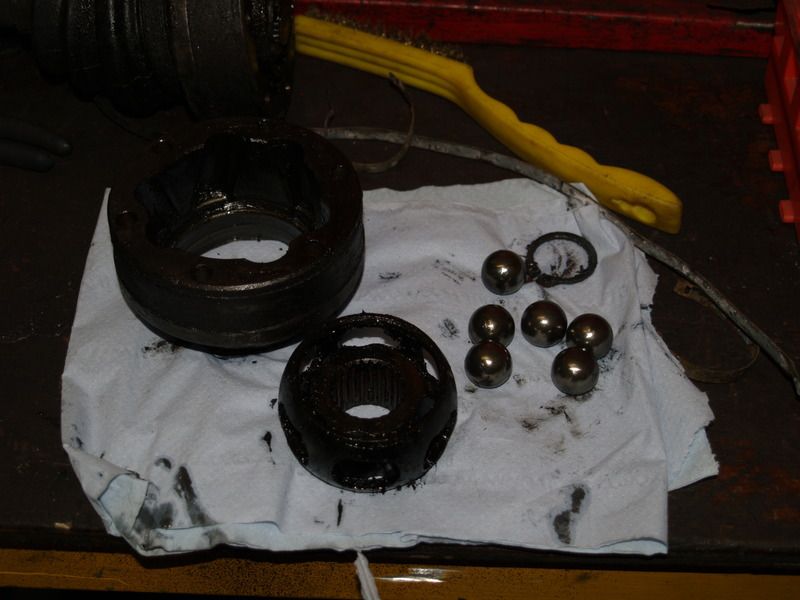 It turns out that the cage and balls don't go back in the place you might expect them to, because the slots in both parts are sloped in odd directions... The powder coated slam panel has all its bolt holes drilled out (Joe broke one of my drills last time, and I broke one of his this time, then he broke one of his, so I suppose I have to break one of mine to equalise...) and the crash foam fitted - all holes with the proper bolts. 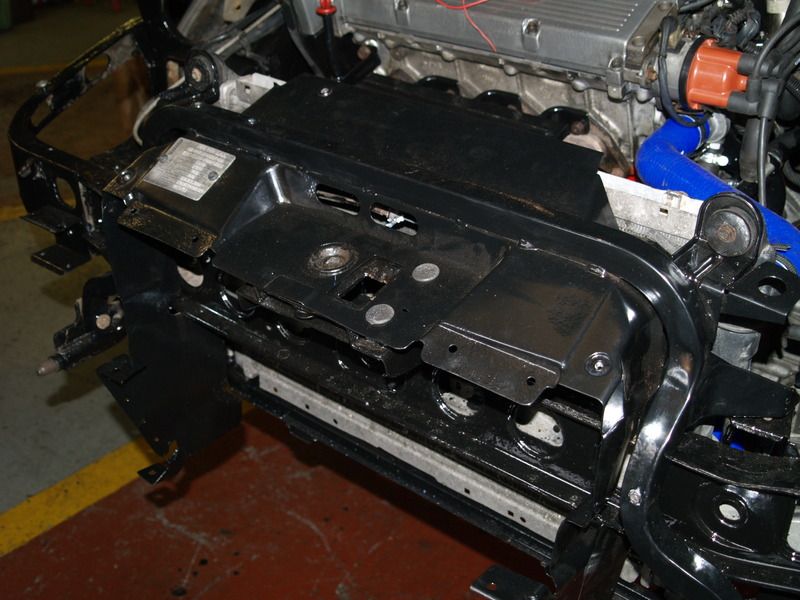 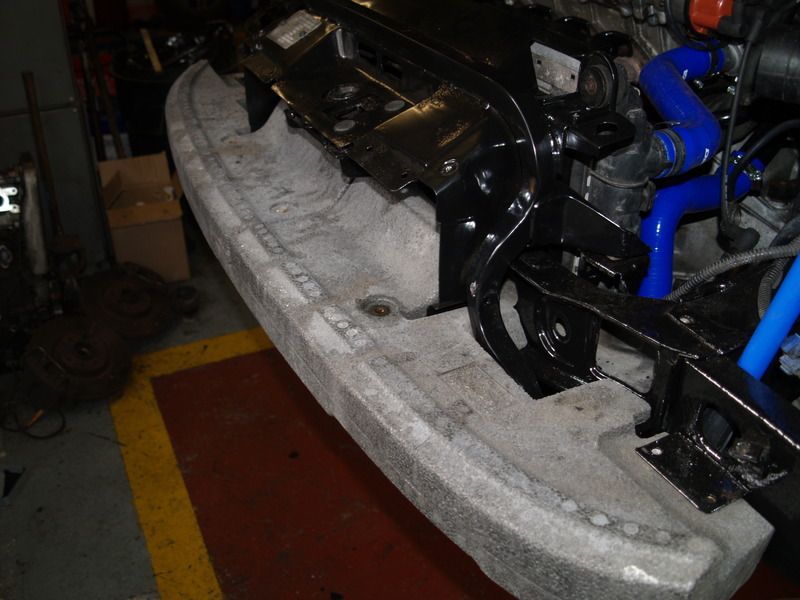 The hubs, shafts, brakes and discs reassembled and fitted. 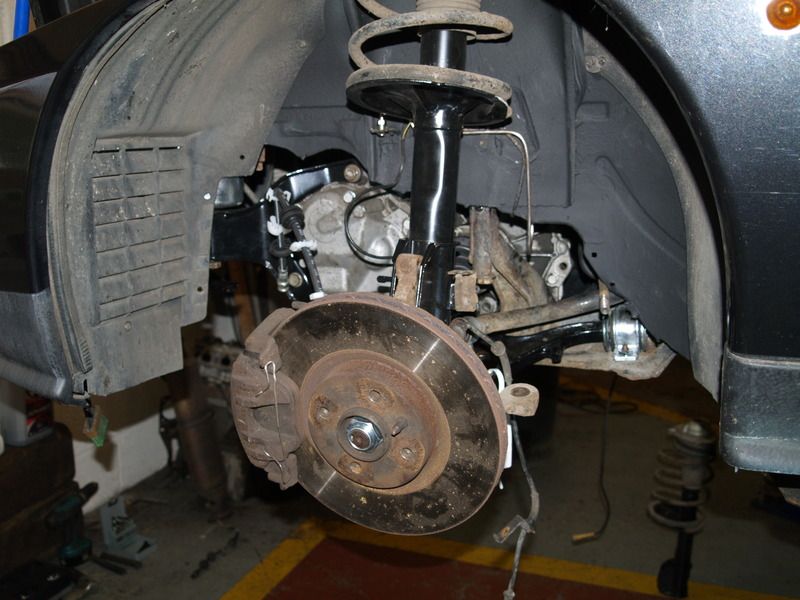 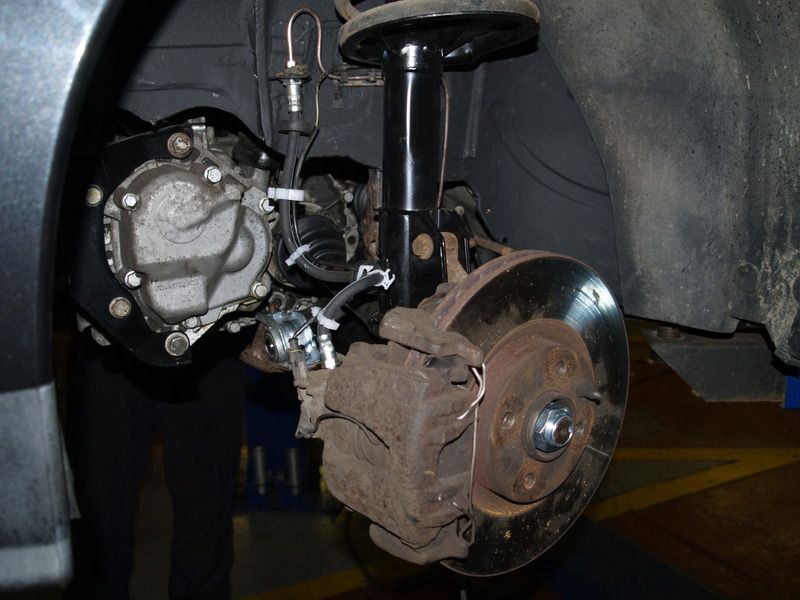 It is important to ensure that when lifting an engine, appropriate techniques are used: 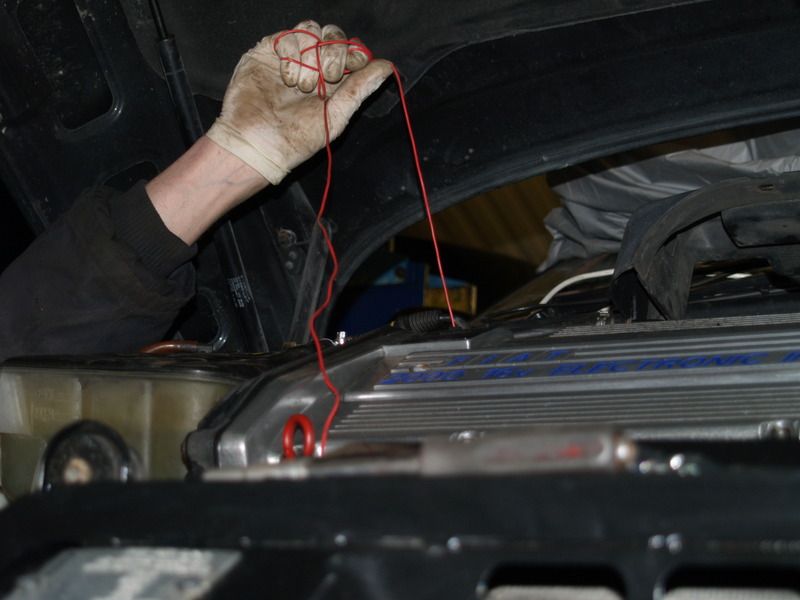 Finally, it's pretty much all back together:  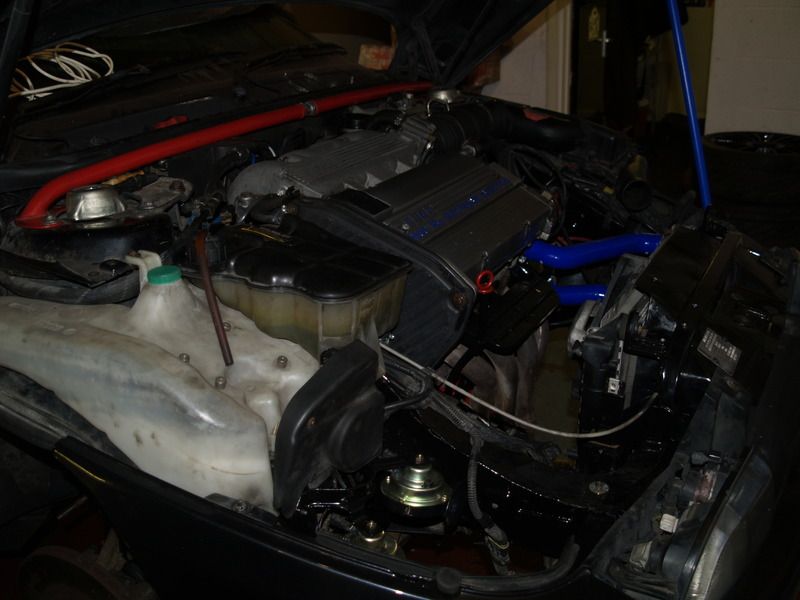 Still to do this week: - Tighten a couple of 'weight on wheels' nuts and bolts
- Fit the clutch pipe (a single flex pipe by Pirtek is being used
- Bleed clutch and brakes
- Install battery tray and ancillaries
- Install undertray
- MOT
- Wheel alignment
|
|
|
|


![[Linked Image]](http://www.fiatcoupeclub.org/fiatcoupenet/pics/sig_barnacle_v1.gif)


![[Linked Image]](http://www.fiatcoupeclub.org/fiatcoupenet/pics/sig_book_v1.gif)


