Following a request, I've fixed the old chargecooler guide from GrahamL (again) please can a Mod replace the old one which has broken photo links.Finally finished chargecooler installation today, so here's a small fitting guide that i wish i'd had before starting it myself.
Overall the complete job is relatively straight-forward, only real headaches were caused by parts not fitting properly and taking time out to modify them or the car to make them fit.
General fitting layout i used was like this:
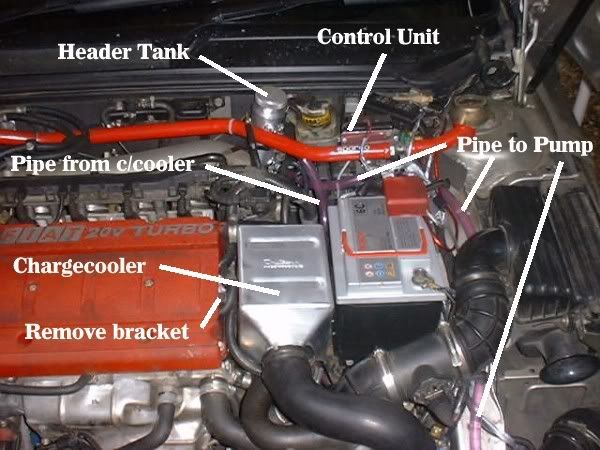
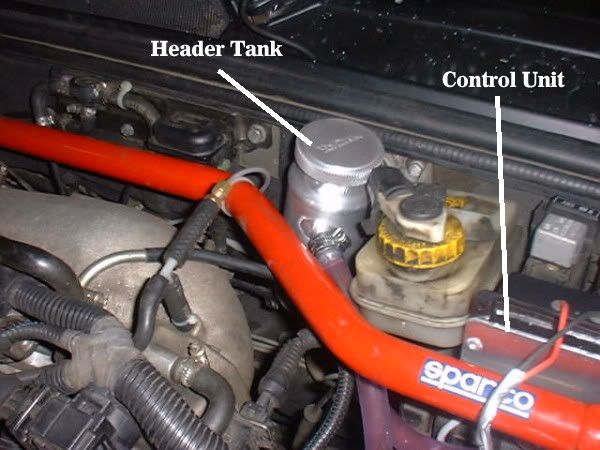
I just managed to squeeze the header tank into position next to the brake fluid tank, but due to the strut brace had to severly modify the bracket fitted by pace. Had to cut it down much shorter and bend it right back on itself, then bolted it onto an extra (unused) threaded hole on the firewall.
As pic #2 shows the tank has to be angled to allow the pipes clearance of the strut brace and brake fluid tank.
PACE show the pump control unit mounted on the bracket for the ABS controller, but again due to the strut brace mine just wouldn't fit there. Ended up using a small metal bracket (about 1.5" long with a hole drilled at each end) i had lying around to run up from the ABS bracket at an angle and allow the pump controller to clear the strut brace OK.
I took a ground point from a bolt near the suspension strut top, just to the right of the control unit. An ignition switched +12v is found on the thick orange wire on the main connector just below the pump control unit, behind the battery.
Fitting the chargecooler unit itself i found quite easy, just had to remove the metal bracket mounted on the side of the engine (used to secure the ignition coil power lines before the go under the spark plug cover) and cut about 1" off the dump valve hose.
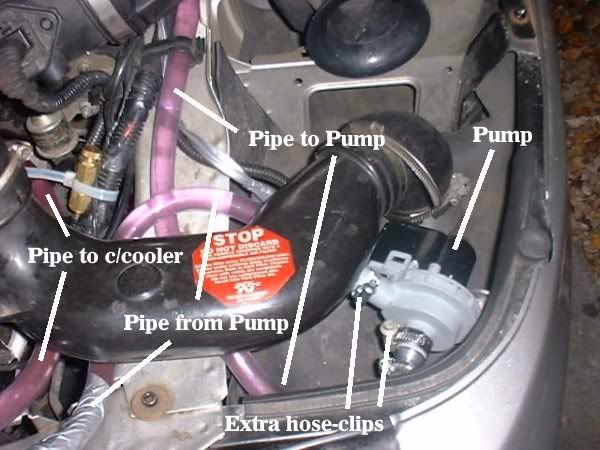
The only spot in the entire engine bay i could find to mount the pump was above the intercooler! (See pic #3)
You'll have to remove the front bumper (i had to do this anyway to drill other bits!) and drill a couple of holes to mount the pump bracket, but in this position you can actually mount the pump vertically as shown in the PACE fitting guide. I found the pump input side was leaking quite badly, so added an extra couple of hose clips around the plastic sections where the hoses connect to the pump. Seems fine now and no more leaks...
The clear water hose supplied is almost exactly the correct length for this installation method - i only had about 2" spare at the end, so be very careful not to waste any hose. I reckon they should have supplied at least another foot or two of hose.
Fitting the water pre-rad was also a tight fit! Had to cut both sides of the bumper to allow it to fit back snugly into place. Also had to trim the rear of the front grille down a bit and even so it still won't fit flush as before, so i fitted an extra spacer bolt on each side (see pic #4).

I'm not sure where they expect you to be able to run the pre-rad hoses , but i found the best way was just to cut a pretty big hole out of the metal just in front of the engine cooling radiator. (see pic #4)
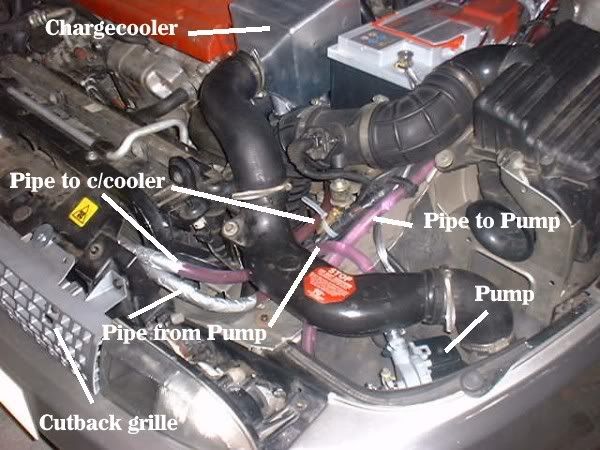
Finally pic #5 shows the finished pipework.
Thanks to taz for encouragement, you were right it did all fit in the end.