Fiat Coupe Forum
- Founded by Kayjey & James Northam
- Funded by the Club for the benefit of all owners
Fiat Coupe Club UK
join the club
Fiat Coupe Forum
 
» Announced
    Posting images


» Related sites
    Main club site
    fiatcoupe.net


» External data
    owners listed
 
Who's Online Now
1 registered members (ExCoupe), 132 guests, and 2 spiders.
Key: Admin, Global Mod, Mod
Forum Statistics
Forums69
Topics113,573
Posts1,340,826
Members1,796
Most Online731
Jan 14th, 2020
Top Posters(All Time)
barnacle 33,544
stan 32,122
Theresa 23,299
PeteP 21,509
bockers 21,071
JimO 17,917
Nigel 17,367
Edinburgh 16,723
RSS Feeds
Club Events
Club Information
Track Events
Rolling Road/RWYB
Social Events
Non-UK Events
Coupé Related Chat
Coupé Spotting
Coupé News/Press
Buying/Selling Advice
Insuring a Coupé
Basic FAQ's
How to Guides
Forum Issues
Technical Problems
General Maintenance
Styling
Tuning
Handling
ICE and Alarm
Coupés for Sale
Coupés Wanted
Parts for Sale
Parts Wanted
Group Buys
Business Forum
Other Vehicles for Sale/Wanted
Other Items for Sale/Wanted
Haggling/Offers
Ebay links
Other Cars
Other Websites
General Chat
Previous Thread
Next Thread
Print Thread
Dan's 16v Turbo Restoration project #844244
05/06/2009 12:54
05/06/2009 12:54
Joined: Dec 2006
Posts: 759
England
D
Danhgt Offline OP
Enjoying the ride
Danhgt  Offline OP
Enjoying the ride
D

Joined: Dec 2006
Posts: 759
England
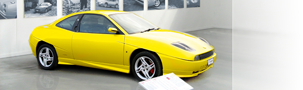
I brought this 16v turbo 2 years ago, it was basically a non runner with knackered cams and no oil pressure. It was also still on its original suspension with no modifications whatsoever. The bodywork was a tad rought too but there was no major accident damage anywhere.

On the plus side it had one owner from new (well nearly, the second owner had it 3 months) and nearly full service history (it counted for a lot).

First things first was to get it up and running, so I started to strip the engine down to see what was salvagable. The answer was not a lot as the camshafts where very worn,

click to enlarge
click to enlarge
click to enlarge
click to enlarge
click to enlarge
click to enlarge

I then dropped the rest out, on the face of it everthing all looked relatively alright. So I started to clean
everything up and then found the block had a big crack in it, damn frown .

click to enlarge
click to enlarge

So I needed to source another block, which turned into a bit of a nightmare as there was no way I could afford to fork out for a new one. Most 16vt's on ebay etc where dog's (like mine) and decent engines where no where to be found.

Luckily a forum member was selling a bottom end, unfortunatley it had a melted piston so it was a bit of a gamble. I picked it up and stripped it down, the crank looked fine but the cylinder wall on number 2 was very lightly scored and had a few small lumps of piston welded to it. If it did'nt clean up i'd be faced with a big bill for oversized forged pistons.

click to enlarge
click to enlarge

I set about it with a honing tool which removed the light scoring and remnents of the piston. Afterwards it measured up fine so it was ready to be used. I measured up the rods and crank, they where fine so all was well. Well not quite as I needed a size B piston to replace the melted one, My other bottom end had one so I pinched it. I then had to remove the paint from the block which too ages and generally clean everything up ready to be assembled.

I then went to Fiat to order a load of parts, they no longer sold the gaskets, main shell bearings or the exhaust manifold studs. So new camshafts, bottom end bolts, big end shells,thrust bearings, belts and balancer shaft shell bearings was all I could get. I took a trip to a motor factor and got a full gasket kit for £60, result but the headgasket looked to be of poor quality. I found a Goetze gasket on Italian ebay and brought a lenght of stud for the manifold studs. The main shells I got from a motor factor, they where Federal mogul. They measured up fine so I decided they were fine.

click to enlarge
click to enlarge
click to enlarge

I started to assemble the bottom end after a lot of reading (mainly on Guy Crofts website) It took a long time but it all went together fine. I measured the bearing clearances with Plastigauge, they where all spot on smile .

click to enlarge
click to enlarge
click to enlarge
click to enlarge
click to enlarge
click to enlarge
click to enlarge
click to enlarge
click to enlarge
click to enlarge
click to enlarge
click to enlarge
click to enlarge
click to enlarge
click to enlarge
click to enlarge
click to enlarge
click to enlarge
click to enlarge

I then put the head back on after having an engineering firm overhaul it. It was now ready to go back in. It took a good 2 weeks of evenings to get it all hooked up again (it was bloody freezing too). It had new engine mounts, clutch kit, lightened flywheel, oil cooler and pipes, radiator, reconditioned injectors, water pump, thermostat etc. It had no balancer belt as the shafts were now locked.

click to enlarge
click to enlarge
click to enlarge

Once it was ready I started by priming it first, It had no oil pressure for the first 5 seconds of cranking, then another 5 second burst still showed no oil pressure frown . I started having visions of removing it all again and wondering what i'd done wrong. I then cranked it again and the pressure shot up to 3bar, happy days ooo. I got the engine ready to start, it then coughed and spluttered into life, it was a tad lumpy at first which was worrying but it soon settled down. I then ran it in on Castrol non synthetic oil for 1k miles before switching to Silkolene 10w50.

It was then Mot time, it passed first time so I un-sorned it and insured it laugh

All was fine untill it had covered 2k miles when the cambelt slipped rolleyes .

I built it so i'd obviously done something wrong (I 'think' I over tensioned the cambelt), I removed the head and found 8 bent inlet valves. I managed to get a used head off of Countrycruising and removed the valves from it. This time I decided to do the head myself. I got it skimmed by a machinist and got another headgasket, I found out that a Payen headgasket was identical to the original Fiat gasket.

I refitted it all again but this time I found a thread on Evocorner showing the proper tensioning tool dimensions. I decided to make a replica of it.

click to enlarge
click to enlarge
click to enlarge

I also had to repair a few wires as the insulation was broken on them (crank sensor, icv and the dash temp gauge sensor)

click to enlarge
click to enlarge


Its been running spot on since.


Last edited by Danhgt; 14/01/2010 16:00.
Re: Dan's 16v Turbo Restoration project [Re: Danhgt] #844264
05/06/2009 13:29
05/06/2009 13:29
Joined: Dec 2006
Posts: 759
England
D
Danhgt Offline OP
Enjoying the ride
Danhgt  Offline OP
Enjoying the ride
D

Joined: Dec 2006
Posts: 759
England
I recently fitted new pads and discs all round, new wishbones, track rod ends and droplinks.

The pads where starting to come away from the backing plate (it had passed an Mot the week before),

click to enlarge
click to enlarge

New pads,

click to enlarge

Old parts,

click to enlarge

New parts,

click to enlarge
click to enlarge
click to enlarge
click to enlarge


Last edited by Danhgt; 05/06/2009 13:50.
Re: Dan's 16v Turbo Restoration project [Re: Danhgt] #849266
13/06/2009 19:17
13/06/2009 19:17
Joined: Dec 2006
Posts: 759
England
D
Danhgt Offline OP
Enjoying the ride
Danhgt  Offline OP
Enjoying the ride
D

Joined: Dec 2006
Posts: 759
England
I've decided to underseal the car, so i've started at the back first. Obviously to do it properly I needed to remove the tank and rear axle etc.

I'm glad I did as everything is pretty knackered, One good thing is theres hardly any rust.

click to enlarge

I think someones dropped the tank before, one of the mounting bolts had been bodged.

click to enlarge
click to enlarge
click to enlarge
click to enlarge
click to enlarge
click to enlarge
click to enlarge
click to enlarge
click to enlarge

The shocks don't return anymore,

click to enlarge

The handbrake cables where full of water,

click to enlarge
click to enlarge

The rear compensator valve was completely seized, I don't know when it last moved,

click to enlarge
click to enlarge

Rear beam, the subframe bushes where pretty perished, as are all the brake lines which i'm going to replace,

click to enlarge

New Subframe bushes,

click to enlarge
click to enlarge
click to enlarge
click to enlarge
click to enlarge
click to enlarge
click to enlarge
click to enlarge

I've cleaned up the subframe and given it a lick of paint,

click to enlarge
click to enlarge

I've left all the brackets in rust remover for now,

click to enlarge

I replaced the rear trailing arm bearings, they had a bit of play in them,

click to enlarge
click to enlarge

I need to get underneath and grind the rust off, then underseal it and start putting it back together. Its just taking ages to clean bits up and source some parts.


Last edited by Danhgt; 13/06/2009 19:38.
Re: Dan's 16v Turbo Restoration project [Re: Danhgt] #854705
23/06/2009 00:55
23/06/2009 00:55
Joined: Dec 2006
Posts: 759
England
D
Danhgt Offline OP
Enjoying the ride
Danhgt  Offline OP
Enjoying the ride
D

Joined: Dec 2006
Posts: 759
England
I've gradually been making progress due to the good weather smile

I got the grinder out and removed the rust, what a horrible job. I then gave the affected areas a good coat of anti rust primer in preperation for the underseal.

I gave the mounting points for the beam special attention as it seems to be where they go.

click to enlarge
click to enlarge
click to enlarge
click to enlarge
click to enlarge
click to enlarge

I then cracked on with applying the underseal, I was a bit shocked at how thick it is, its like bitumen. Its got added waxoyl so i'll see how it goes.

click to enlarge
click to enlarge
click to enlarge
click to enlarge
click to enlarge
click to enlarge
click to enlarge
click to enlarge
click to enlarge
click to enlarge

I then started re-assembling the rear beam with new brake lines, dampers, bump stops, trailing arm bearings, compensator valve, overhauled rear brake calipers and subframe to chassis bushes (already in).

click to enlarge
click to enlarge
click to enlarge
click to enlarge
click to enlarge
click to enlarge
click to enlarge
click to enlarge
click to enlarge

I thought i'd grease this one up,

click to enlarge

I then jacked it back in, it was'nt too bad. I copper slipped all the bolts and torqued them up.

click to enlarge
click to enlarge
click to enlarge
click to enlarge
click to enlarge
click to enlarge
click to enlarge
click to enlarge
click to enlarge

Slowly getting there smile


Last edited by Danhgt; 23/06/2009 01:38.

Powered by UBB.threads™ PHP Forum Software 7.7.1
(Release build 20190129)
PHP: 7.3.33 Page Time: 0.012s Queries: 14 (0.006s) Memory: 0.8234 MB (Peak: 1.0108 MB) Data Comp: Off Server Time: 2024-04-16 22:17:20 UTC